
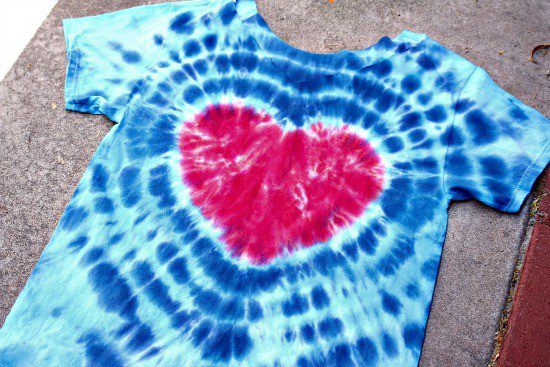
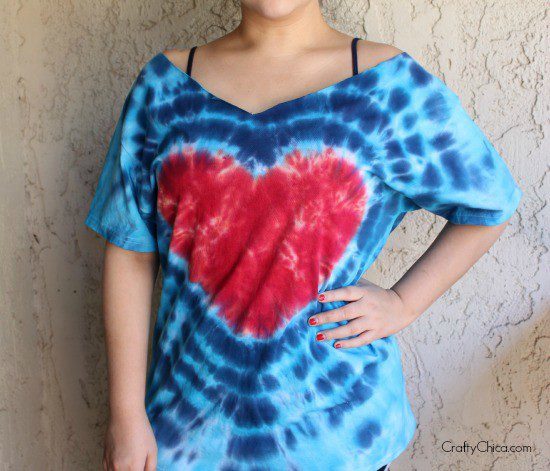
Here is a DIY Tie-Dye Heart Pattern on a shirt. Did you know a tie-dye heart design is much easier to make than you think? It’s all about the folding and rubberbanding. I’m gonna break it down for you! This pattern is a fun one to teach to kids and you can mix and match your colors for any time of the year. I made this one for the fourth of July and recently made it for Valentine’s Day.
Actually, this tie-dye heart pattern is good for any time of the year. Hearts are always in style and you can mix and match the colors to your liking or theme. This pattern also serves as a great backdrop for a silkscreen design on top, or a permanent vinyl design. Heck, even hand lettering with fabric paint or markers!
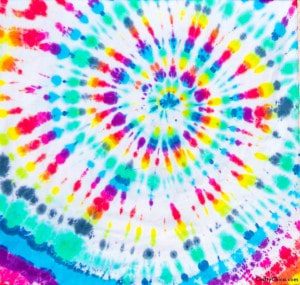
See why I love tie-dye? There are so many possibilities and it’s a fun craft for any age. As long as you stick with colors that complement each other, you can’t go wrong.
Supplies for a tie-dye heart pattern on a shirt:
100% cotton T-shirt, pre-washed, damp (rayon will also work, but make sure your shirt is not polyester or any other synthetic fabric)
Fabric dye (you can find this at the craft store, I like the kind where you just add water and shake)
Yellow chalk
Rubber bands or zip ties
Scissors
Plastic table cover
Baker’s cooling rack or any other kind of tray to prevent dye from pooling under the shirt.
Oh – and plastic gloves!

Directions to make a tie-dye heart pattern!
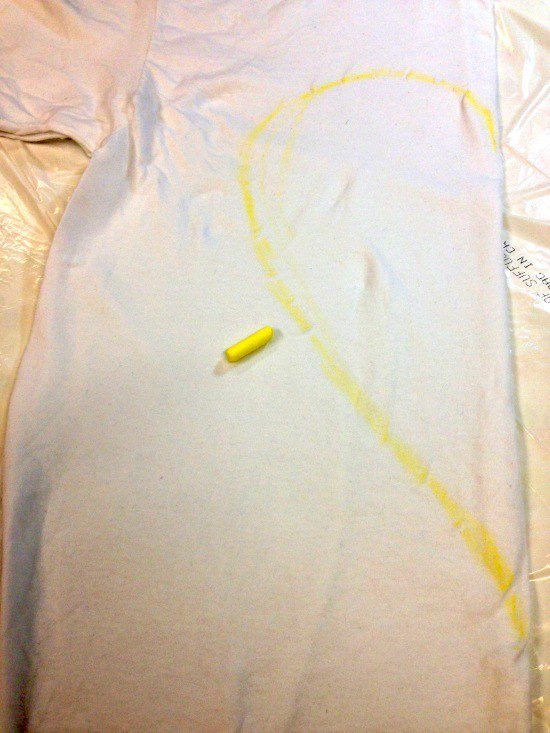
Pre-wash your shirt to remove sizing and, while it is damp, fold it in half lengthwise. Along the fold, draw half of a heart, really accentuate the dip and the bottom point. Make it a big juicy heart! The yellow chalk comes in handy because it is easy to remove. You could also use a washable ink pen, but honestly, I always use yellow chalk.
Find some kind of an elevated grid, I use cooling racks for baking. They are under $10 and last forever. I also use these for my ceramics. Really nice craft investment. Separate the crafts ones from the ones you’ll use for baking.
Using a cooling rack will allow your dye to drip to the table and not muddy up the bottom of your project. You’ll thank me later, I promise! If you don’t have a cooling rack, find some kind of grid you can elevate on bricks or cans.
Always use plastic gloves. The dye is permanent and will stain your hands and fingers. It eventually washes away, but not immediately. If you happen to get dye on your hands you can clean up with baking soda and water.
Put some water in a spray bottle. I do this to keep my fabric moist while I color it with the dye. As you are adding the colors, some areas can dry out before you get to them. You don’t want your fabric soaking wet, but you do want it damp for best results.
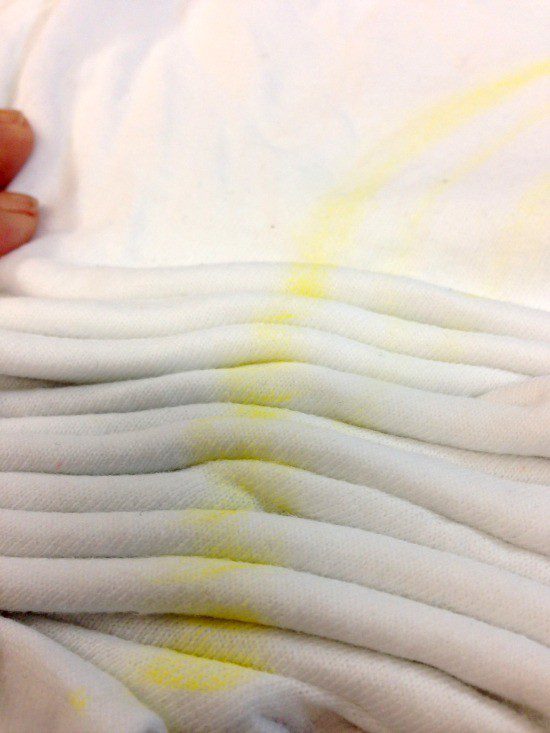
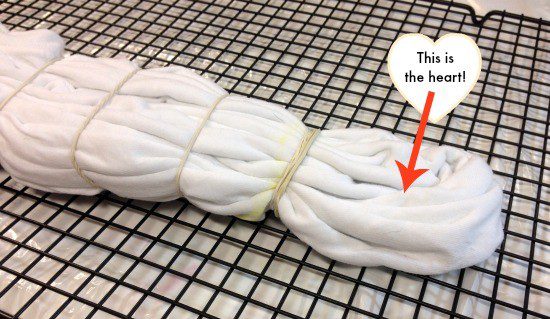
Make the fold!
Starting at the bottom, accordion fold the shirt so that the yellow chalk lines up straight. This will make your heart outline crisp and defined. It might take a little practice. Go all the way around the shape of the heart until you see that yellow “straight” line!
If you mess up, simply try again. Keep the line straight as you fold! You can do it, I believe in you!
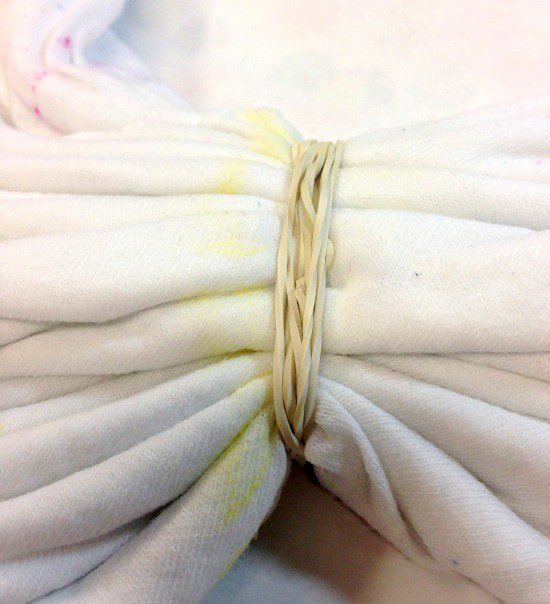
Carefully slide on the rubber band or zip tie. You want the folds to stay lined up, but you also want them tightly bound. After you add the rubber band, adjust the folds with your fingers to keep the yellow chalk line straight. Add a second rubber band if you feel it needs to be tighter. This will give you a crisp design once you unband it.
Remember – you want it to be tight!
Related: DIY Tie Dye Heart Pillowcases – Rainbow Style!
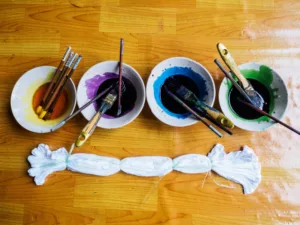
Prepare the dye according to package directions.
Tulip dyes are my fave because all you do is add water and shake. Here’s how I do it though – add water halfway, shake and then add more water. if you add all the water to the bottle at one time, some of the chunks of dye won’t have room to break up and dissolve. Then it will blast out of the bottle onto your fabric. So fill halfway – shake, then fill more, shake, etc.
You can use squirt dye or spray dye. Line your work area with a plastic cover and put on plastic gloves so your hands don’t get dye on them. Add other rubber bands to the rest of the shirt for more design. If your shirt feels dry, run it under water and wring it out. You want it to be damp, but not totally soaking. Place the shirt on the baker’s cooling rack. This is so the dye won’t bleed and spread, the rack is raised just enough so the shirt won’t touch the table.
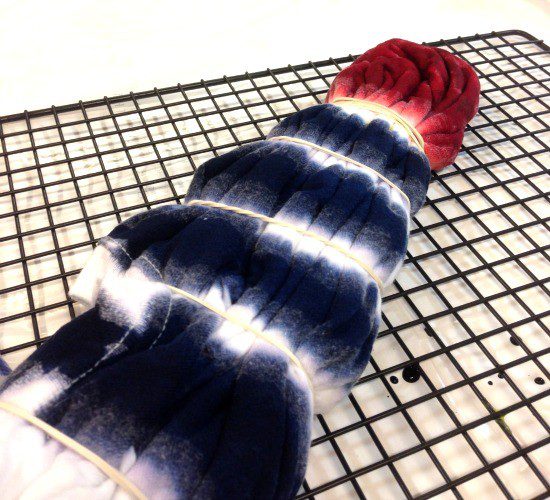
Add the dye!
Start by adding the red dye to the top heart area. Flip it over and add it to the other side as well until it is fully saturated. Keep the red away from the rubber band, about half an inch, so it won’t bleed into the blue. Next, add the dark blue dye in the middle of each section on both sides. Next fill in the white areas with the light blue dye. Make sure it is nice and juicy!
Cover with plastic wrap and let the shirt sit for six hours.
Put on the gloves again! Rinse in the sink until the water turns clear, then wash in the machine in cold water. Hang to dry.
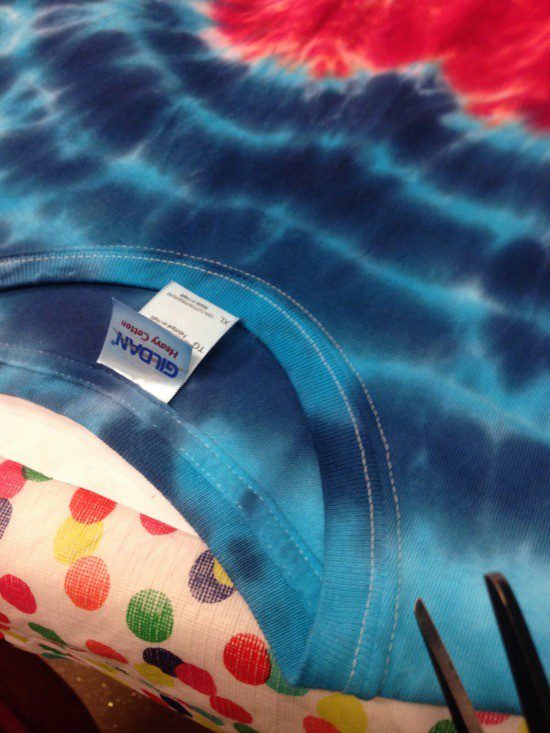
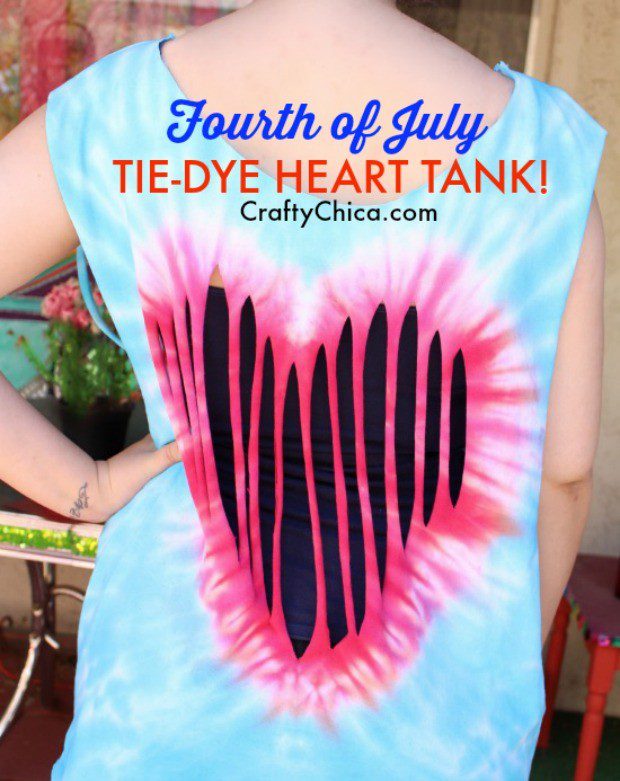
If you want, you can cut off the neckline. And. . .
to snip the back, simply snip lines within the shape of the heart.
Thanks for checking out my tie-dye heart tutorial! If you do any kind of tie-dye, this is such a fun project and you’ll love the result!
And here is another project to try – tie-dye sneakers!
Is the shirt still folded in half when you start to fold it.
Yes, it sure is!
When you wash it the first time are the rubber bands still on?
I leave them on at first, then remove them as I’m running the water through. I don’t do it right away so I don’t get dye all over my hands.
Is the folding done according to the shape drawn??
Do you avoid the acid washing the shirt first? My colors don’t stay vibrant and I wonder if this is why. Also, is it better to leave the finished project in plastic over 24 hours to seal in color?
Hi! If it is a new shirt, wash to remove sizing, and make sure the shirt is slightly damp before adding dye. Then cover with a bag for six hours and then rinse in cold water. Then wash in machine on cold water and hang dry. Hope this helps!!
Yes follow the line as you fold keep it straight if you follow the line your heart really pops