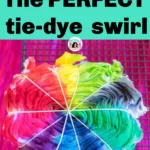
Here is how to make the perfect tie-dye rainbow swirl. It comes out bright and beautiful!

Tie dye rainbow swirl is one of the easiest techniques and yields bright and bold results! Our kids contributor, Meagan from AvasLookBook.com recently shared this cute Sekka Shibori dress she made, but while she worked on that project, little Ava made her own masterpiece – this gorgeous rainbow swirl tapestry! Talent definitely runs in the family!
See why I love tie-dye? There are so many possibilities and it’s a fun craft for any age. As long as you stick with colors that complement each other, you can’t go wrong.
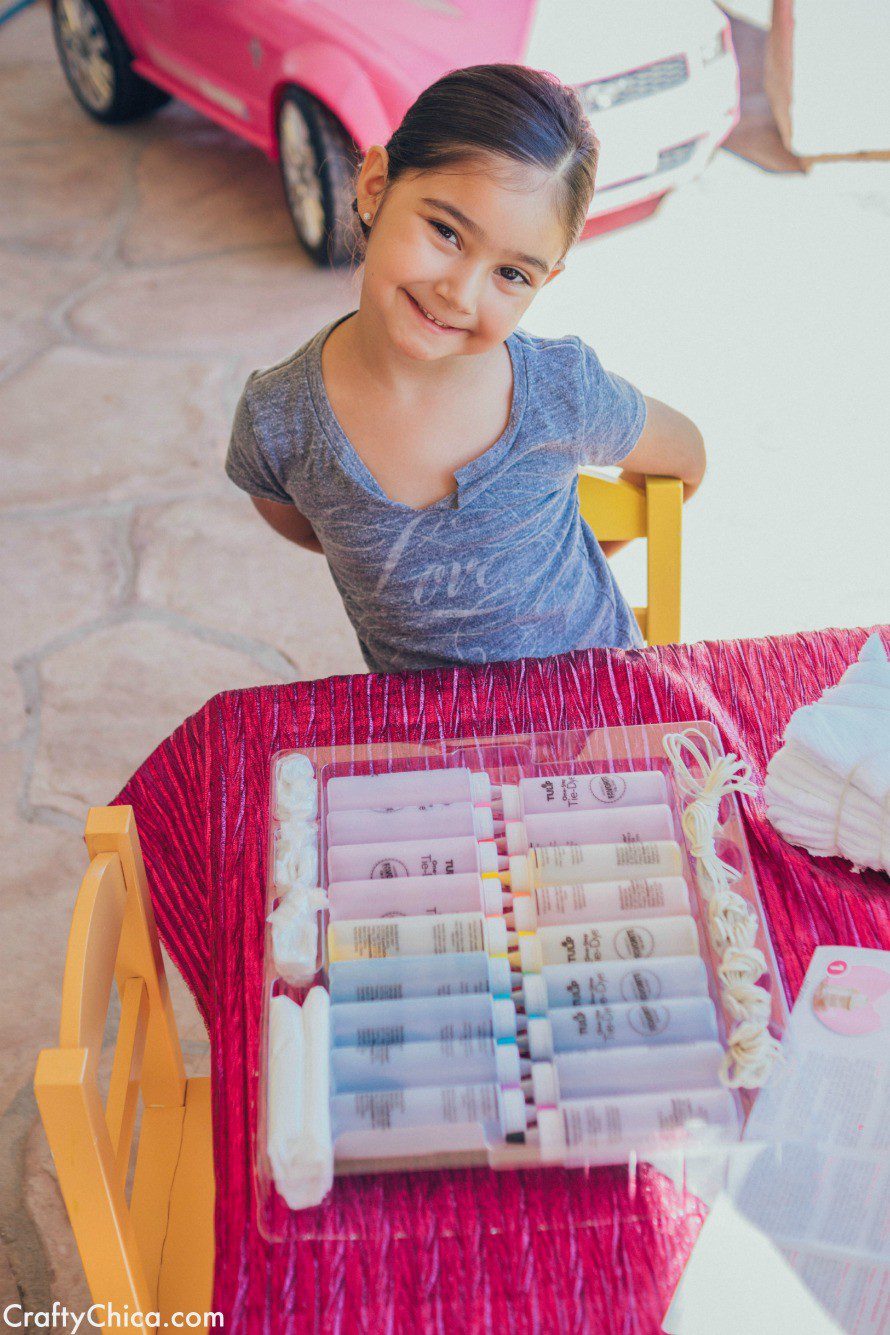
Here is Ava ready to go with her Tulip One-Step Tie-Dye Kit! Make sure to pre-wash the fabric – they used a light cotton gauze – and then while it’s damp, that’s when it is time to dye!
Prep time for your tie dye rainbow swirl
Before you get started, prep your area. Clear a large space on your work table and cover it with a plastic tablecloth or trash bag. Dye is PERMANENT, it will forever stain whatever it touches.
Next, find some kind of an elevated grid, I use cooling racks for baking. They are under $10 and last forever. I also use these for my ceramics. Really nice craft investment. Separate the crafts ones from the ones you’ll use for baking.
Use plastic gloves.
Also – put some water in a spray bottle. I do this to keep my fabric moist while I color it with the dye.
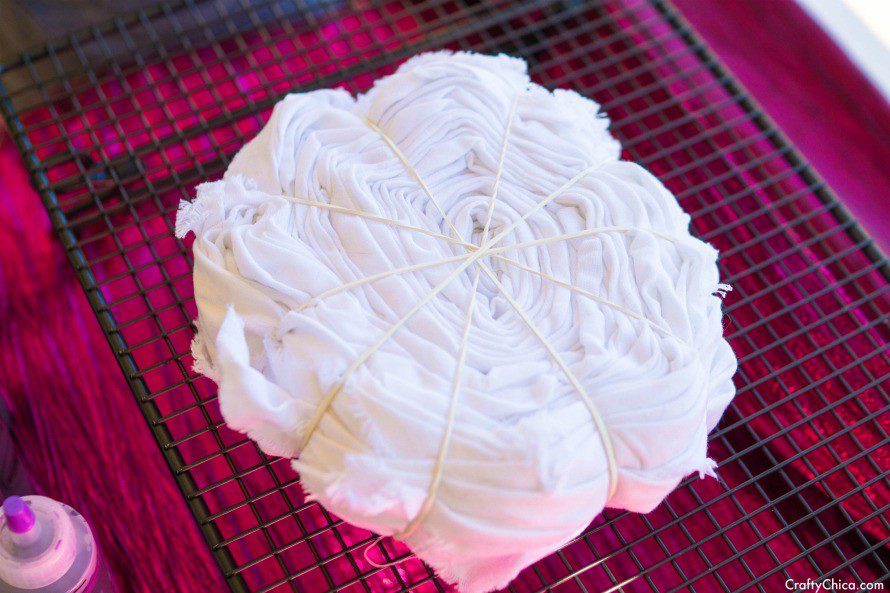
Meagan said she used a fork in the center of the fabric and then swirled it around. Then she applied five rubberbands until she had ten sections.
Mix the dye
Tulip dyes are my fave because all you do is add water and shake. Here is how I do it though – add water halfway, shake and then add more water. if you add all the water to the bottle at one time, some of the chunks of dye won’t have room to break up and dissolve. Then it will blast out of the bottle onto your fabric. So fill halfway – shake, then fill more, shake, etc.
RELATED: Tie-dye for beginners
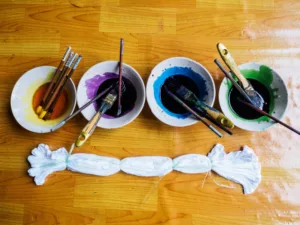
She added water to the dye bottles and shook until all the powder was dissolved, then Ava slipped on the gloves and began to dye!
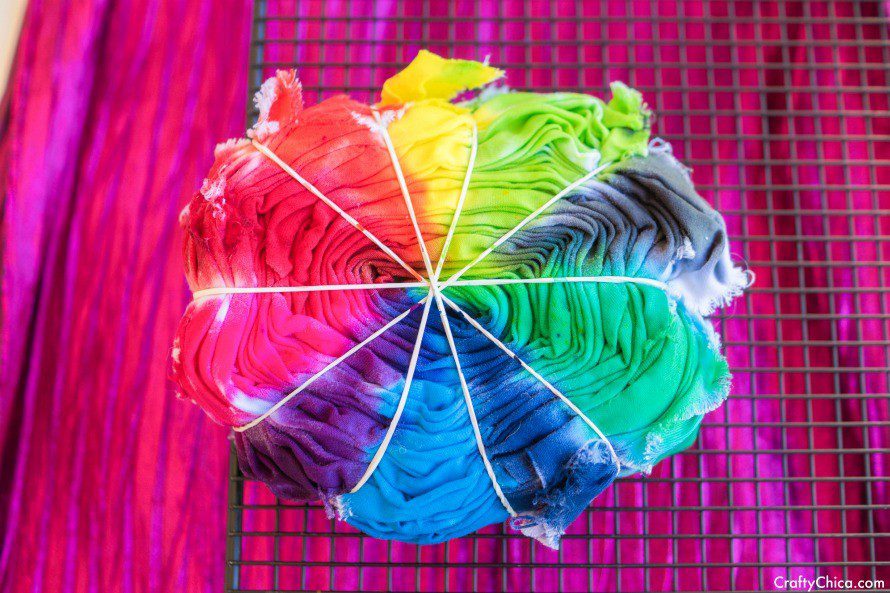
Ava added one color on each section. Spray your fabric with the water bottle, then add the dye to the center of each section. Go slowly so you get it right!
REMINDER: Notice that the fabric is set on top of a cookie sheet. The cookie sheet has notches to lift it from the table, this will prevent the dye from spreading across the bottom of the fabric. The dye will drain to the bottom (line with a plastic tablecloth).
Apply the color generously to one side, then flip and do the other side. Be careful where you pick it up so you don’t transfer dye from your gloves to the project. Change out your gloves if you have to!
Let the magic happen
Cover your project with a plastic bag. Set it aside, out of the way. Six hours is plenty of time, the dye stops activating for any longer.
After six hours, wearing gloves, take your project to the sink and let cool water run over it on both sides. Carefully remove the rubber bands and continue to rinse until the water runs clear.
Wash in your machine on light, so soap.
Remove from the washer and hang dry. Press with an iron.
Now you have rainbow swirl fabric ready to go.
I love this concept of first dyeing the fabric, then you can use it as a tapestry or cut it up to make other items. For best results, use white cotton fabric, that will absorb the dye beautifully! I’m going to buy a tapestry and dye it!
This technique would also work great for bed sheets and pillowcases!
Related: How to Make Rainbow Shorts
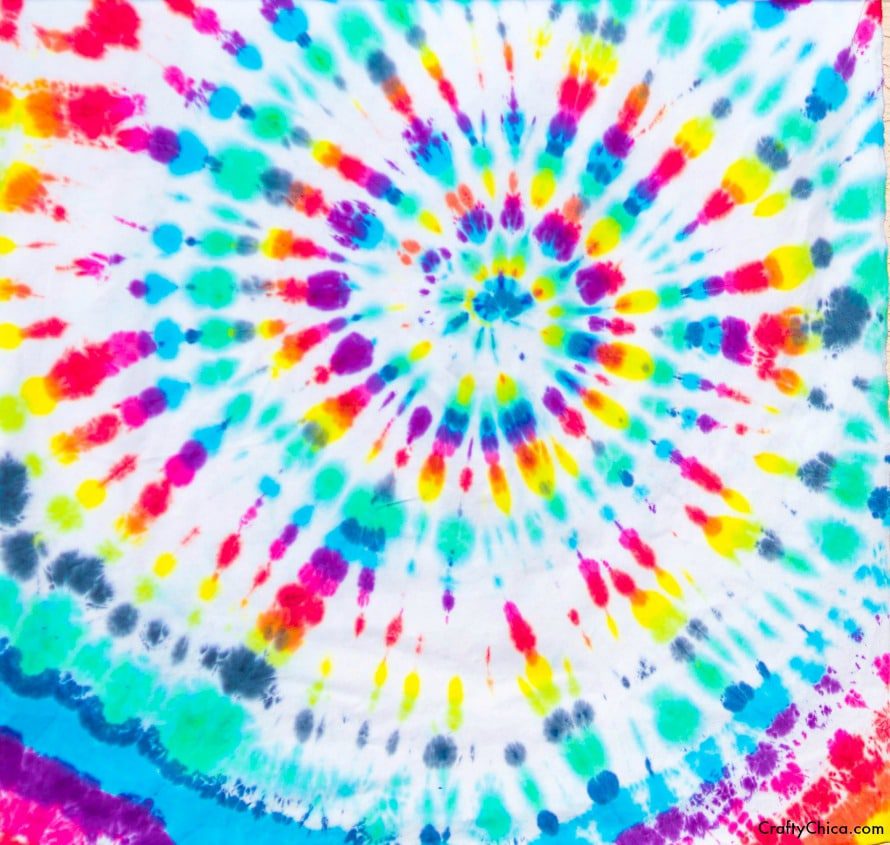
What I love about Ava’s piece is that she didn’t go overboard on the dye. It just goes to show that a little bit goes a long way and the white really makes the design pop! This would be a great window covering or tablecloth – or even cut up and used to make a garment or bag! You could even stretch it over a canvas and paint on it – the tie-dye makes for a beautiful background!
Thank you for checking out this tie dye rainbow swirl technique.
Special thanks to Meagan and Ava for sharing their work! Don’t forget to check out their blog – AvasLookBook.com.