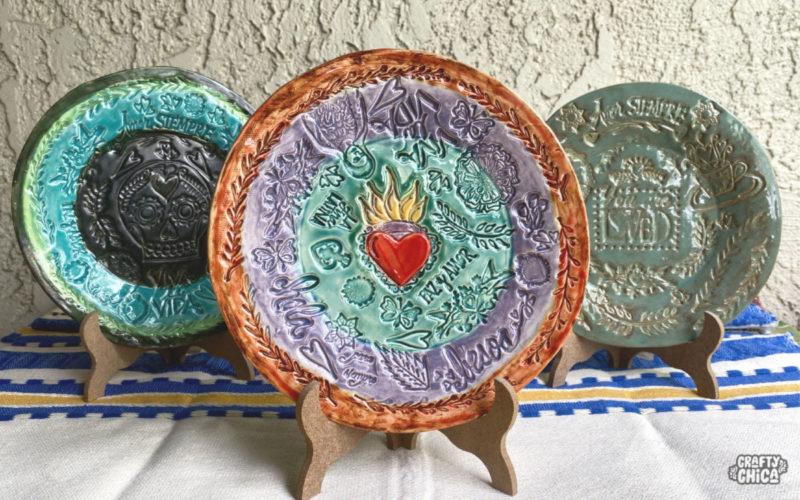
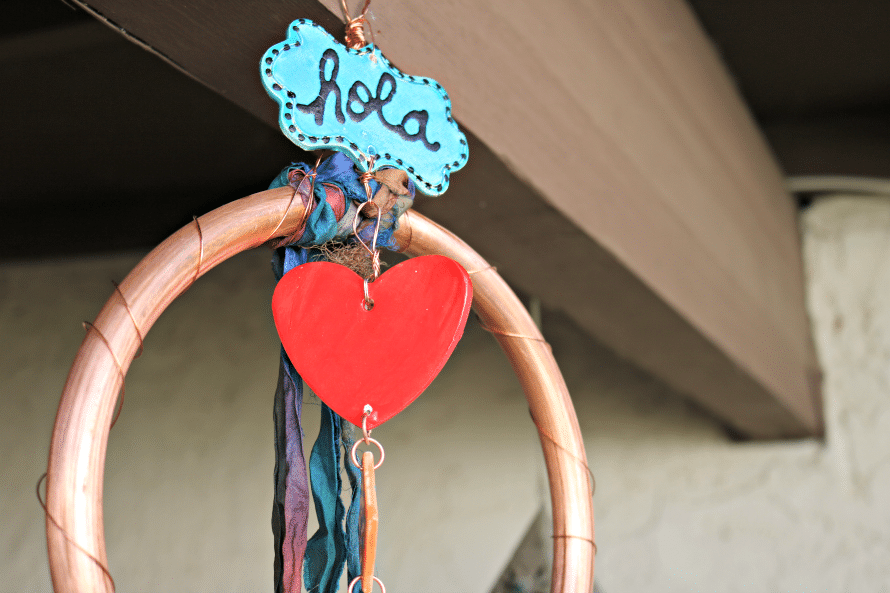
When I work with clay, it’s hard to toss the scraps. I make something out of every little piece with the intention to use eventually put each one to work. I finally followed through to make this crazy-looking copper and ceramic wind chime. I also pulled out my sari ribbon stash to give it some softness and warmth against the thick and chunky fired clay pieces.
And this project came in handy as this month’s Bernzomatic Torchbearer project! I thought copper would give the whole piece even more of a unique look.
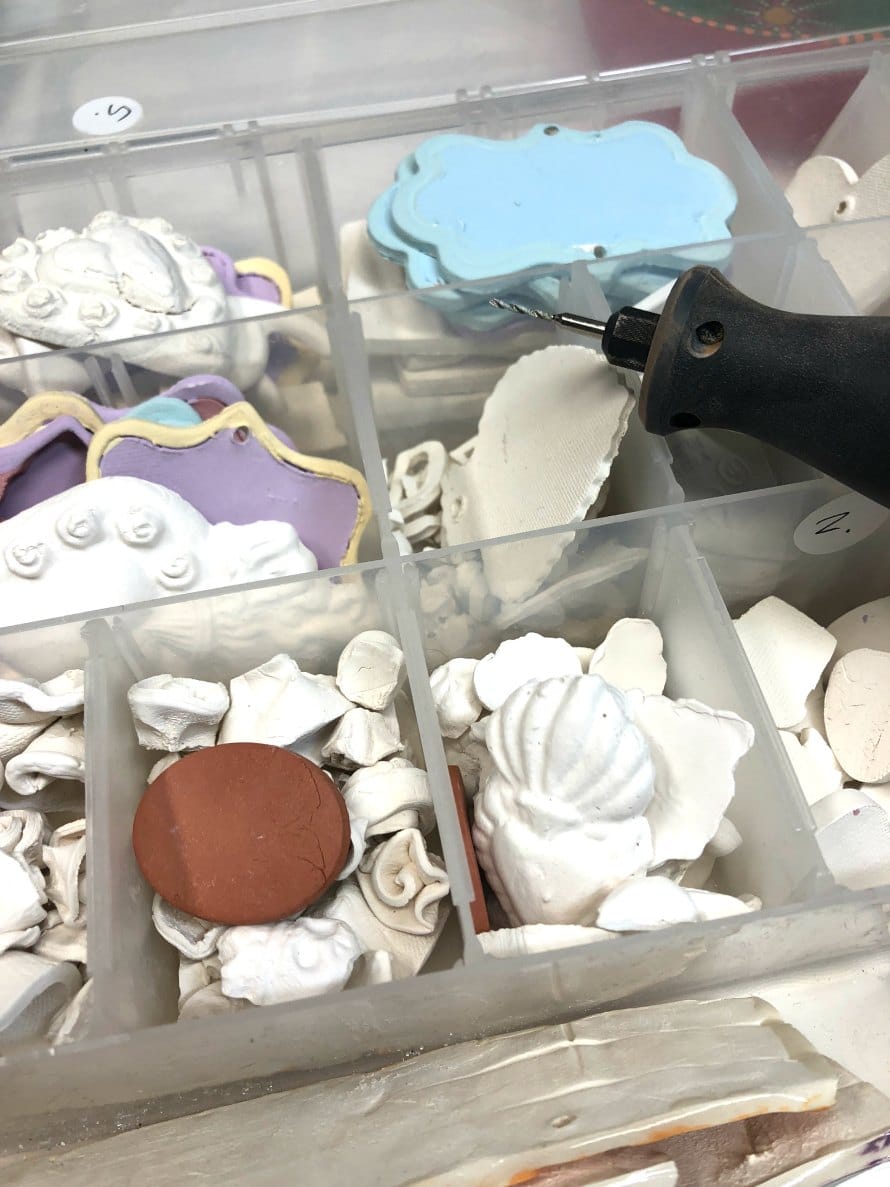
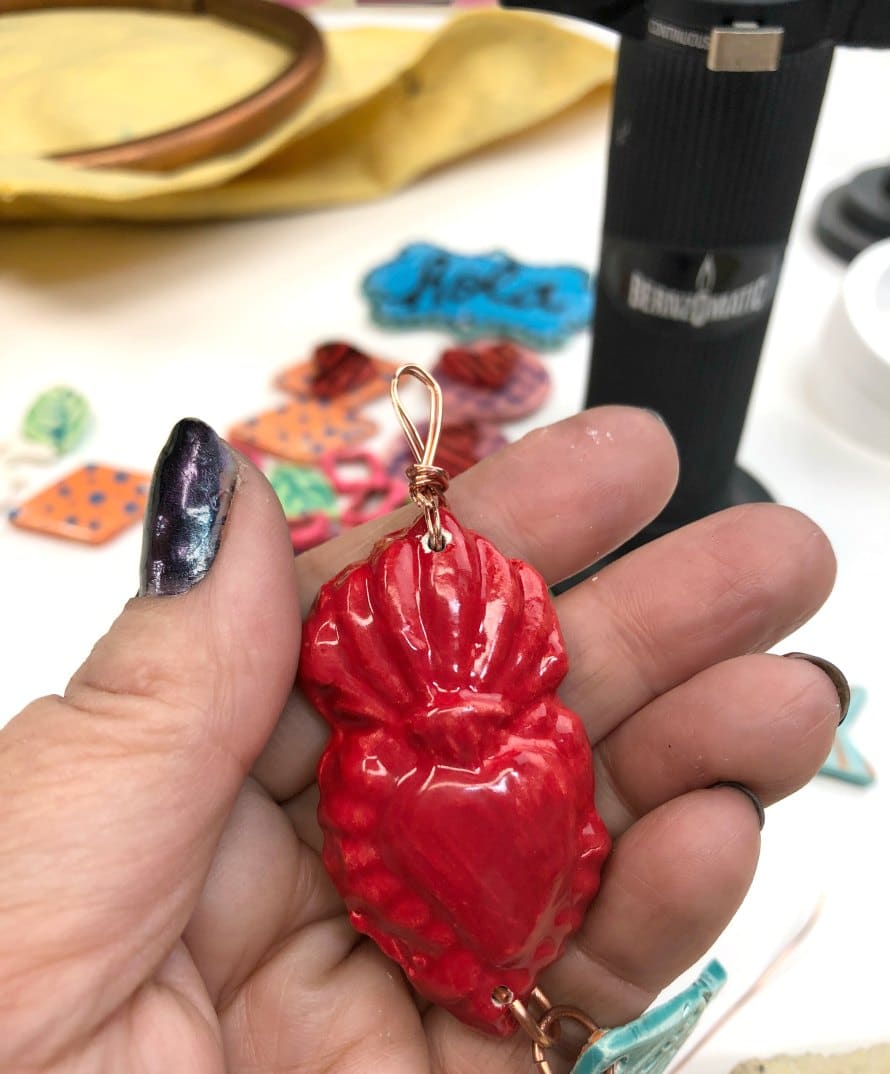
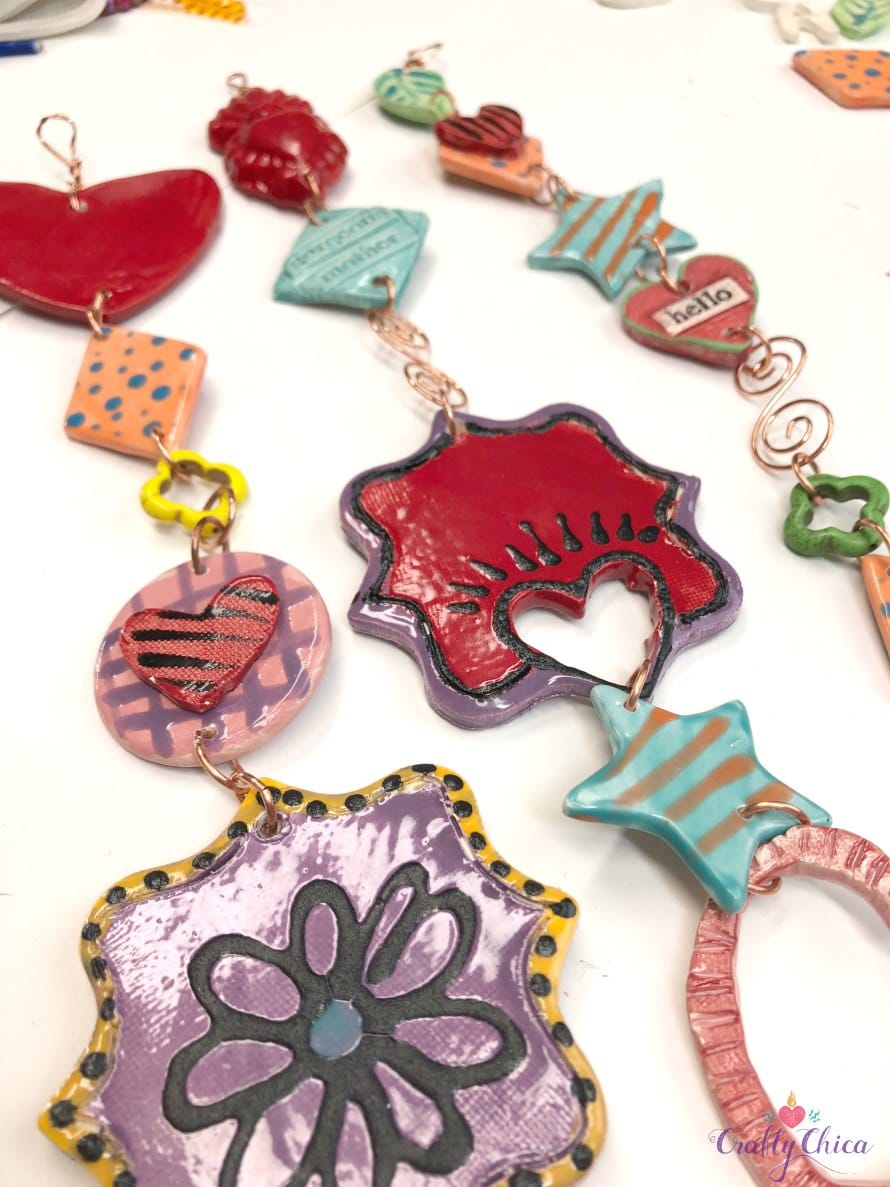
Here is my bisque stash. All of these are pieces I made with cookie cutters, coiling, stamping and more. I made holes in them because I knew they make perfect charms. For the ones that didn’t have holes, I used a diamond drill bit. Then I added color with underglazes and then added accents with a liner brush on top. Lastly – fired them in my kiln.
RELATED: DIY Soldered Tin Mirrors
Now it’s time to put everything together!
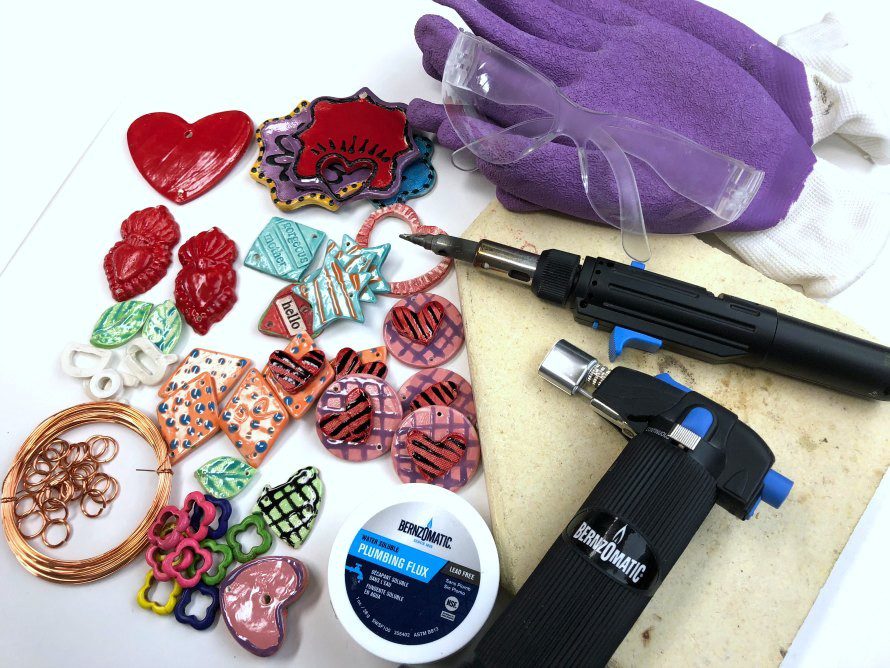
SUPPLIES
Bernzomatic ST500: 3 in 1 Micro Torch
Bernzomatic Lead-Free Solder Wire & Flux
Kiln shelf or heat brick
Goggles and gloves
Small brush for flux
Assorted charms
Copper jump rings and wire
Sari ribbon or fabric strips
 How to make this copper & ceramic chime
 How to make this copper & ceramic chime
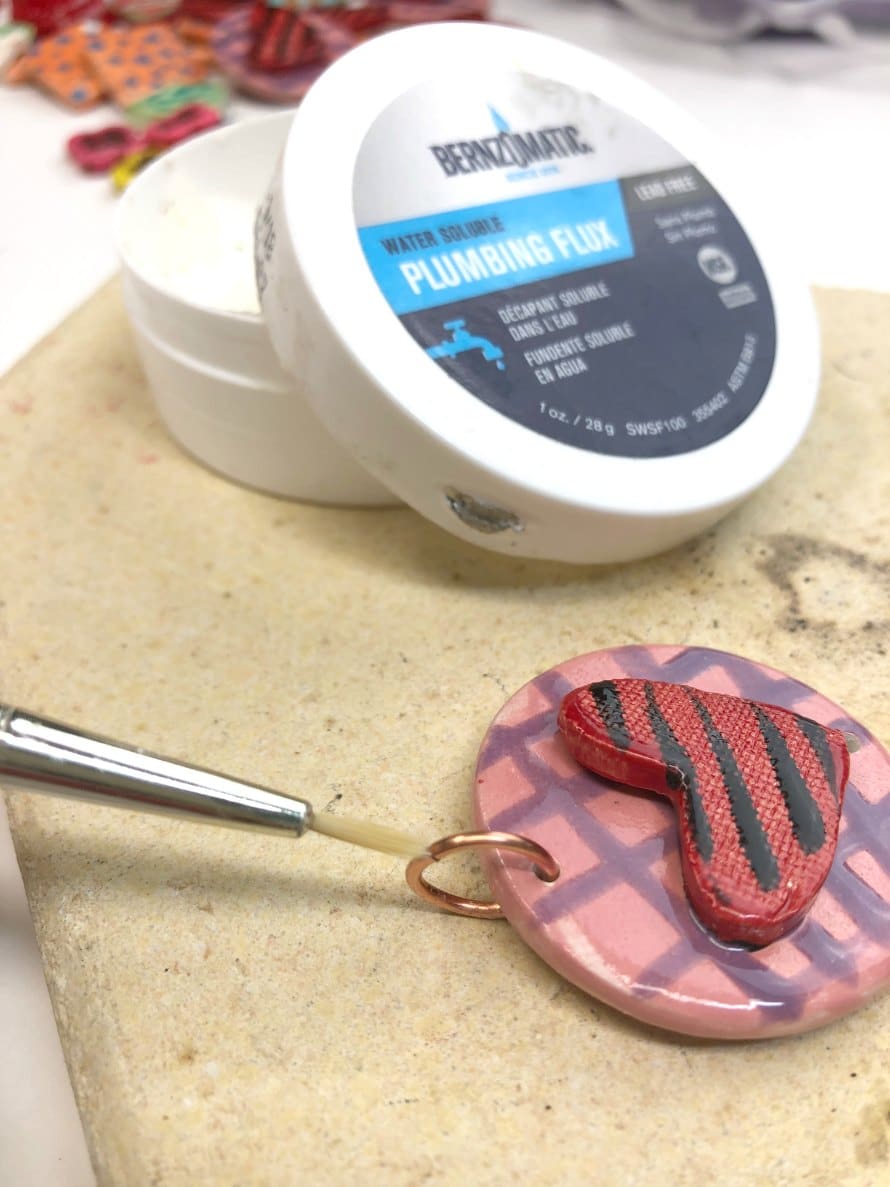
When it comes to attaching the jump rings, I used two pairs of needle nose pliers. If you really want to secure the rings, you can add a bit of flux and solder and hit it with the micro torch. I used a combo of the jump rings and wrapped wire. I really wanted a mixed media type of look.
Okay, truth: I ran out of jump rings! But it still looks cool with the wrapped wire!
Use a variety of open frame beads, anything that can be connected and has weight. It’s a chime, remember? Set aside your strands. We’ll get back to those later.
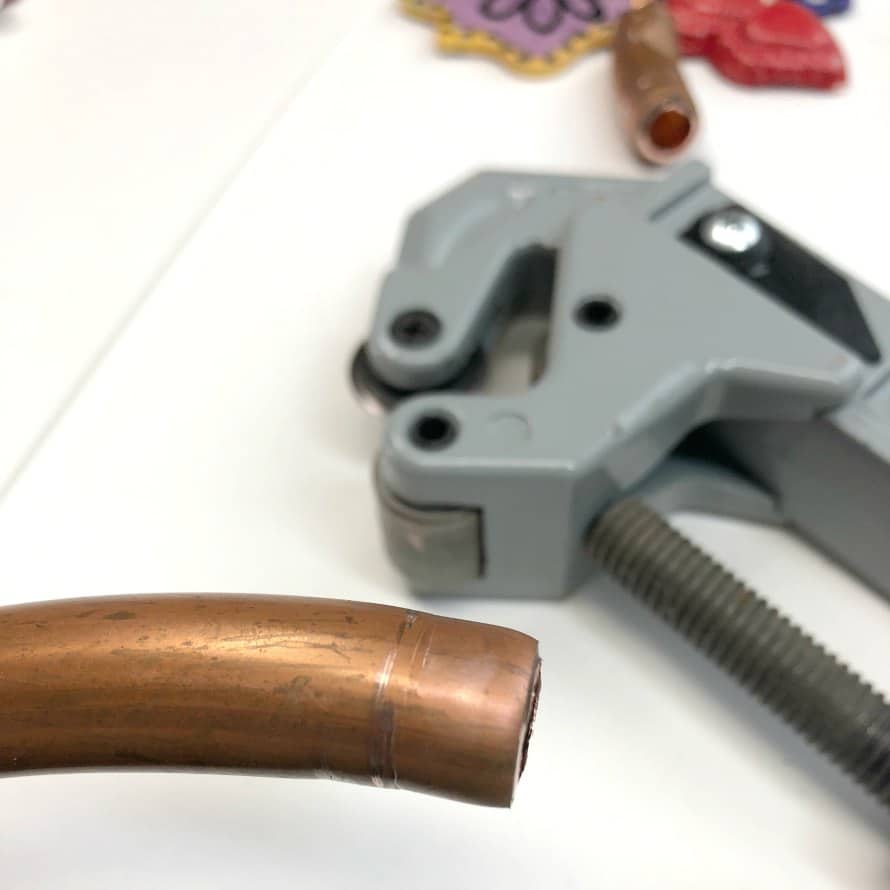
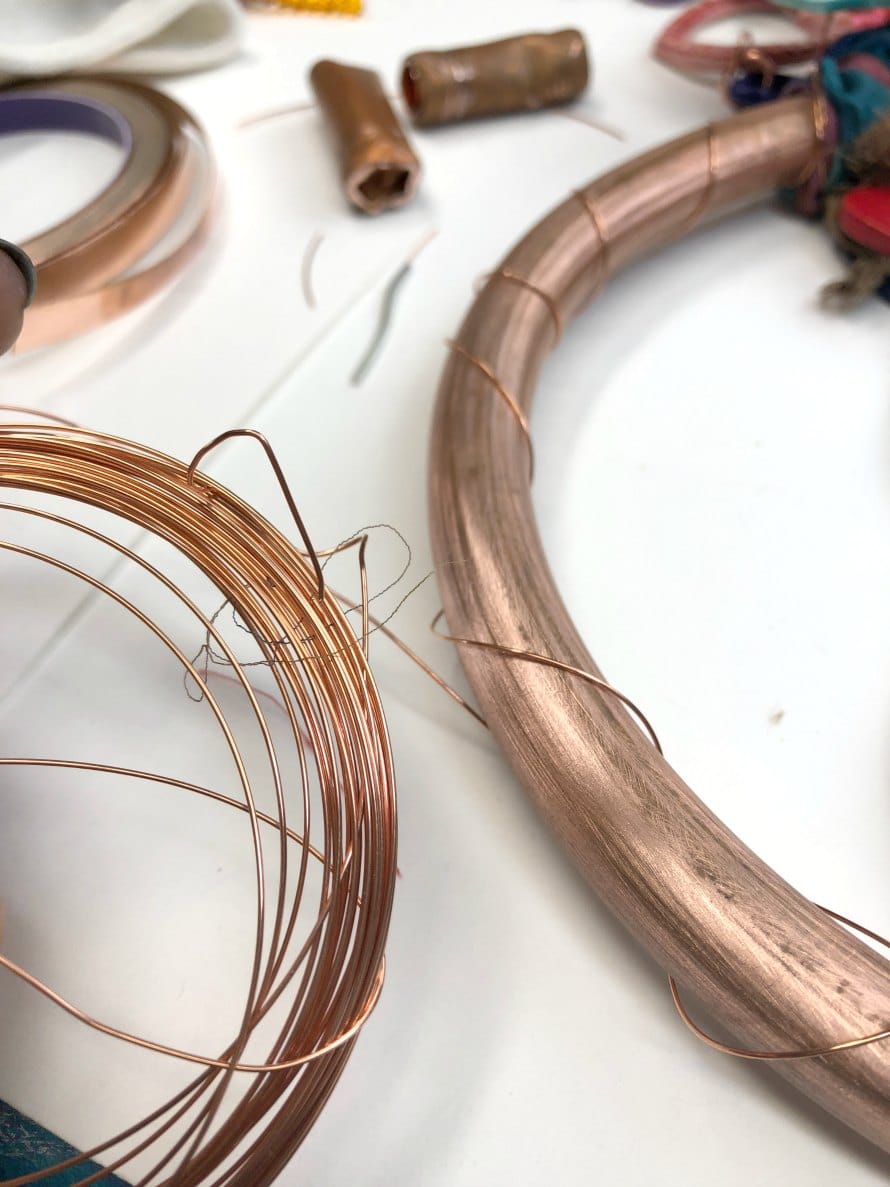
Now comes the copper part. I used copper coil from the hardware store. I also used a copper coil cutter and cut it to shape. This took a little bit of patience. I then even used a mallet to shape it into a circle. The goal is to get the ends smoothly cut and lined up together.
Tap the mallet on the copper coil on a hard surface until you have a balanced circle.
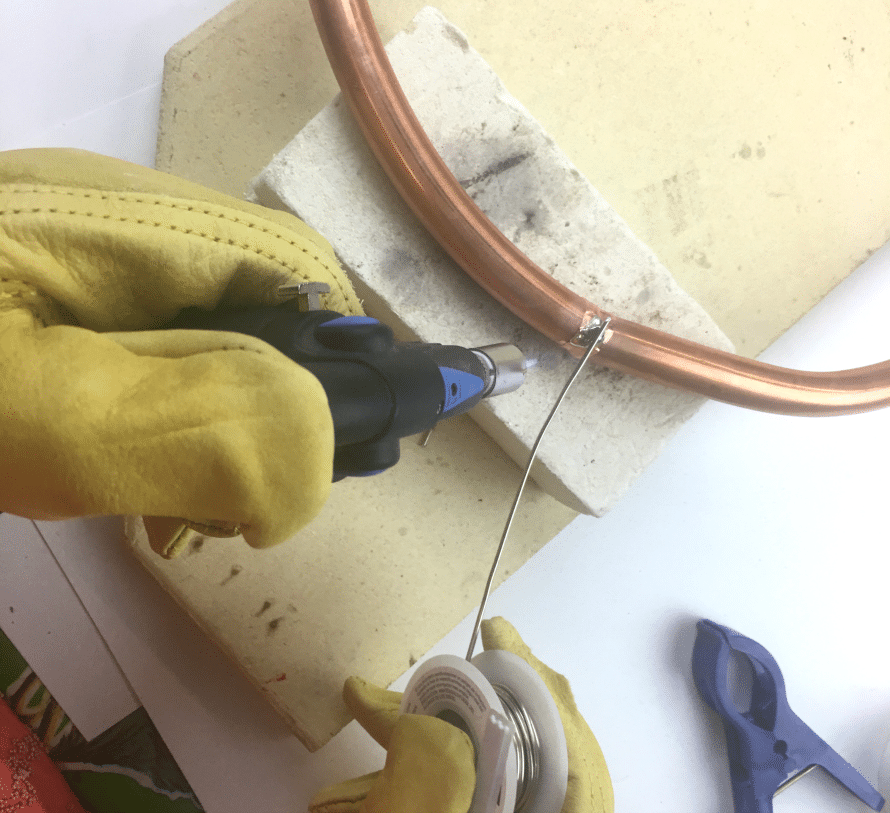
Wrap the ends with copper tape, add flux.
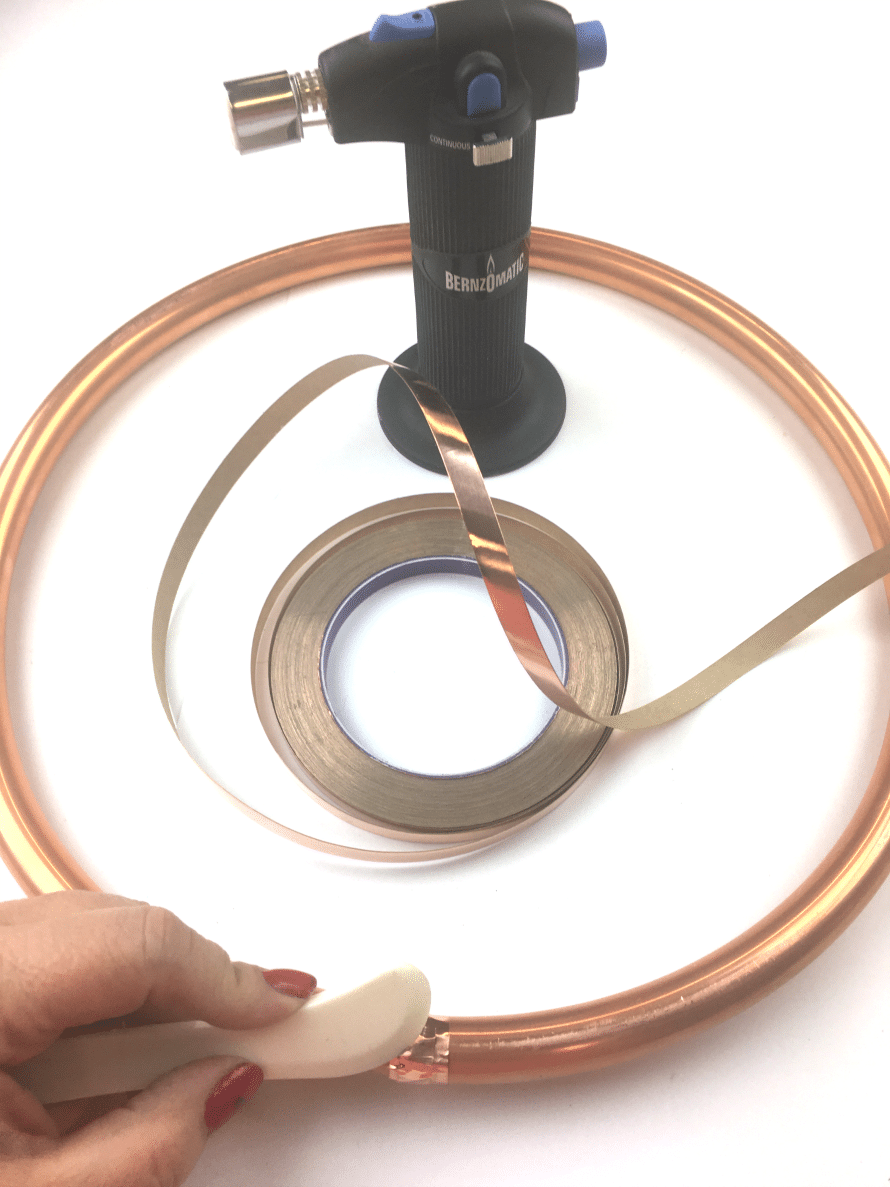 Put on the goggles and the gloves. Make sure everything is cleared out of the way and work on top of the kiln shelf or heat brick. Follow the manufacturer directions to melt the solder onto the copper tape. I keep the flame on medium. you don’t want to point the flame directly on the solder, move it in circles around the area to heat it evenly.
 For a little bit more texture, I wrapped the circle with the wire. I like going that extra bit.
Then I wrapped the seam with sari strips and let them hang down. Next, use jump rings or wire to attach the strands, and even more pieces to your copper and ceramic chime if you want!
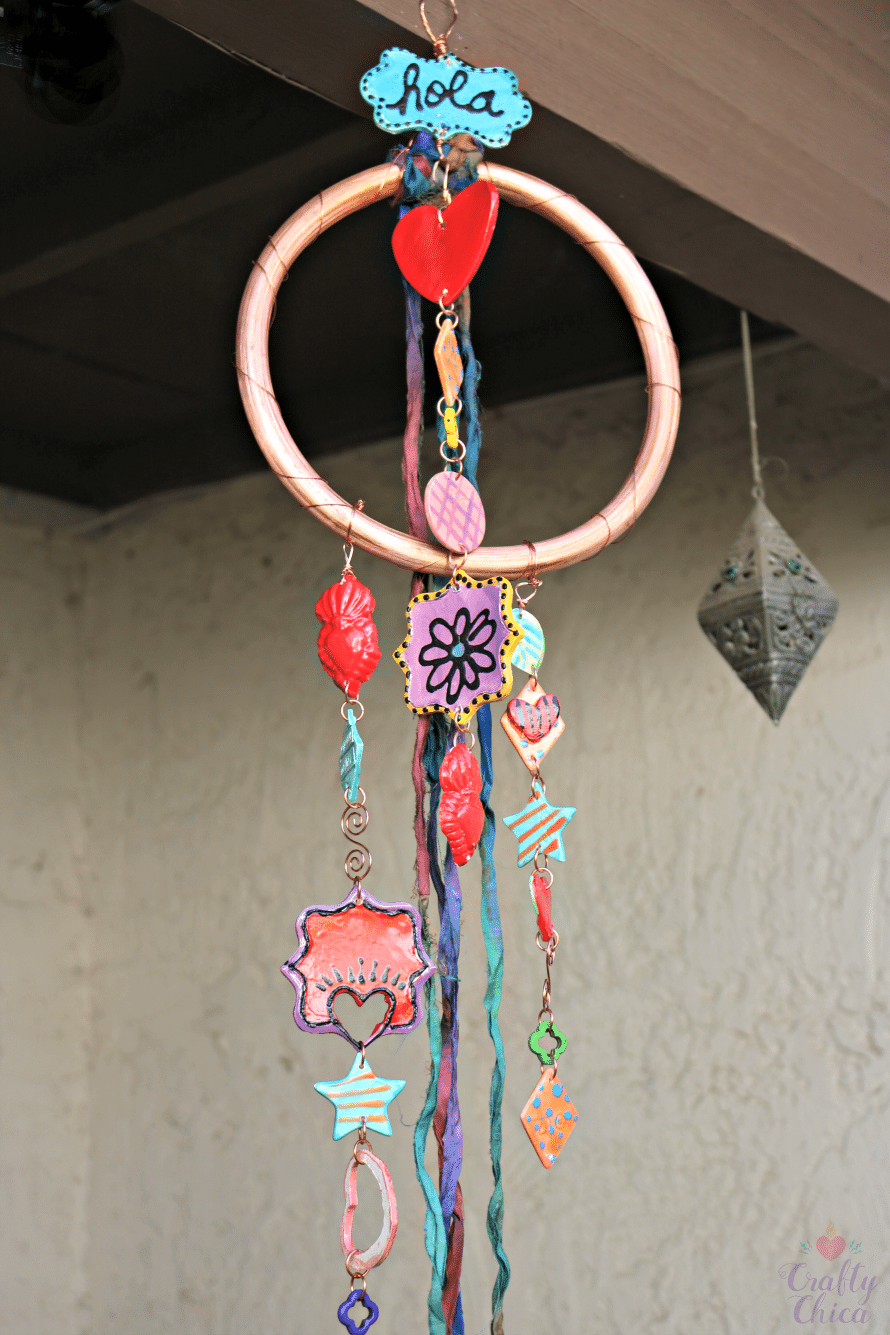
I’ve decided I’m going to keep adding to this. It will be one of those progressive, on-going projects. And if I ever need some charms, I can always go and remove them from a strand? Maybe not, we’ll see how things pan out…
I hope this project inspires you to try a Bernzomatic ST500: 3 in 1 Micro Torch, it comes in handy for so many projects. From food to crafts to repairs. We now have three of them in the house!
![]()
From the Bernzomatic site:
“Find Your Fire. There’s a fire in each of us. Waiting to ignite. We believe in carrying the torch ignited by our founder in 1876—whose quality craftsmanship and progressive mindset are what blazed the trail that got us here today. We believe in awakening the innovators in all of us—inspiring a culture of creators who can break boundaries, mark new territory and go where no flame has burned before. We believe in empowering those who’ve found their flame and dare to follow it. Because the ones who do are the catalysts of bold transformations that redefine the limits of what we can achieve. We believe in our fire and in your fire. It’s time to ignite.”
Thanks so much for checking out my project!
This post is part of a sponsored campaign with Bernzomatic. All ideas, opinions, and the excitement to work with this new art genre are 100% my own.
Be sure to follow them!
· Facebook: www.
· Twitter: @
· Instagram: @