

It’s getting hot in here! Seriously, folks…your inspiration will fire up once you see how easy these Torched Copper Rings are to make. I recently bought a variety of copper sheets, strips, and shapes and spent an afternoon playing with them.
I loved the results so much, I decided to use my pieces for this month’s Bernzomatic Torchbearer project!
This was my proud moment of the weekend.

I know, when you read “torch” you probably think of something like this:

Torches have come a long way – they aren’t just for chefs or mechanics anymore. I’ve been a Bernzomatic ambassador for a couple years now and have learned there is a torch for every personality and need. Now for me, I LOVE the Bernzomatic ST500: 3 in 1 Micro Torch.
It works for so many uses in my craft room. (You can see all of them here)

This torched copper ring project is very easy, great for beginners. For best results, block off a couple hours to give yourself time to play and practice with different techniques and applications.
NOTE: “copper coated” won’t work, you have to have pure copper.
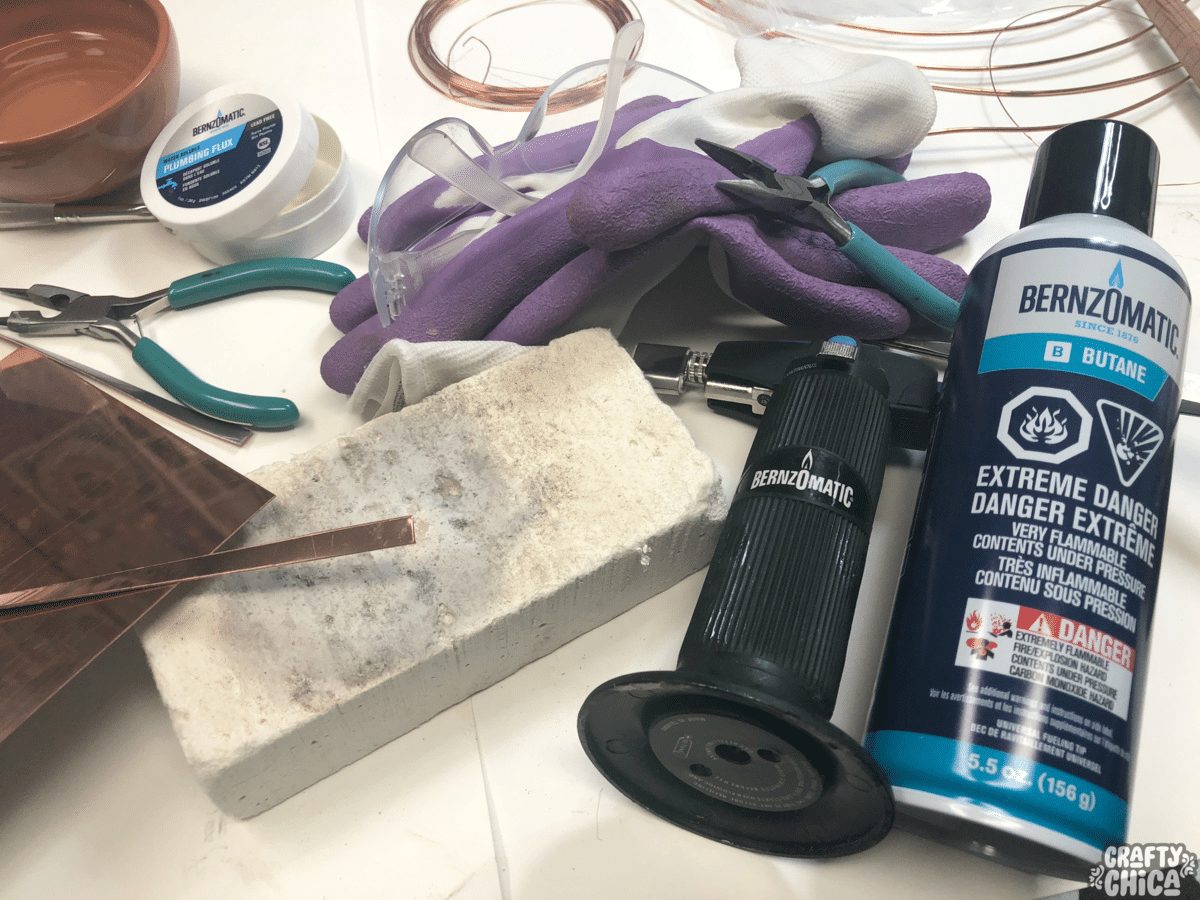
SUPPLIES
Bernzomatic ST500: 3 in 1 Micro Torch
Bernzomatic Lead-Free Solder Wire & Flux
Gloves and goggles
Third hand (I use this one)
Chasing hammer and metal block
Metal flush cutters, file
Copper blanks, sheet, and strips – I used 24 gauge (I bought mine on Etsy)
If you are cutting a sheet, for simple designs you can use shears, but for very detailed cuts, you may want to look into a jewelers saw kit (I plan to buy one!)
Bowl of water
Tweezers
Polishing cloth or tools
Heat absorbent surface, like a brick, kiln shelf or large tile
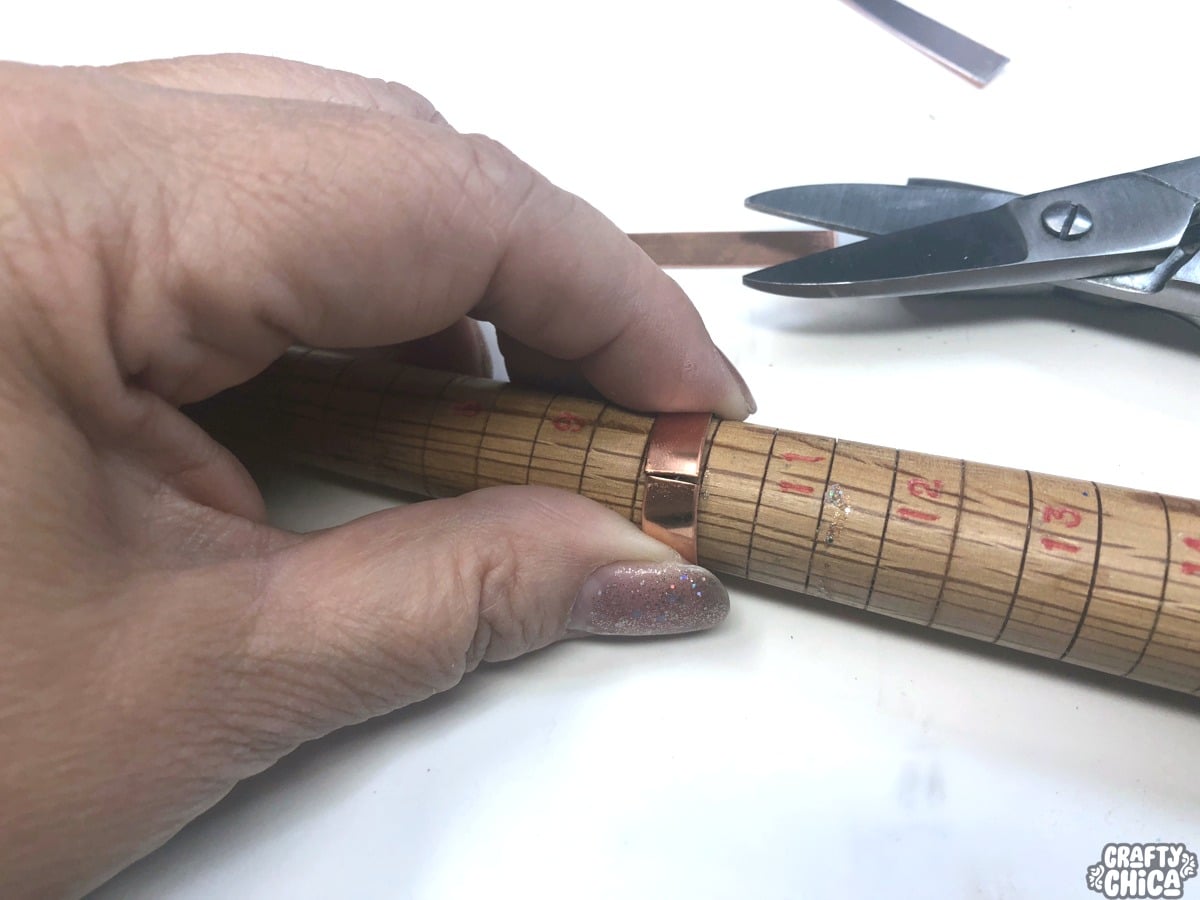
To start, measure your ring size and cut a piece of copper strip to fit.
Wrap it around the mandrel. Make sure each end is cut straight and sand. You want to line up the edges perfectly. you may need to overlap one side so they will butt up against each other.
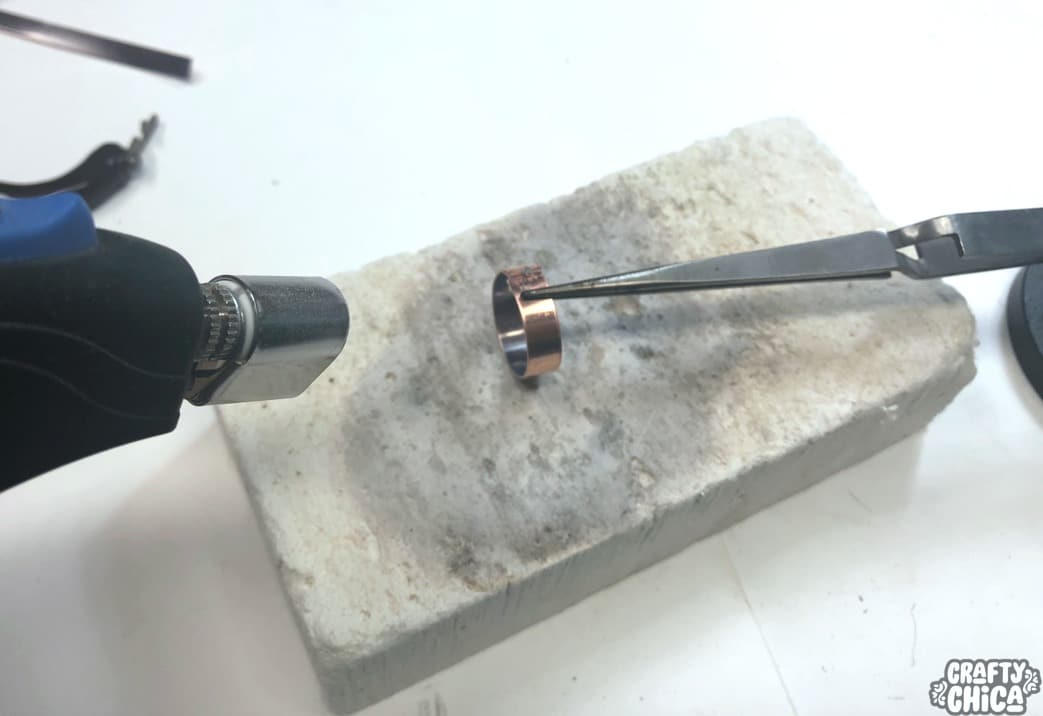
Set it on the firebrick and in the third hand. Add flux on both sides and a small piece of solder wire in the groove. Wearing gloves and goggles, use the manufacturer’s directions to start the micro torch. Move the torch in circles around the area to heat up from the outer edges in. You’ll see the solder melt and connect the sides. Turn off the torch, set aside. Lift the third hand and drop the ring in water to quench.
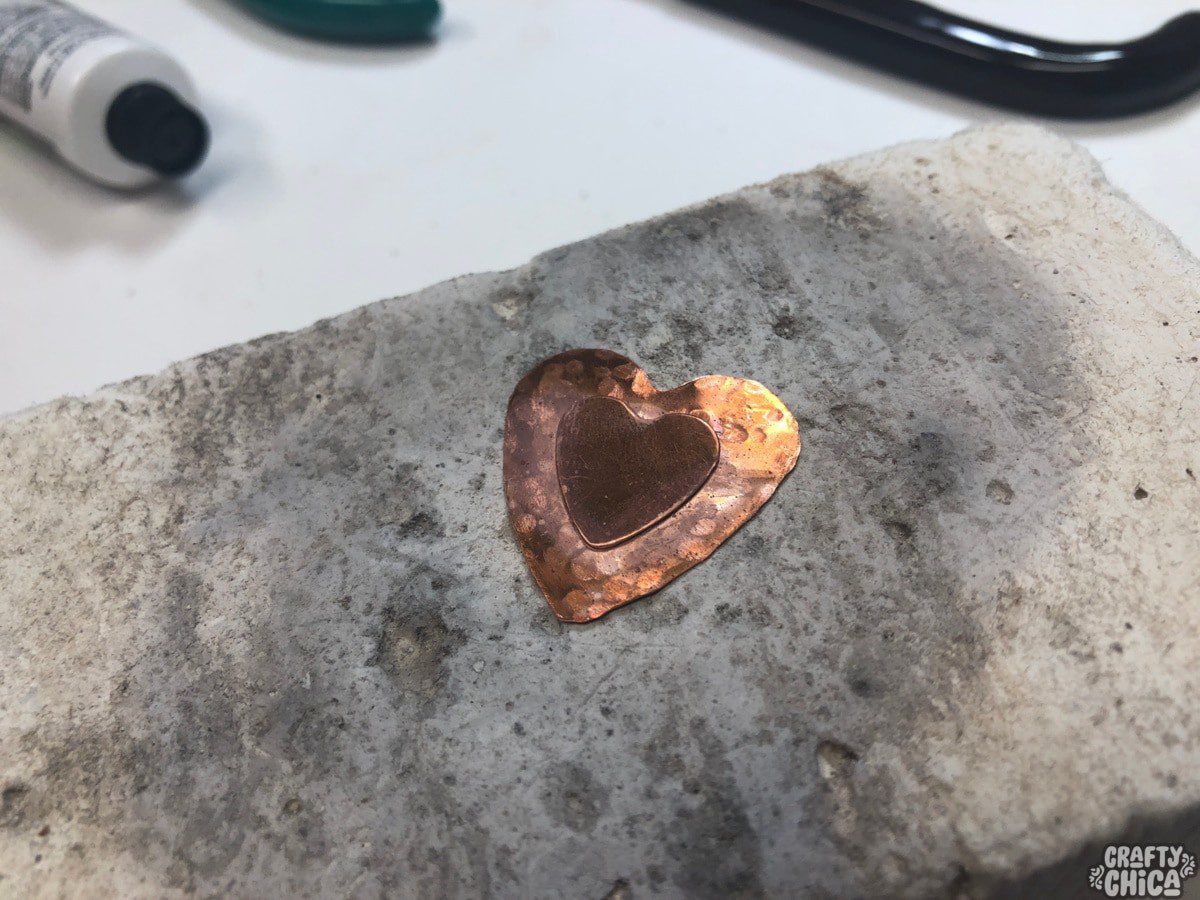
Now you can add whatever embellishment on top. I cut out some hearts and used a chasing hammer to give them texture. Add flux on the back, and repeat the above process.
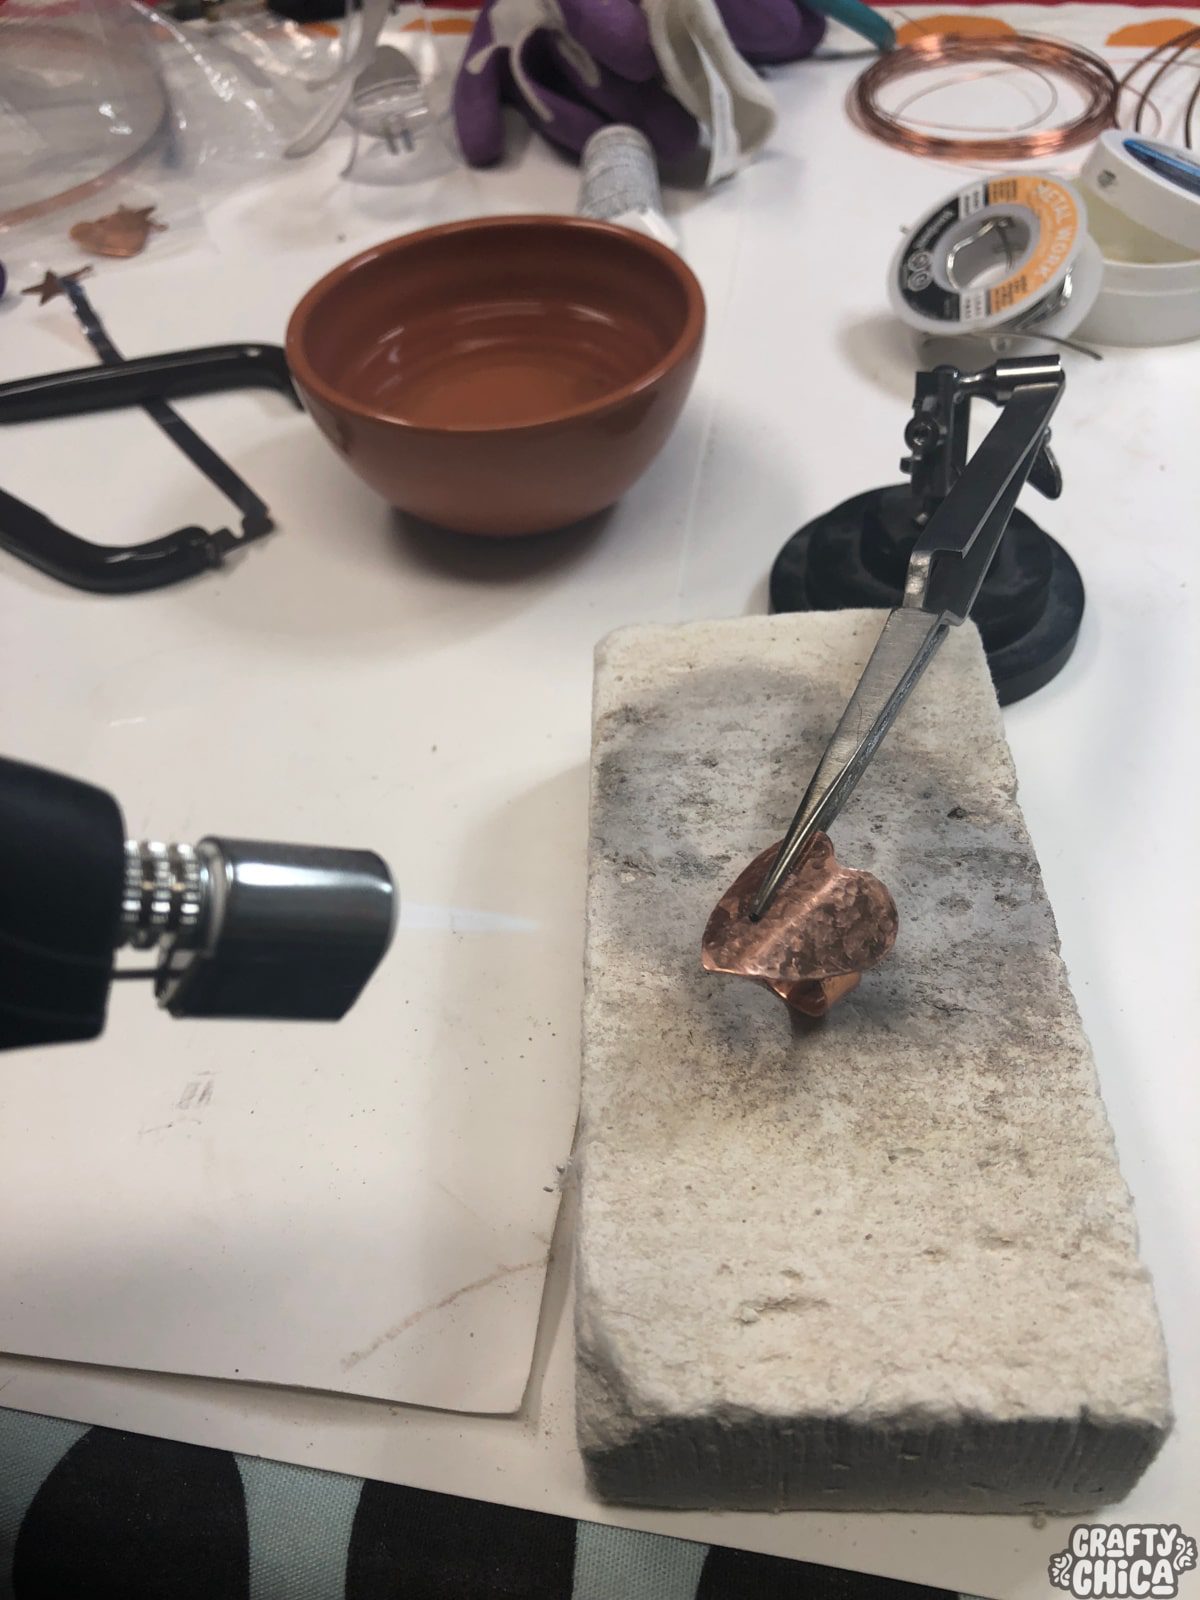
You can also layer pieces like I did here.
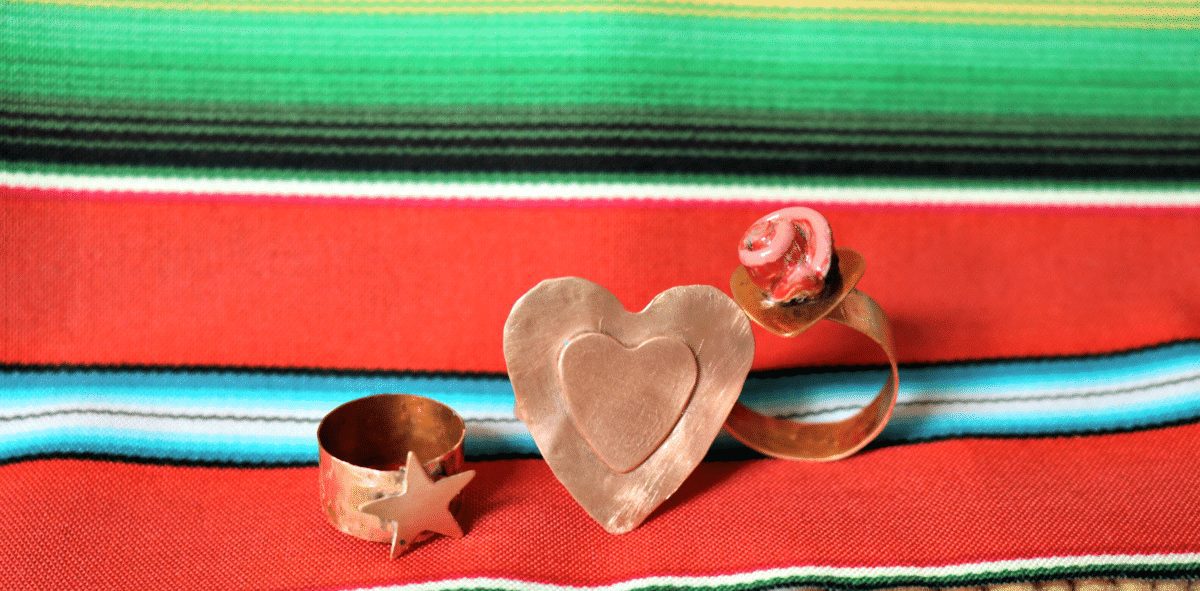
I made a batch of rings with different statements on top. Torching and soldering is awesome because you know it’s sturdy and legit. This is a basic project, but once you practice, you’ll get better and up the design factor. Make use of the chasing hammer and even metal stamps to add more customization!
I forgot to add that once you are done torching them, and quenching them, they will be a little banged up and gritty. I used a light polishing attachment on my Dremel to shine these babies up. You can also use a product called Penny Brite, along with a polishing cloth.

For this one above, I made three little holes and inserted gemmed brads. It was a little difficult to polish, but it still came out cool.

Next time I definately intend to add more design and texture! But for now, these are a great launching pad for more torched copper rings!


