
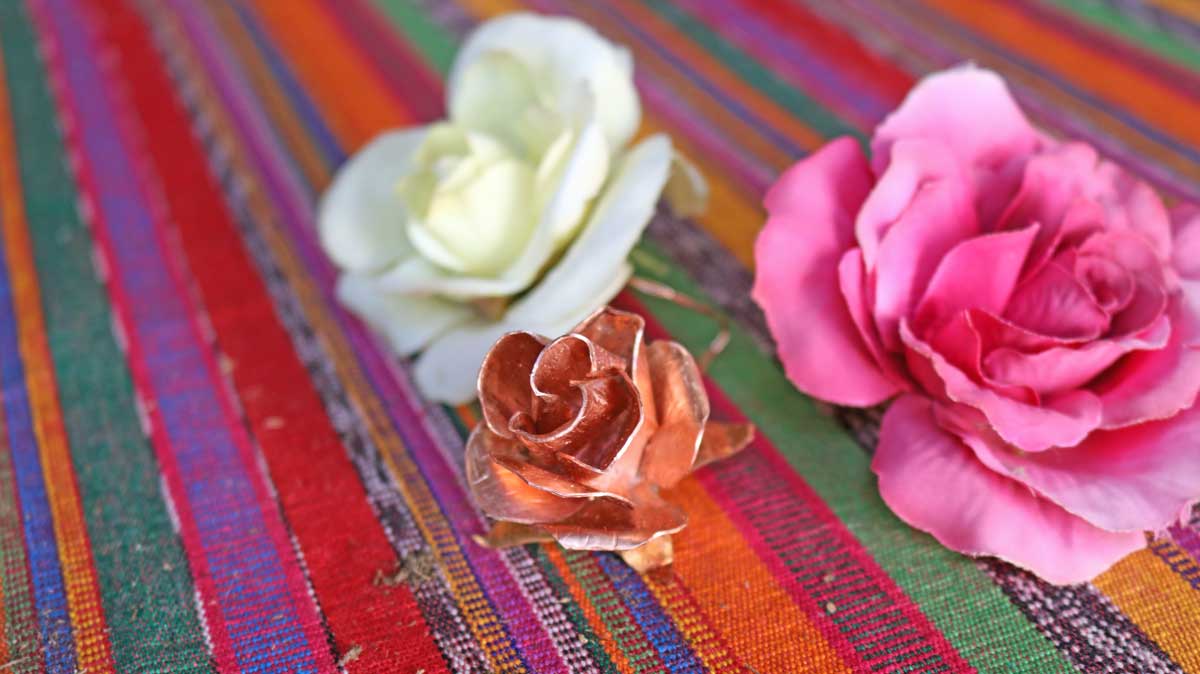
I’ve always wanted to make copper roses and after watching a variety of methods on YouTube, I went for it! This was a perfect opportunity for this month’s Bernzomatic Torchbearer project!
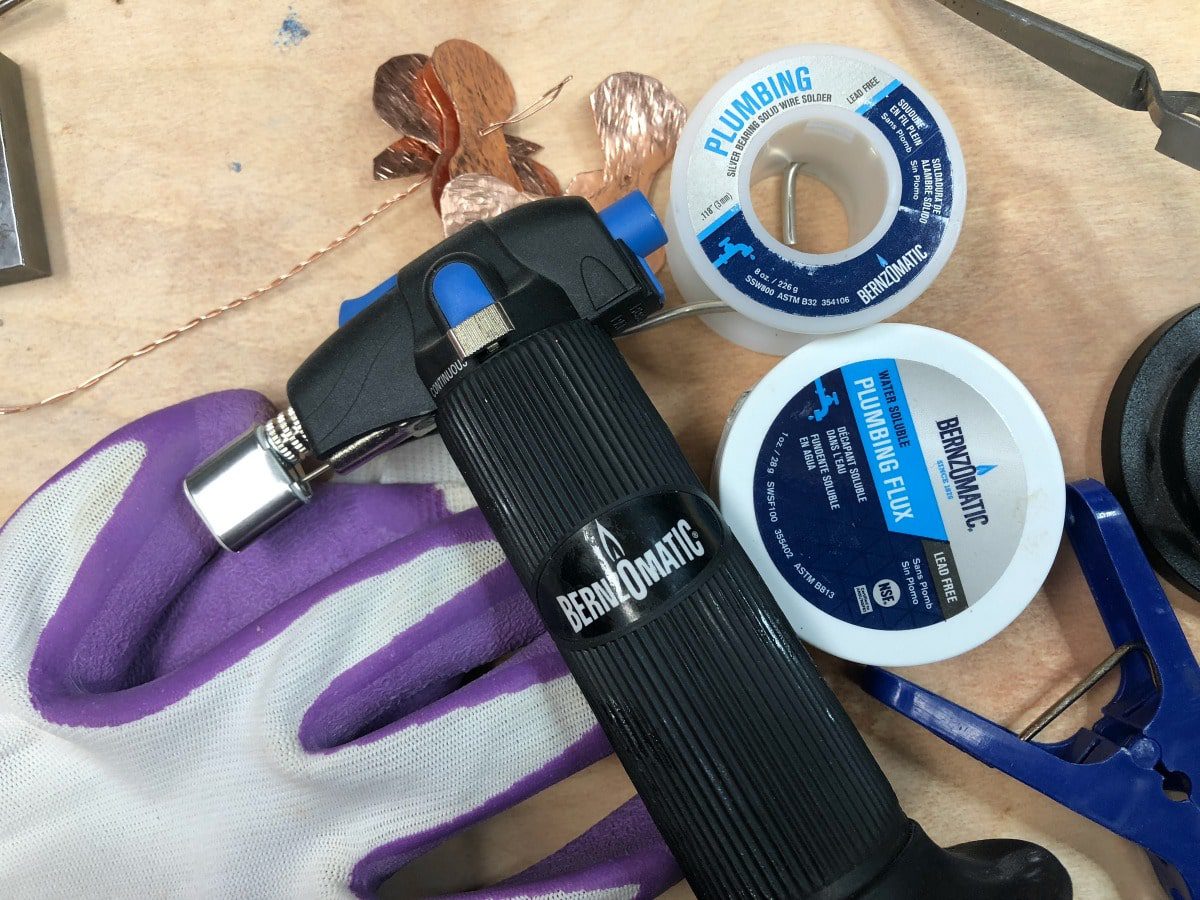
Alrighty, I’ll be honest, there is a bit of a learning curve on this one. And it takes a lot of patience and stamina – but it’s totally worth it. And once you make one copper rose, you’ll want to make a dozen. I used a micro torch and solder to fuse the copper pedals together – you’re also going to need a strong set of pliers!
This is the torch I used!
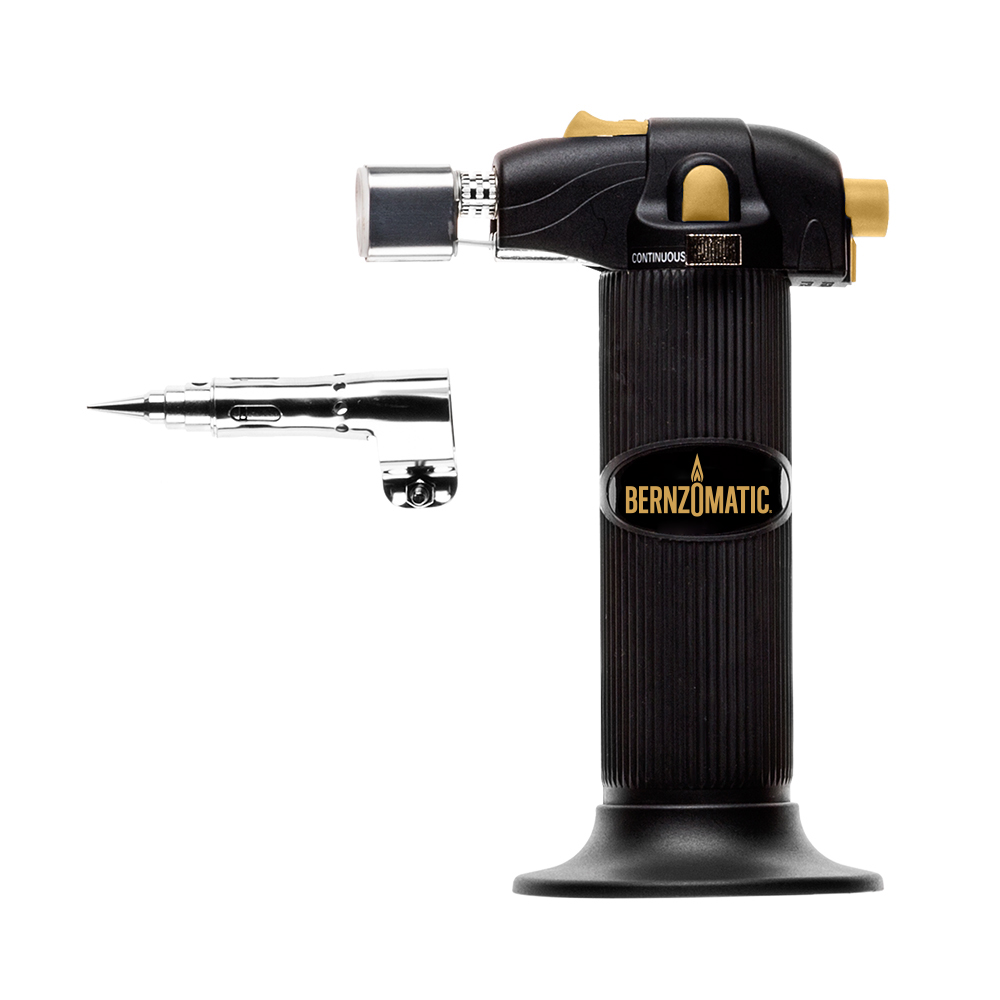
This is always my go-to because it has so many features. I can use it as a soldering iron, a micro torch or even a mini-heat gun.
Let’s get rolling on this copper rose, shall we?
SUPPLIES to make a copper rose:
Bernzomatic ST500: 3 in 1 Micro Torch
Bernzomatic Lead-Free Solder Wire & Flux
24 gauge copper sheet
Tin snips
Marker, pattern
Hammering block, chasing hammer
Copper wire or skinny tubing
Third-hand tool
Goggles and gloves
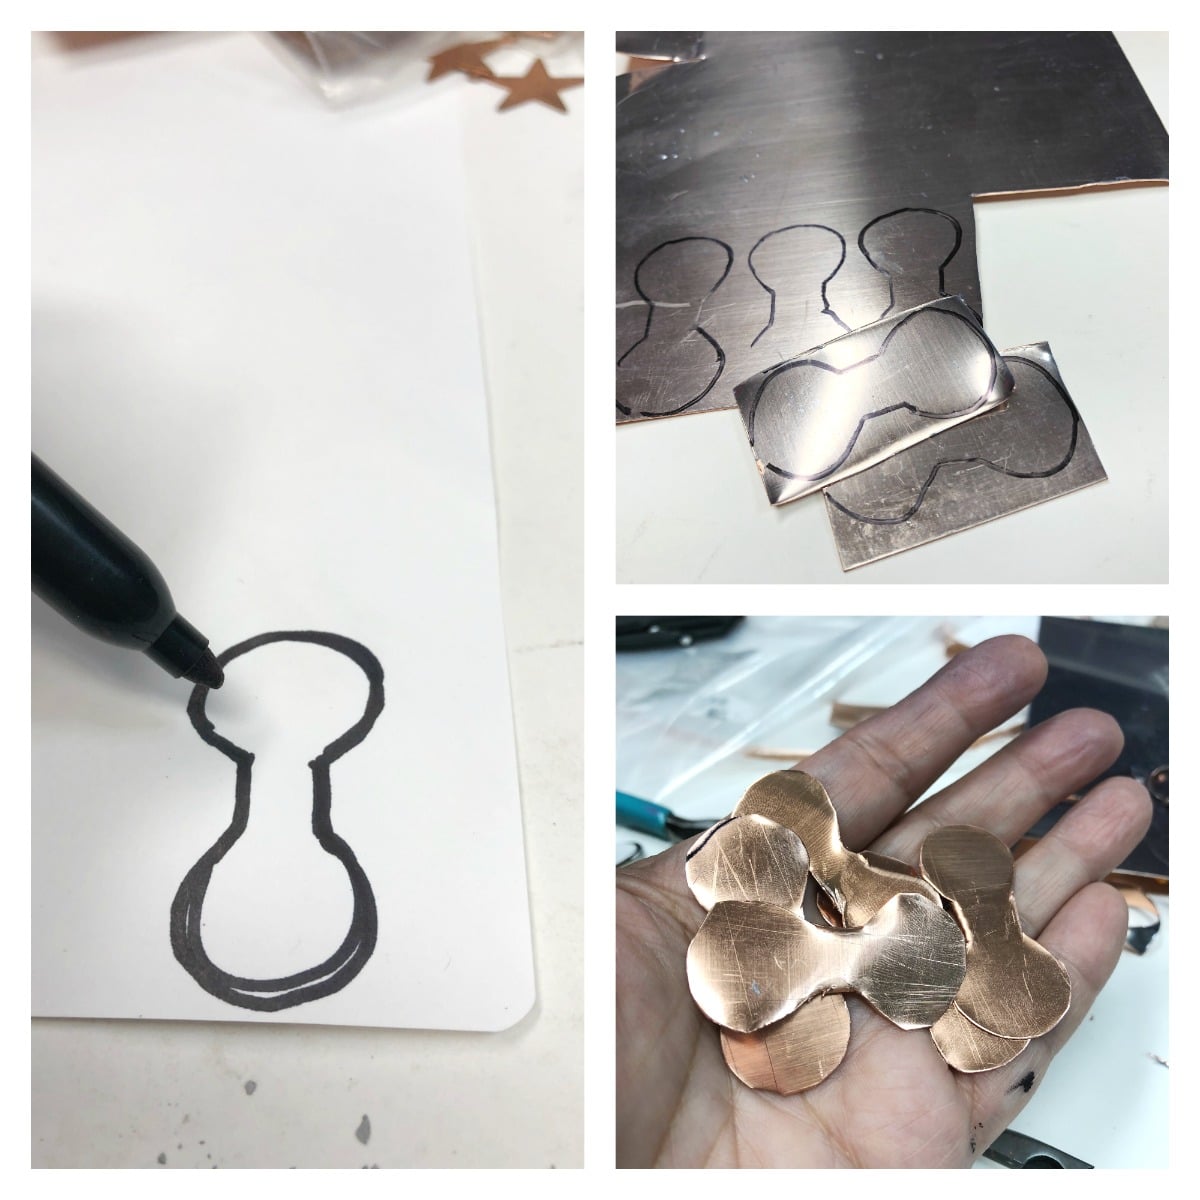
Draw out a pattern to the size you want. I kept mine small since this was my first time. Now that I know the process, I’ll definitely make a larger rose next time! Use your snips to cut out about five or six pieces. Peel away the protective skin from the front side of the copper sheet.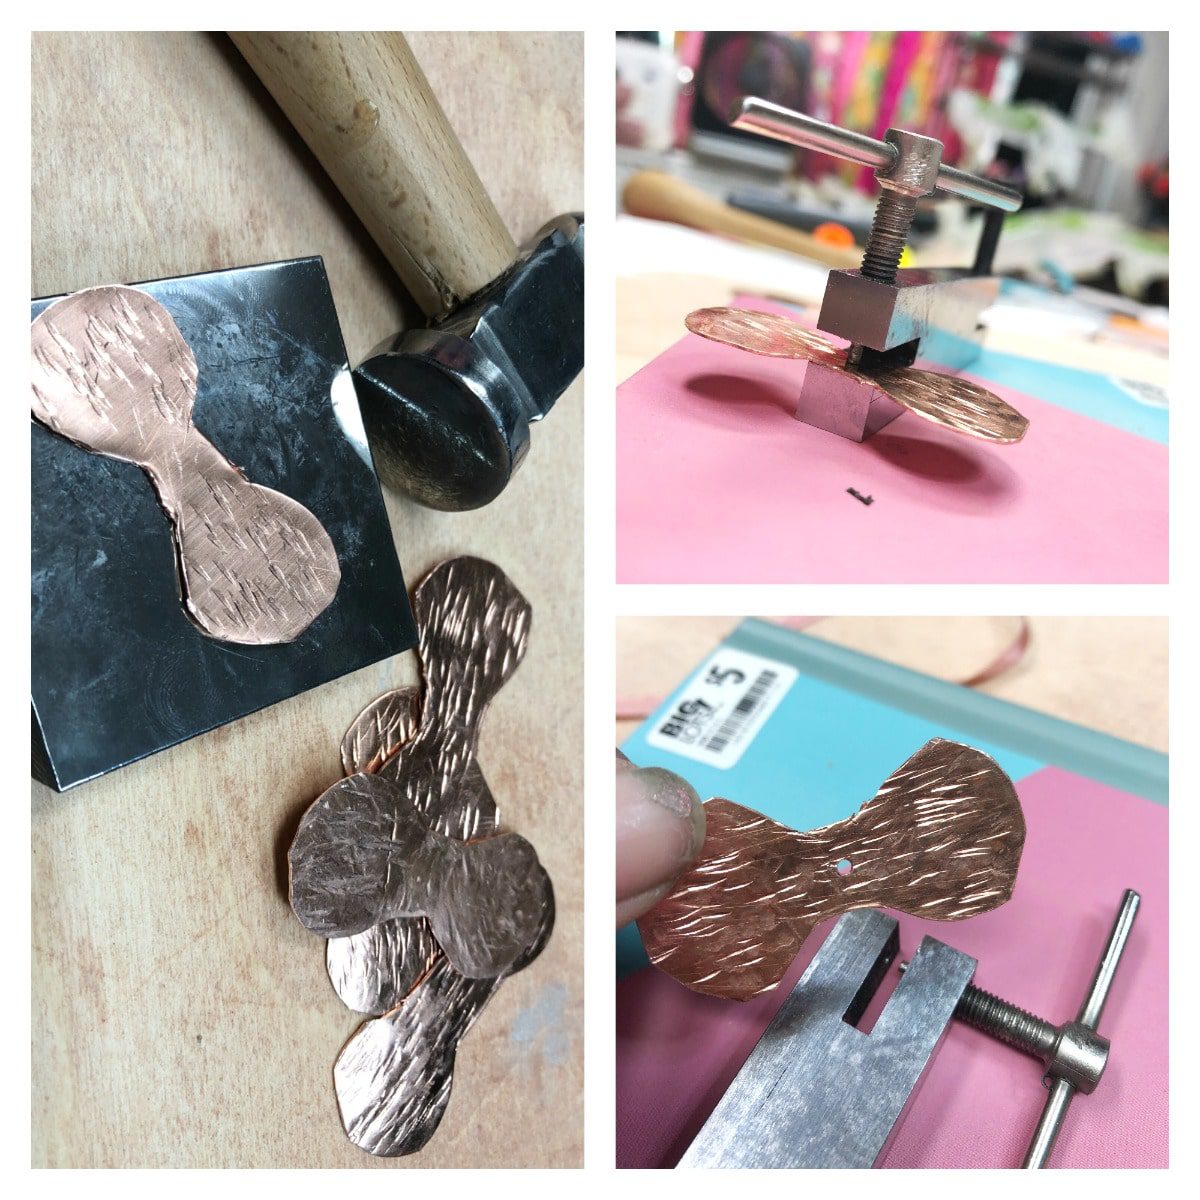
This portion takes a bit of muscle and stamina! Use your chasing hammer to flatten each piece. This will make the copper soft and pliable and will give your pedals texture. Punch a hole through each one.
 Time to put them all together. Gather up the rest of the supplies. I twisted copper wire to feed through the holes to connect the pedals. You want to stack them alternatively, and if you want you can make the leaves that are under a rose.
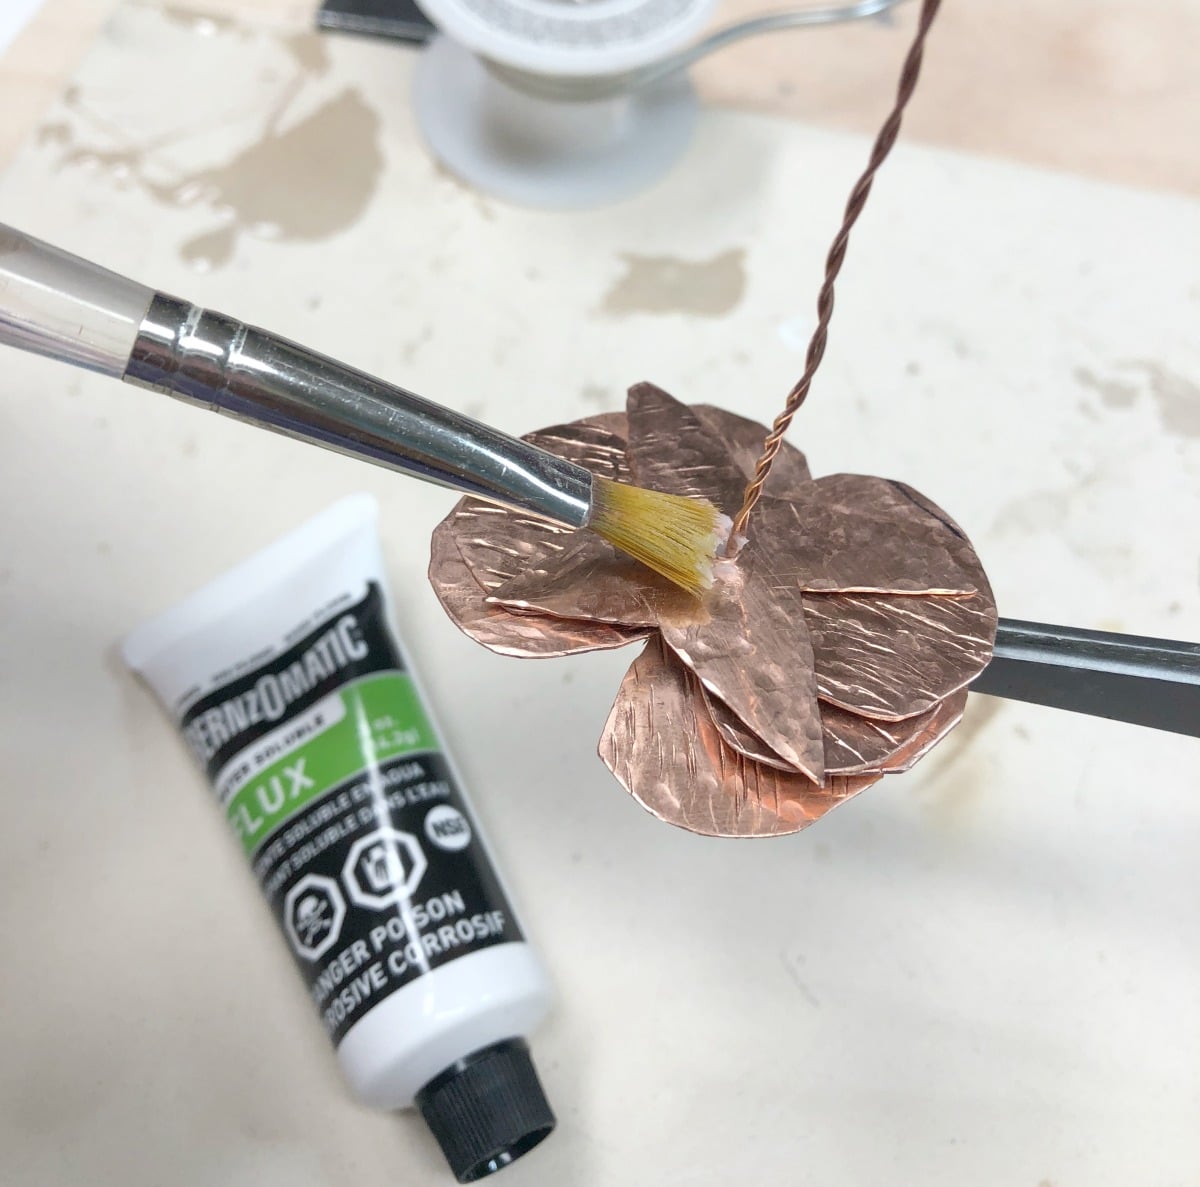
Set the rose upside down in the third-hand tool, and apply flux and solder. Time to light up your torch! Follow the manufacturer’s direction. I used a medium flame for this.

Slowly circle the flame around the piece to warm up the medal, rather than aiming it directly at the area. Go around in small circles and the solder will melt and fill in and connect the stem to the pedals. Drop in a cup of water to quench.
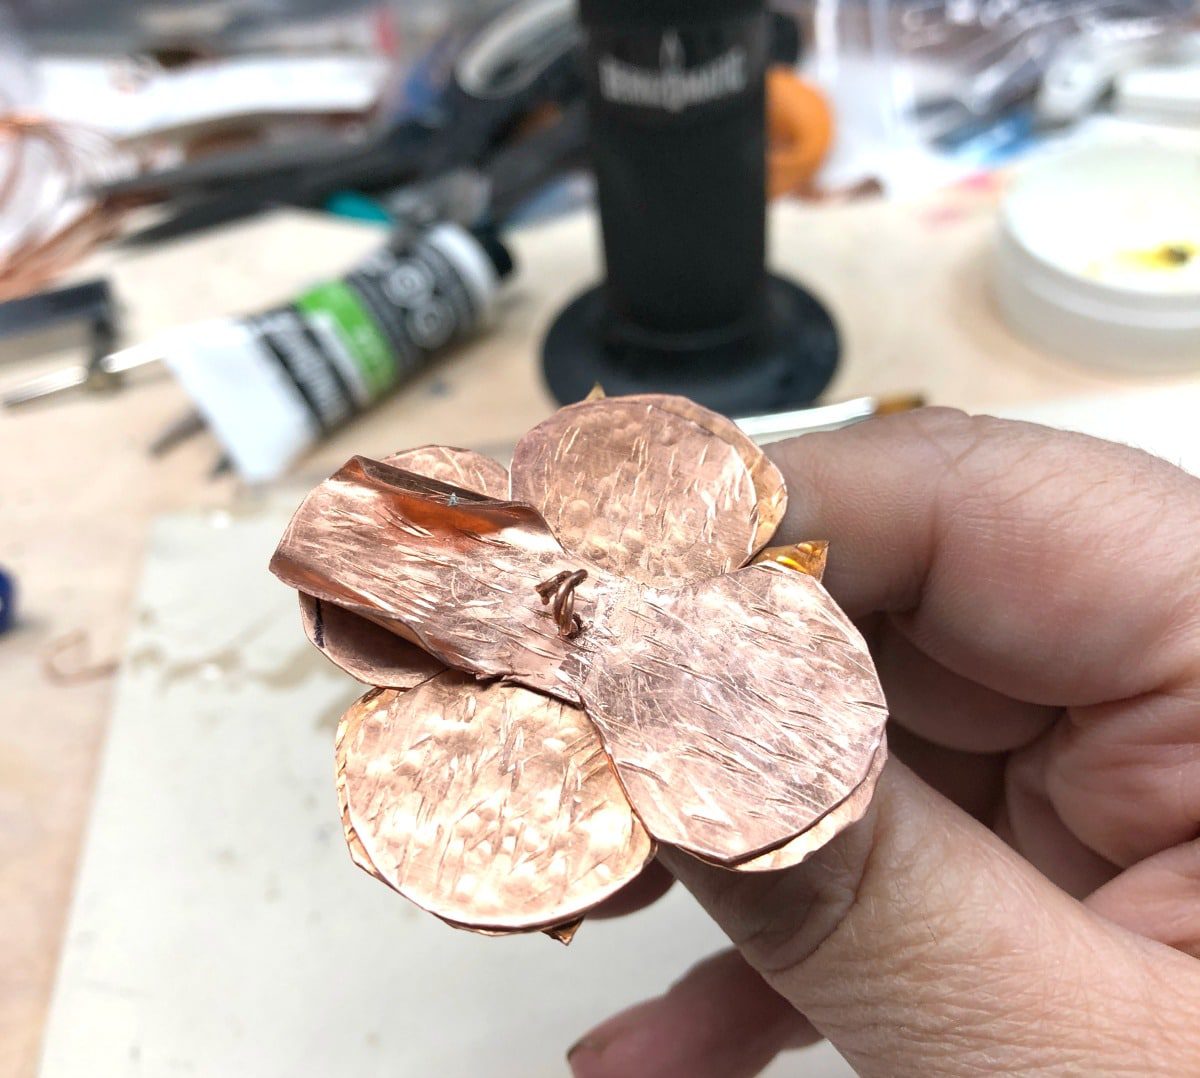
For the top, I twisted a portion of the wire to secure the pieces. Polish as necessary, then use needle nose pliers to bend, shape and curl your rose to your liking!
Related: How to make copper statement rings
 And there you have it! These are so cool and fun to make once you get the hang of it. I’m excited to play with idea more and try bigger roses!
![]()
From the Bernzomatic site:
“Find Your Fire. There’s a fire in each of us. Waiting to ignite. We believe in carrying the torch ignited by our founder in 1876—whose quality craftsmanship and progressive mindset are what blazed the trail that got us here today. We believe in awakening the innovators in all of us—inspiring a culture of creators who can break boundaries, mark new territory and go where no flame has burned before. We believe in empowering those who’ve found their flame and dare to follow it. Because the ones who do are the catalysts of bold transformations that redefine the limits of what we can achieve. We believe in our fire and in your fire. It’s time to ignite.”
Thanks so much for checking out my project!
This post is part of a sponsored campaign with Bernzomatic. All ideas, opinions, and the excitement to work with this new art genre are 100% my own.
Be sure to follow them!
· Facebook: www.
· Twitter: @
· Instagram: @
Thanks for checking out my post!, let me know if you try this project!