
Here is the deal on mold making for casting resin – plus milagro wall art…that’s a mouthful, I know! But I swear it’s worth the look-see.
One frosty, magical December, I hosted the first ever Crafty Chica Art Retreat in San Miguel de Allende. Lasting a week, our experience consisted of crafting, eating, shopping, and lots of walking!
We all loved the experience, I’ll be sharing more soon, but first I wanted to share one of the workshops we had. I taught a resin class, plus a bookmaking project and watercolor painting.
But our FAVORITE class was from a town local, Rafael! He taught us how to make beautiful wood milagro hearts.
RELATED: DIY wood corazón con milagros

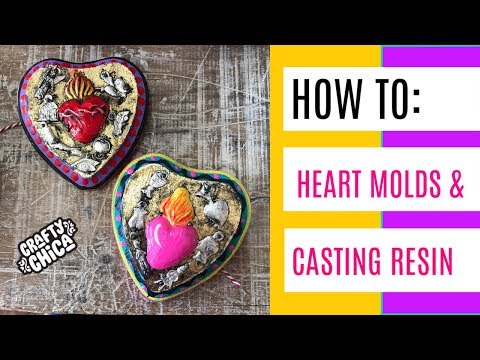
I wanted to share the idea with all of you, but I put my own twist on the idea – I made my own resin corazons!
This will be a two-part tutorial, the first part will cover making the the mold and the casting resin. The second part is putting the heart together, inspired by the class we took in San Miguel!
Here is the video, it’s about 13 minutes. I take this one slow!
Supplies for mold making for casting resin
Mold making kit (check your local craft store for sales and use your coupon!)
Mask, gloves
Small mixing cups, plastic or wood stirrer
Item to use inside the mold
Wax paper
How does mold making work?
For starters, we are making a silicone mold. You’ll need a two-part mixture. This type of mixture is ideal for creating molds because it hardens quickly and can be easily removed from the mold once it’s set.
A mold creates a negative mold of the desired object. This negative mold is then used to create a positive mold out of silicone. The positive mold is then filled with casting resin (or slip or metal, etc).
Silicone molds are awesome because so much detail comes through! The material is also flexible, it can be easily removed from the mold without damaging the final object.
Directions for mold making:
Line your work surface with the wax paper.
Set out the item you want to cover with the mold maker, make sure it is clean and free of debris.
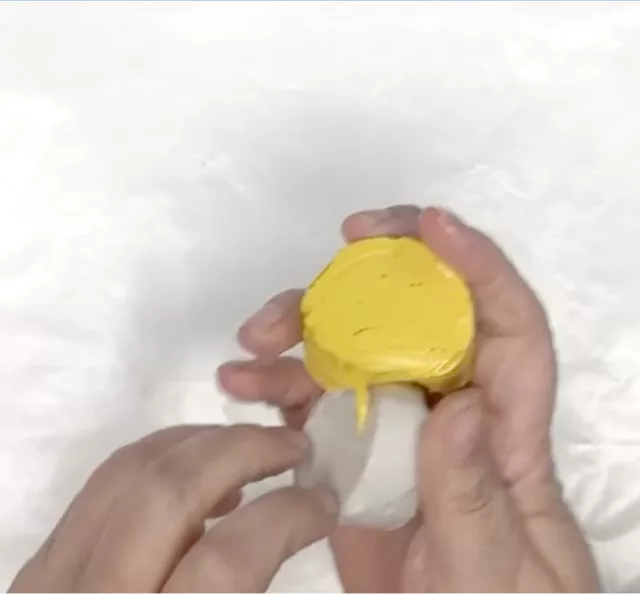
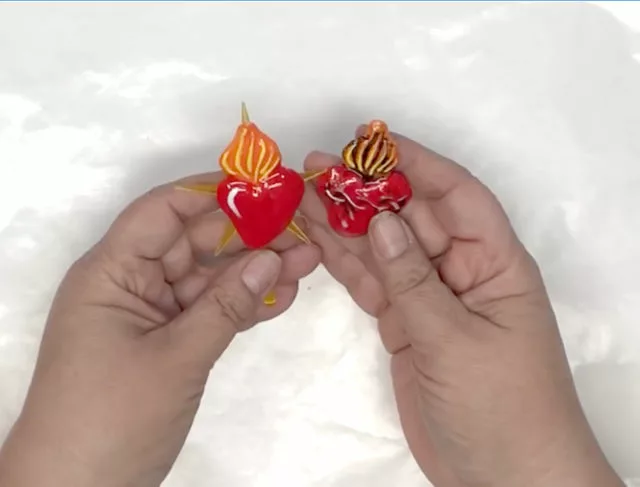
Take equal parts (or what your manufacturer says on packaging) of the mold maker. Roll them between your hands and mix thoroughly until the two colors are fully blended.
NOTE: In my video, I should have mixed the mold of the big heart much more because you can still see the white. Therefore, that area didn’t cure, it became very sticky.
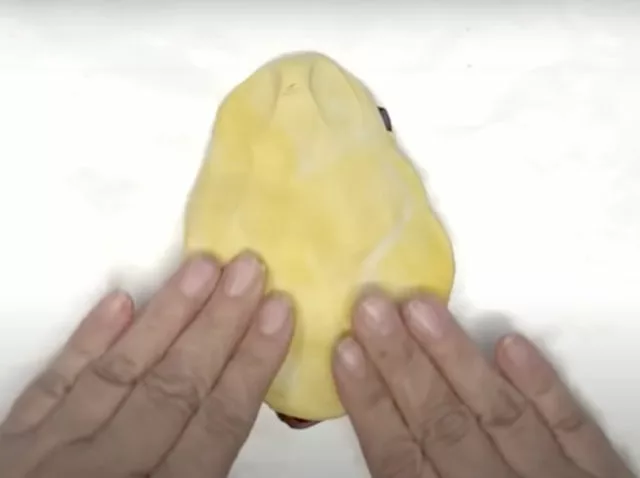
Roll and pat your mold putty into a slab to press over your item. Press in place and let set for at least ten minutes.
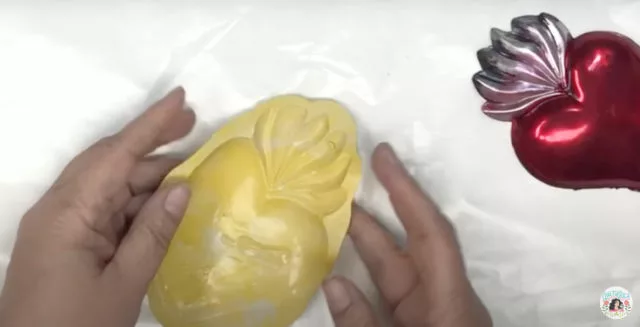
Press your finger into the mold putty to see if it is firm and not sticky. If it’s good, lift the piece and separate the items from the mold you created.
Directions for resin casting
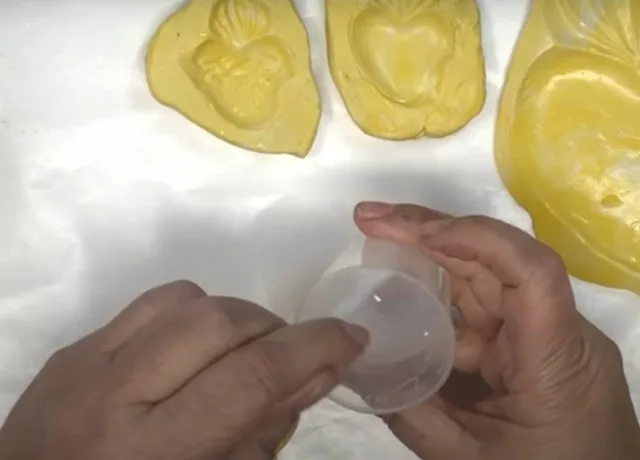
Now that we have our wonderful molds, it’s time to use them! Give yourself grace if they didn’t all turn out perfect. Especially if this is your first time making molds. Practice makes progress!

Let’s talk about casting resin. It’s different that the traditional clear resin we often see in crafts.
First tip – make sure you buy the correct product. There have been times when I’ve accidentally bought the wrong resin for my project. Casting resin cures to WHITE. Solid white. Whereas resin cures clear. Look closely at the package.
What is casting resin?
Casting resin is a type of clear plastic that is often used to create specific shapes and objects. The material is poured into a mold and then left to harden.
Once it is hardened, the object can be removed from the mold and will retain its shape.
Casting resin is often used for creating jewelry, figurines, and other small objects. It’s also sometimes used for coating surfaces or filling in gaps. It is also frequently used in the production of fiberglass and carbon fiber objects. But in our case – its for crafts!
Pouring the casting resin
Set out your molds, and for any that tilt, add a little folded paper underneath to make sure they rest even on the table.
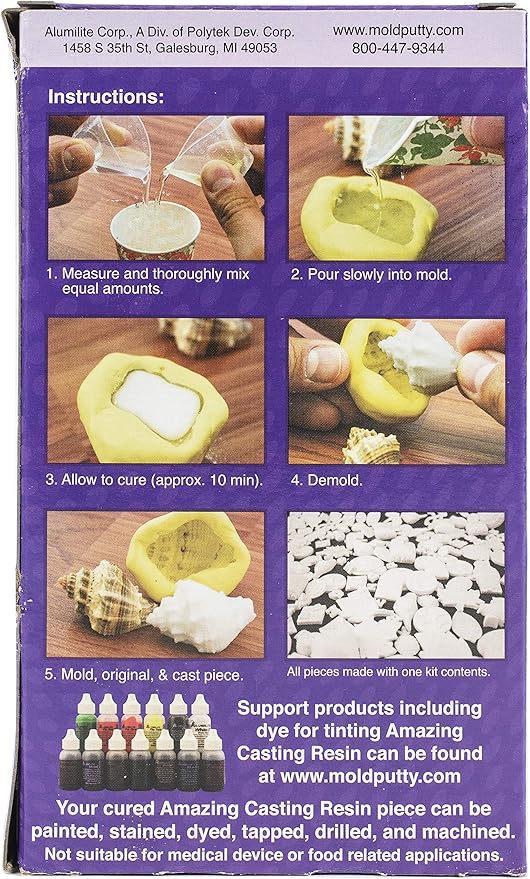
Put on your mask and gloves and mix the two-part casting resin. Make sure to work in a well ventilated space.
Mix thoroughly with the stirrer, as soon as you see it start to become cloudy, it’s time to pour.
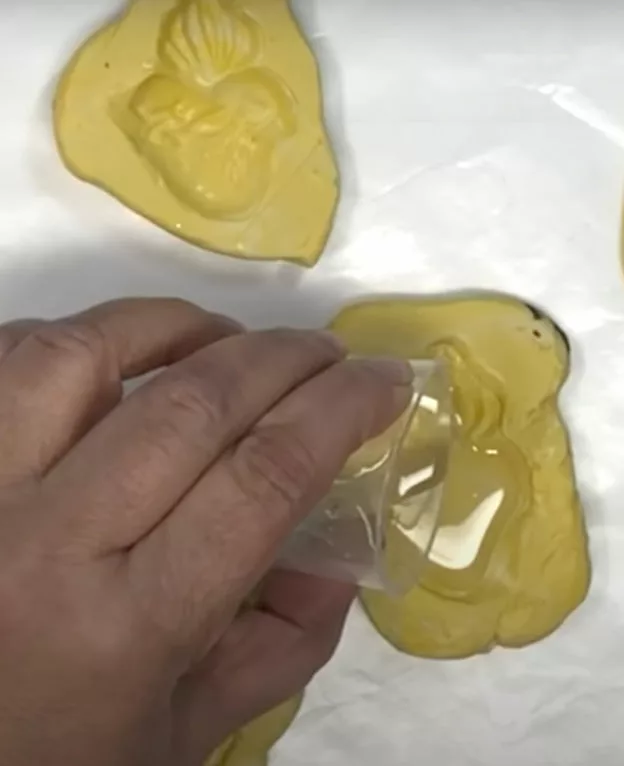
Carefully fill your mold with the casting resin. Make sure to get every groove.
TIPS: Make sure to leave enough room around the item to allow for overflow of the casting resin. Especially if your mold is very shallow.
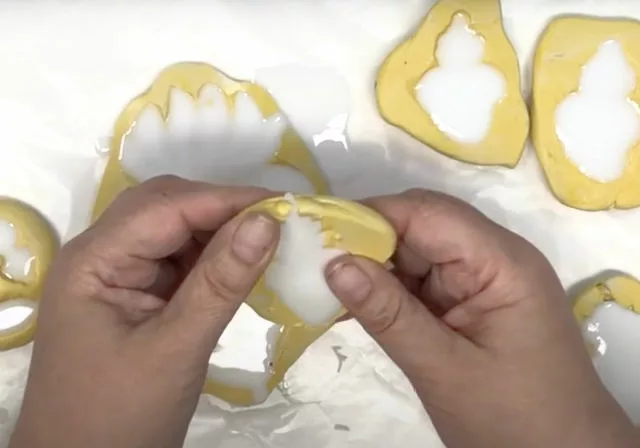
Once you are done, let it set for 15 minutes until it turns solid white. Remove from the mold. Trim away any excess.
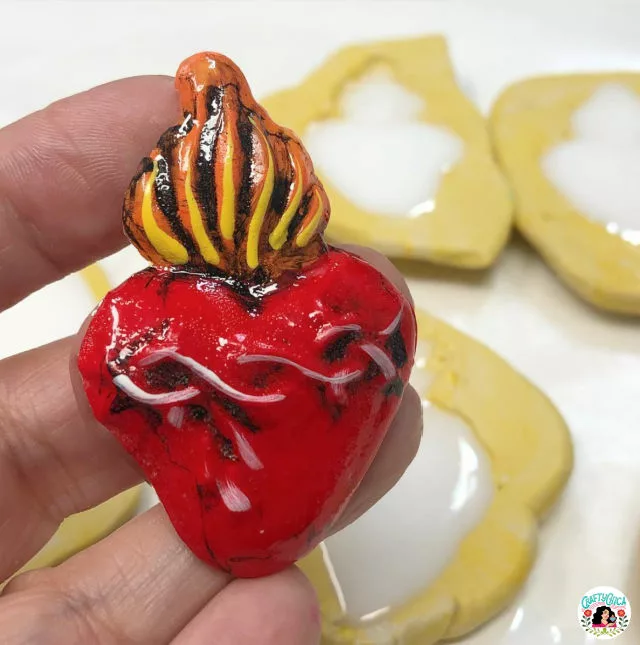
Paint as you wish! I hope you like the project of mold making for casting resin! I think it is worth it to have in your craft supplies!


These are so beautiful!!! I will be travelling to San Miguel later this year. Does Rafael do workshops for the public? Any info would be appreciated!
I second that, I will also be there this fall. Is there any info you can provide on how to contact Rafael?
Do you know where we can get wooden hearts?