
Ready for another round of kiln tips for beginners? When I first set up my kiln, I created a post here called Kiln Tips for Newbies – and it ended up being one of my tops posts on this site!
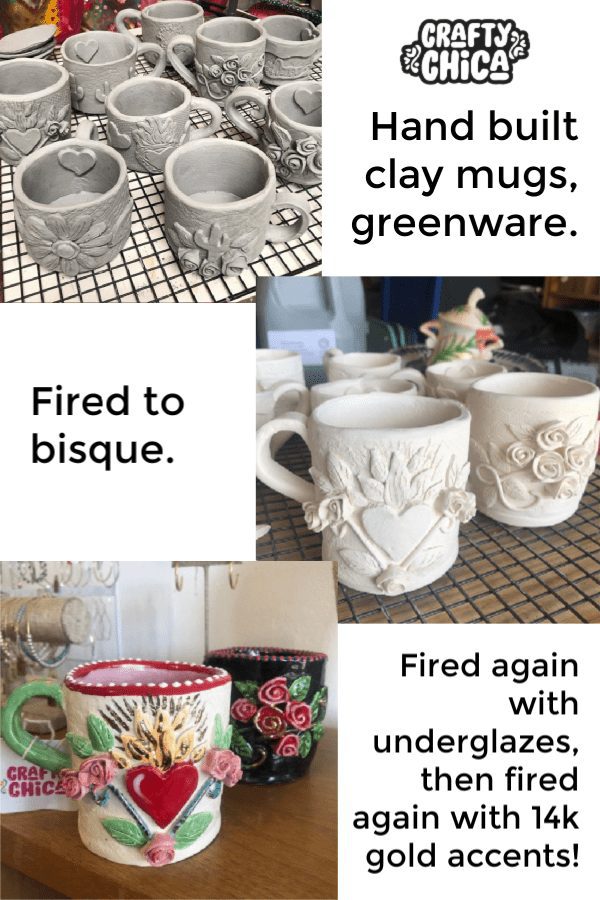
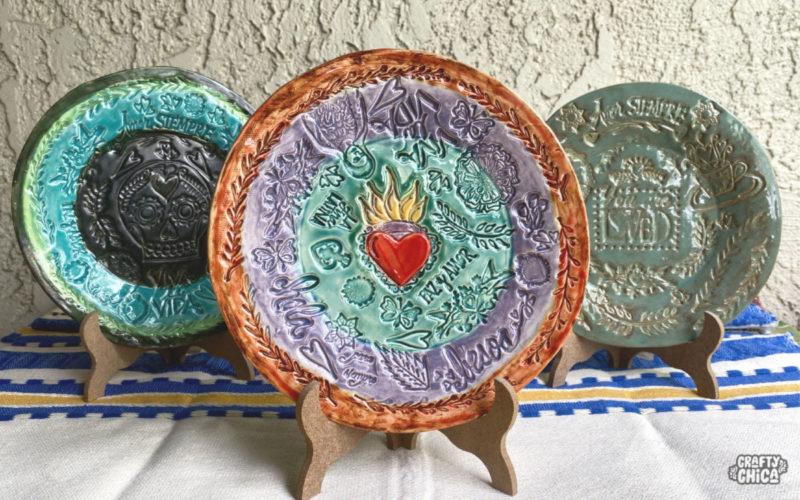
Now that I’ve had my kiln and have used it faithfully every week for the past several years, I feel way more comfortable with the process. She’s a member of the family now! Granted, I have yet to fire glass, but it’s on my list! But I use my kiln almost every day to fire greenware to bisque and then bisque with underglazes. It’s become a big part of my creative livelihood!
Kiln Tips for Beginners
In the meantime, more and more questions have popped up, so I went right to the source – Jim Skutt, the owner of Skutt Kilns!
Here’s a video from the Skutt site that shows their history. For my first post, I asked friends in the industry for input, this time around I went straight to the source with Jim. He owns the company that makes these awesome kilns and has seen EVERYTHING when it comes to troubleshooting!
I love that Skutt is a family-owned generational business, and they even have a strong hashtag going on over on Instagram #MadeInASkutt – you can check it out to see all the cool things people have created and fired!
Here is the SkuttKilns IG page: https://www.instagram.com/skuttkilns/

Alrighty, here are my burning kiln questions I asked him! These thoughts came to me while prepping and working on my ceramics. Ideas that make you go hmmmm.

Hopefully his answers help you as much as they have helped me!
This question popped up because I often do my glazing in the evening and want to run my kiln while I sleep. There’s a habit of sometimes not waiting until the glaze is completely dry…
Why is it so important to make sure all glaze is dry before placing pieces in the kiln for firing, won’t it dry when the heat rises inside the kiln?
In terms of your ware, this is really only an issue on your bisque firing. Residual water still in the clay body will turn into steam at 180 F and want to rapidly escape. This can sometimes cause cracking and in extreme cases even cause pieces to explode. That is why we recommend using the Preheat function on our controller as sort of an insurance policy if you think there may be some moisture in the piece.
On Glaze firings, the moisture should already be gone. The amount that is reintroduced during the glazing process is usually negligible and does not soak deep into the clay body. We still like to see pieces completely dry before they go into the kiln. Moisture is just not good for your kiln. Limiting the amount of moisture in the kiln during a firing can extend the life of anything metal including your elements, thermocouple, bands, and hardware.
Note from Kathy: Yup. This convinced me to wait until everything is dry. I want my kiln to live its best and fullest life!!!
Is there a way to quickly cool down a kiln? I’ve heard of people (me) removing the plugs or stilting the lid at 500 or 600 degrees in hopes of cooling the kiln faster. Is this a good idea? Why or why not?
We always encourage to let the kiln cool slowly and naturally to minimize the effects of thermal shock at the end of the firing. Having said that, sometimes people just can’t wait and they need to get that kiln unloaded.
What are the alternatives to the above?
Here is a trick that will be safe in virtually every case we can think of:
Leave the peephole plugs in at all time as well as the lid down (assuming a downdraft vent is installed, like our EnviroVent 2).
Once the kiln controller shows the firing has hit peak temperature and is now cooling you can place a small fan outside the kiln blowing on the red control box. This moves the warm air near the kiln body away from the kiln and will encourage the chamber to give up heat more rapidly, through the firebrick, so there is little chance of thermal shock.
Note: Sometimes with large platters especially, this technique can cause rapid cooling through Quartz Inversion, therefore we don’t recommend any kind of rapid cooling with large platters (large flat things) in the load.
Is it unholy to fire greenware to bisque at cone 06 medium speed, or should it always be cone 04, slow? If it is the latter, why?
You are so funny! Nope, there isn’t a hard and fast rule here, but the reason we recommend Cone 04 and slow is to give the owner the best chance of getting a complete mature bisque, by that I mean fully combusted organic material in the clay body. As good as all our suppliers are, Mother Nature doesn’t make clay in a clean room, so there are organic materials mixed in like carbon, fluorene and Sulphur to name but a few. If that stuff doesn’t have enough heatwork (time and temperature) to fully eliminate the unwanted organic materials, then we see glaze defects show up in the 2nd firing. An example of that would be pin-holing, where the organic material continues to outgas during the glaze firing and the gas makes small holes in the glaze layer.
I’ve always wondered if it’s okay to use underglazes on store-bought terra cotta pots and fire them. If this is okay, what should be the kiln setting?
Works for me. I think you’d just want to fire the underglaze in accordance with the manufacturer’s instructions. Terra cotta pots are lowfire, so I’d think a Cone 05 would get the job done.
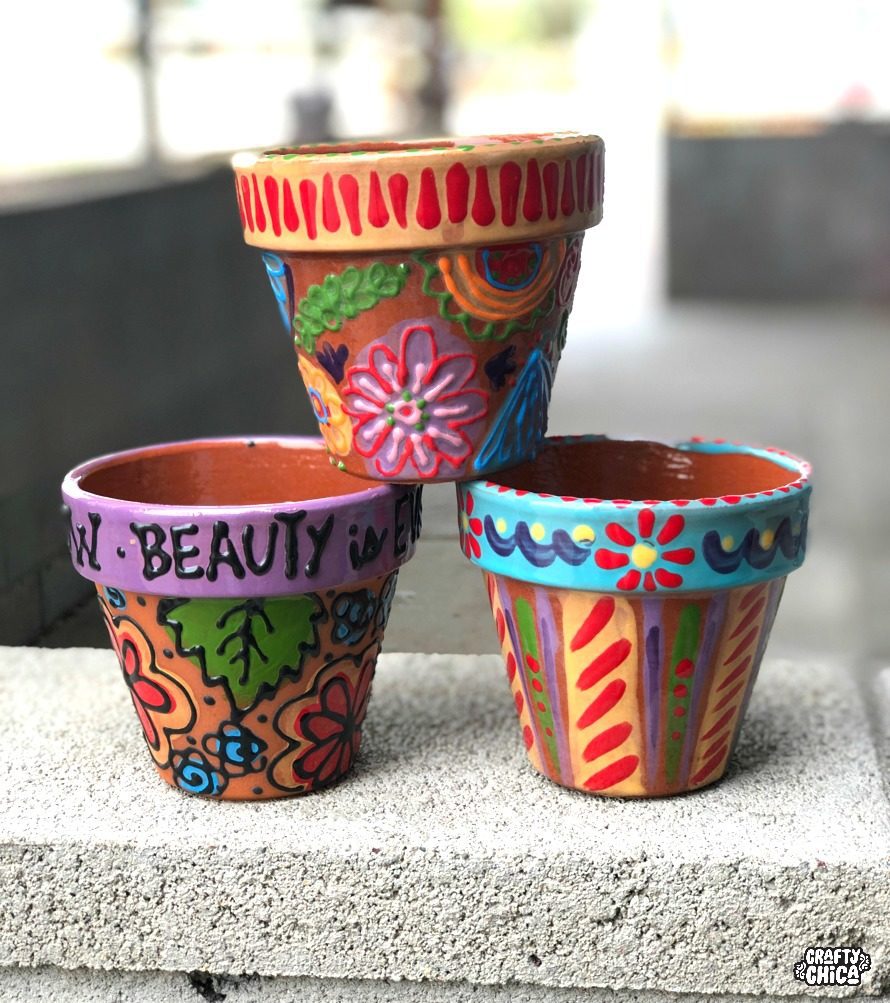
Note from Kathy: I tried it: How to Fire Terra Cotta Pots in a Kiln
A lot of people look at sites like Craig’s List for used kilns to purchase. What are the main things people should consider before doing this?
There are some great deals to be had out there, and we always like to see our kilns go to another studio where they get a 2nd (or 3rd or 4th) life. However, there are a few things to be aware of when buying a used kiln:
- Of course, check the bricks, see if they are supporting the elements correctly, we don’t like to see elements drooping out of an element groove.
- Elements have a life, they can last quite a long time if they only fire to bisque temperatures, but if you go higher, say Cone 5-6 and above their life is greatly reduced. You might ask how many high range firings the elements have on them. But plan for a replacement set of elements, as most used kilns out there need them.
- The small modules that turn power to the elements on and off in a digital (controller) kiln are called relays. Like elements, relays have a life. They are replaceable, and you may want to plan on a new set of them if you buy a used kiln.
- The temperature sensor in the kiln is called a thermocouple. They do decalibrate over time, and like elements, the life of a thermocouple is reduced faster the hotter you fire. Good news on this one, replacement thermocouples are about $16 each.
- Lastly, check the Voltage and Phase of the kiln to ensure it matches your power supply. Nine out of ten times, residential power supply will be 240 volts, single phase. Voltage in the U.S. is either 208 volts or 240 volts. There is no such thing as 220 volts. If the electrical specs do not match your power supply, you’ll want to look into the cost to convert the voltage and/or phase.
Why is it important to always have a kiln wash coating on kiln shelves?
The main purpose of putting kiln wash on a shelf is to keep any glaze drips from sticking to the shelf. So, if your glazes don’t run and drip, you don’t really have to use kiln wash. But, to be safe, I’d always coat the top side of each shelf, leaving a small area around the edge of the shelf bare where you grab it.
Yay! These answers are so helpful. And in case you need more help, here is a video with more best practice tips from Skutt!

Looking for more inspiration?
My friend Ammie Williams from All Fired Up Pottery! She always shares ideas for painting cool designs and lettering. And her stories are super fun to watch!
And another is my friend Nirvana of Nirvana Ceramics! She does all kinds of cool painting, clay work and more!
Well, what do you think, has this been helpful? Let me know in the comments! Now I’m itching to get back in the studio for more ceramics!
Thank you so much to Jim Skutt for this awesome interview!


My Skutt kiln is set to arrive this week and I am so excited. Thanks for the great info and I agree the people at Skutt are so helpful and love what they do. I have called them a million times when I was building my kiln shed.
You’re mugs are amazing by the way!
Stephanie
Hi Stephanie! So excited for you, yes, Skutt is wonderful, great team. They are always there to help!
Hello Crafty Chica, I’m new to pottery and am just reading your adorable article on your “first kiln” fromn 2014, What exact model and number of Skutt kiln did you buy for your first kiln? Thank you so much! I cant wait to get one!