
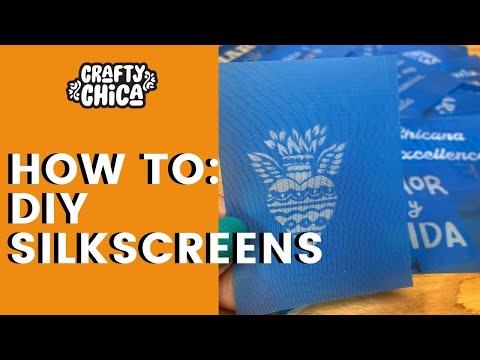
I’m excited to finally post my Ikon Art Stencil Maker review – a.k.a. DIY silkscreens! I first saw this Ikon Art system at the 2019 Creativation trade show and was blown away by how easy it looked to make your own silkscreens (they call them “smart screen stencils”). But at almost $200, I waited a few months to see how the product rolled out and the feedback.
Well, I bought the whole system. I watched a lady on YouTube do a Live where she went through the entire process and knew I could handle it! That was last year and I made one test sheet of designs for my ceramic mugs.
I’m STILL using those DIY silkscreens to this day, that’s how long they have lasted!
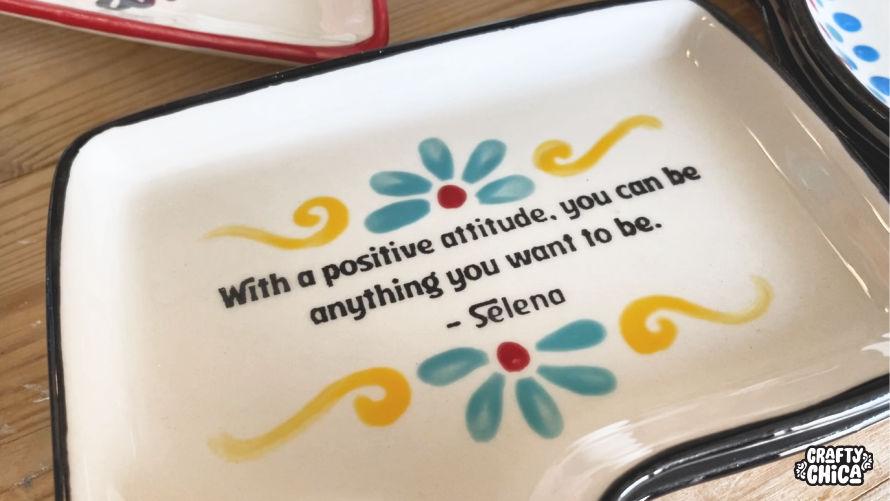
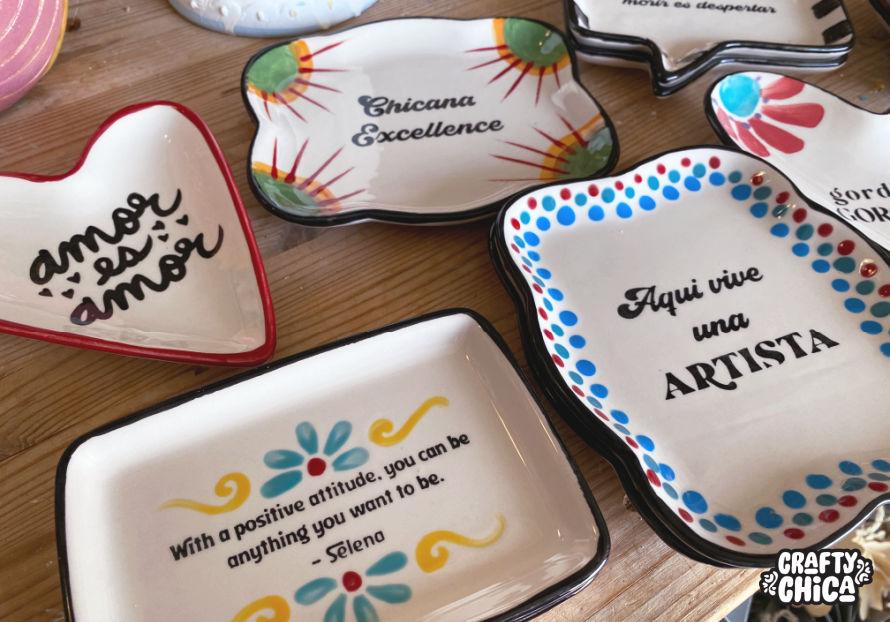
Now with our Mucho Mas retail store reopening and expanding on Oct 2nd, I bought a new package of emulsion sheets and Inkjet printer sheets (you’ll how these work in my tutorial below). I burned four sheets and cut up the designs and used them to make some exclusive Crafty Chica ring dishes that I’m going to sell in my online store and at Mucho Mas!
I noticed Ikon Art also has a new T-shirt system, so um, I bought that too. Look for another tutorial soon!
OVERVIEW:
This at-home silkscreen and screenprinting product is the best I’ve experienced to date. You guys who have followed me for a while know I’ve tried both the Yudu and the Screen It in the past and both of those have been discontinued. This is sooo frustrating because, without the tools and supplies, the bulky machines are useless.
I honestly feel this machine can last for the long haul, all you need are the emulsion sheets, the rest is stuff we have on hand or can be purchased online. But I am really impressed at all the accessories Ikon Art offers – they really considered the user’s needs. Especially those of us who plan to make batch screenprinting products!
Supplies for DIY Silkscreens using the Ikon Art Custom Stencil Maker

NOTE: This is not a sponsored post but I did sign up for the affiliate program since I bought the machine. You can use the promo code CRAFTYCHICA to receive a 15% discount on your purchase.
Designs of your choice
Substrate to use your designs
Craft paint
Another note: I used these diy silkscreens for my ceramics which is a process in itself, but for the everyday user, you can use craft paint, chalk paint, fabric paint, silkscreen paint, etc.
Make your design.
Create a design either hand-drawn or digital. No shading, no super fine lines. I found the thicker the lines, the better. Not too small either.
You can even use phrases and make them in Canva or PicMonkey. BE ORIGINAL. What will make your work special is if you come up with something new that reflects your personality! You can do family names, family quotes, etc. I spent time brainstorming on the designs I created and plan to use them to create a line of Crafty Chica merchandise. It was hard and time-consuming, but worth it!
Make sure the designs are at the blackest level, this will help you achieve a crisp burn on the screen.
Use PicMonkey or Canva to layout your designs on an 8-12×11” template. Leave enough room between each design so you don’t have overbleed when you apply your paint later on in the process.
Print your design.
The kit comes with a package of printing film for both Inkjet and laser printers. I used Inkjet. Remove one sheet, make sure there are not two stuck together, and feel for the duller side. That is the side to print on. I have an HP printer, so it faced it, dull side down for printing.

CAUTION: I ruined a sheet because I inserted the film in the printer white printer paper underneath and when it fed through, it picked up the printer paper for half of my design. Ack! Next pass, I only added one sheet of the printing film and it worked perfectly.
Print on the best setting.
If you happen to run out of the printing film supplied by Ikon Art, I found a workaround. I had clear transparency sheets and used those and they worked great!
Set up.
Assemble your machine according to the package directions and set in on a flat surface near a three-pronged outlet. It comes with a black board to act as a background, set that on the base of the machine, under the lamp.
Open the package of emulsion sheets and remove one (make sure there are not two stuck together) as well as one of the clear plastic sheets. Seal up the bag because the sheets are photosensitive.
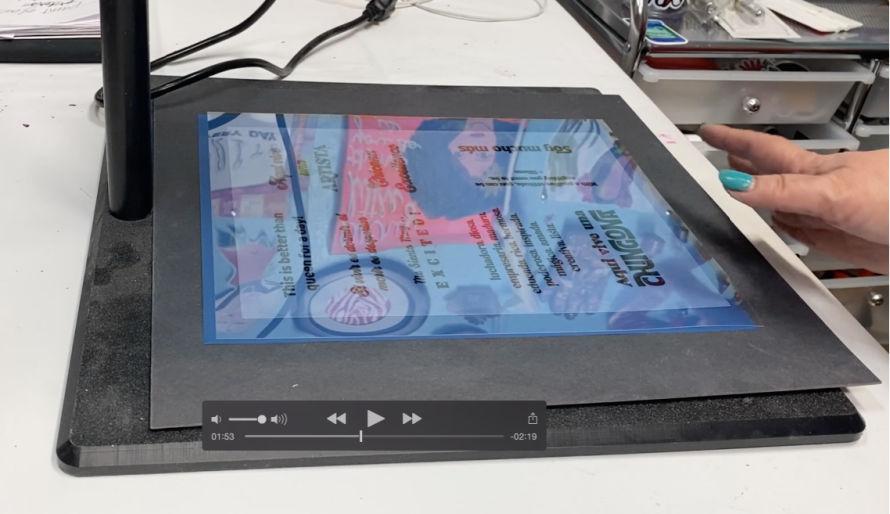
Quickly place the emulsion sheet, shiny side down, on the base, on top of the black board. Now place your printed design sheet on top of the emulsion sheet, right side up so you read your designs (not backward). Place the larger plastic sheet on top of that. Make sure it’s all centered.
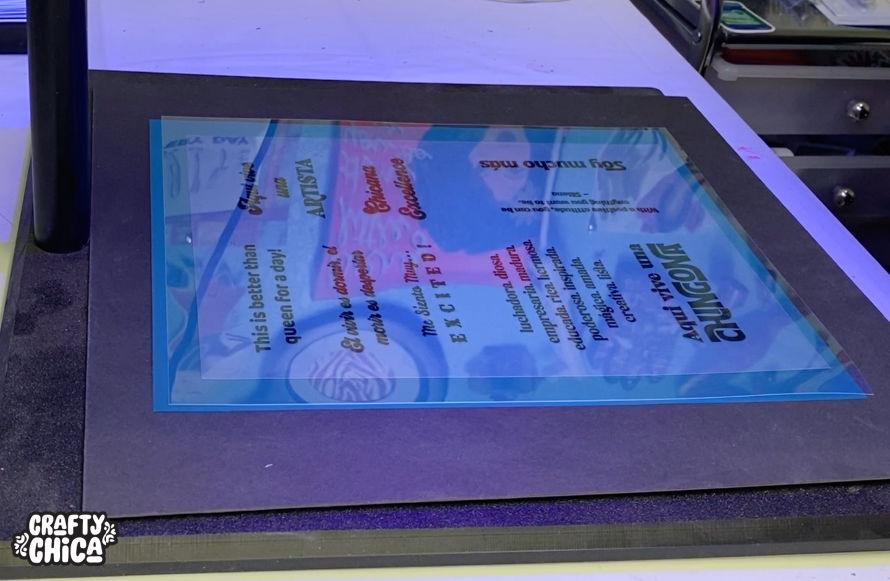
Plug in the machine and as soon as the light turns on, set your timer for 35 seconds. When it’s done, remove the emulsion sheet and place it on the clipboard that comes with the kit.
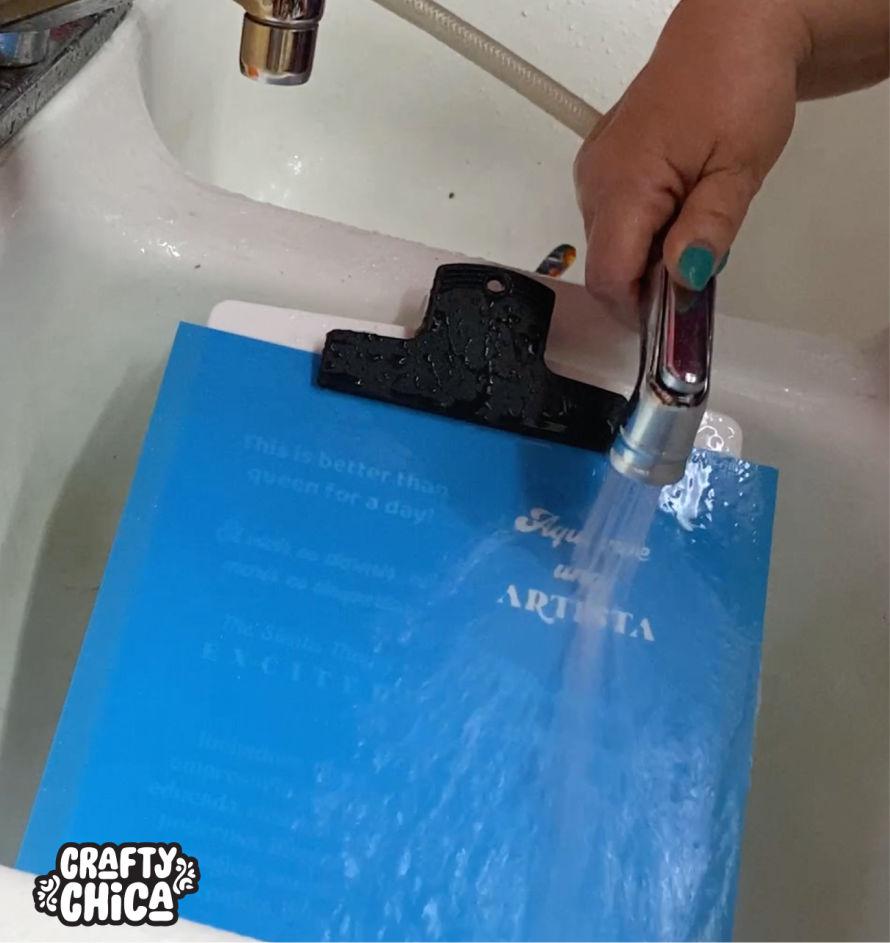
Got to the sink and using a sprayer, spray the screen until your designs show through crisp and white. This process took me about 10 minutes. It might take longer if you have a low-pressure sprayer.
Once you can see all your designs, hang or set out the sheet to dry.
Time to print!
After your silkscreen is dry, you can cut it up or leave it whole, whichever you prefer.
Use a permanent marker to write “back” on the back of the silkscreen, you’ll see why it a bit!
Have water nearby for rinsing.
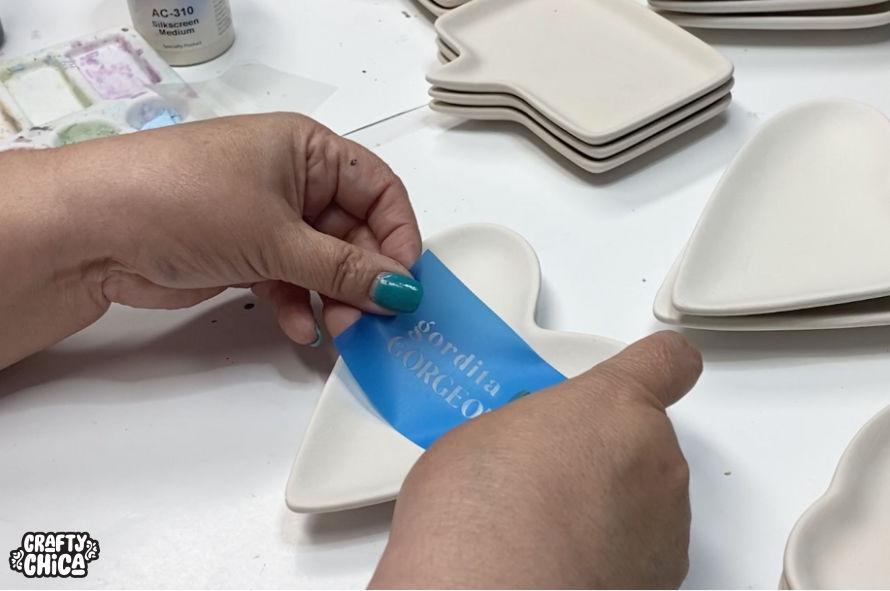
Choose your substrate, then take your silkscreen and remove the plastic backing, keep it nearby. The back of the silkscreen is sticky, which is genius because that means it won’t slide around! Place it where you want it.
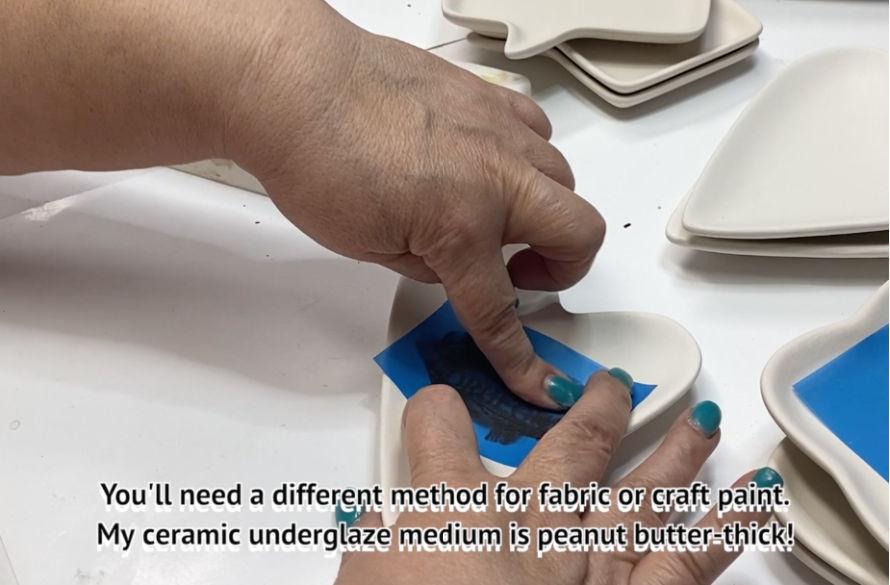
Choose your paint and apply a line at the top of the stencil, then use the scraper to drag the paint across the burned design. Make sure you do this evenly, you can even do a second pass.
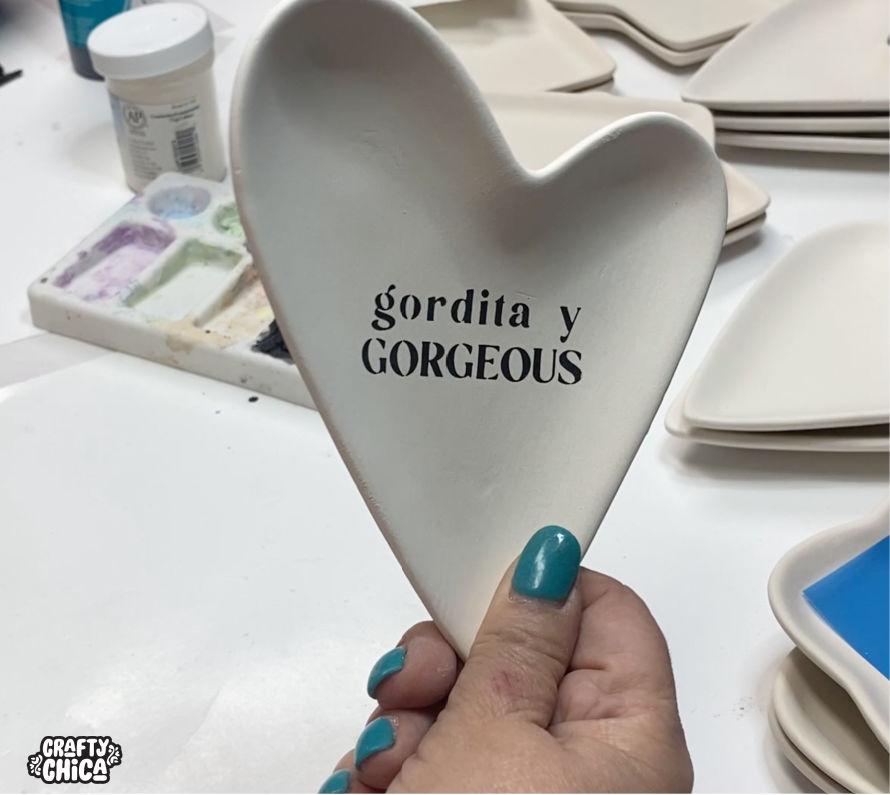
Carefully peel away the silkscreen to reveal the print!
You can reuse about 2-3 more times, then rinse the paint off your DIY silkscreens. DO NOT let it dry because it will close up the holes on the screen, so make sure to rinse asap!
Replace your silkscreen to the backing, let dry before using again.
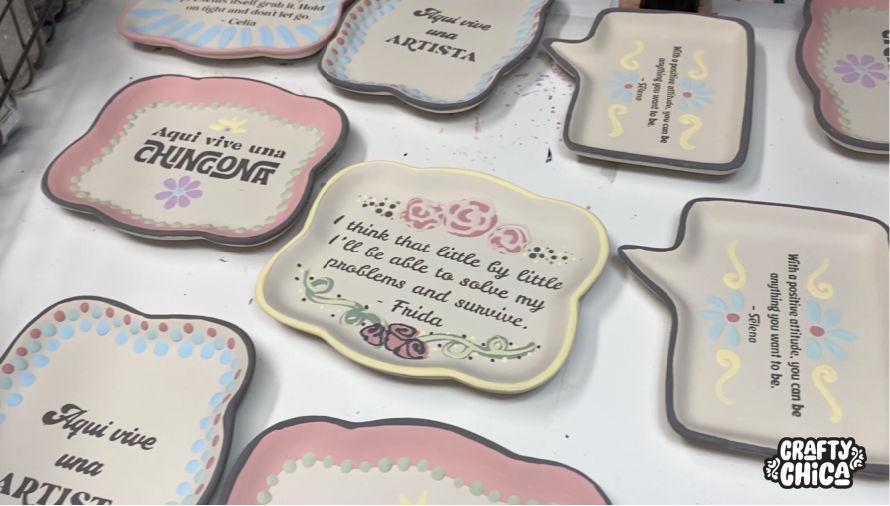
And that’s it! What do you think of this screenprinting process? I’m soooo excited to do more with the Ikon Art system. I love that I can use these to make batches of mugs, plates, ornaments and more!


Thank you!!! I met you at Creativation 2020 and I was so happy to come across your explanation! It was incredibly helpful.
Thank you, Karen!!
Very nice review. Is the light a basic led black light?
I believe it is!