I’ve been wanting to make ceramic portraits since before the pandemic. When we all had that time at home, I worked on them little by little in between making mugs. Well, recently I cleaned out my studio and came across these half-finished pieces. Before I buy any new supplies, I’m completing them!
Thank god they didn’t break! I loved them so much, I even made a couple new ones recently. So I thought I’d share the process with you!
First, I gotta say, I totally winged this project. If you search online, you can find a lot more polished versions and techniques. The way I work is going with the flow. An idea will pop in my head and I absolutely have to carry it out right then and there. Even if the process is wonky – at least I’m learning along the way!
You have a choice of any kind of clay – I used clay to be fired in a kiln, but you can also use air-dry clay, polymer clay or whatever else you find!
Start with a sketch.
Use a piece of printer paper and a pencil to loosely sketch out your face and upper body. Cut it out with scissors and measure it. This will give you a good indication of how big of a slab of clay you need.
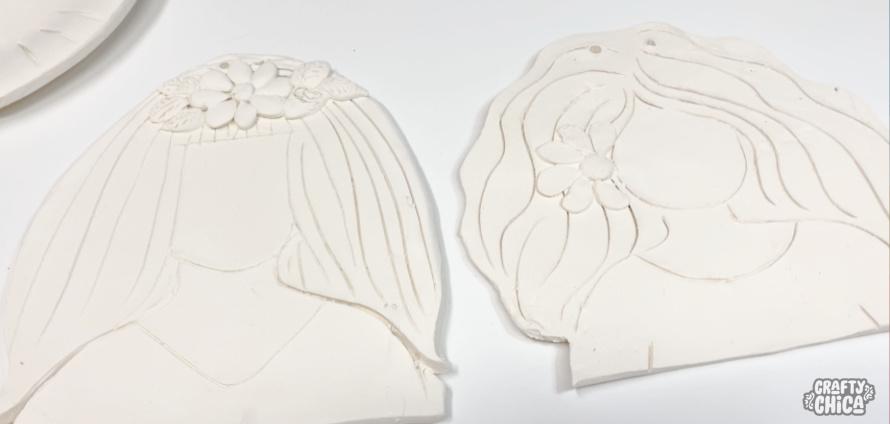
Cut out the shape of your template.
Supplies for your DIY ceramic portrait
Clay
Rolling pin
2 flat measuring sticks
Scraper tool
paper or cloth to work on
Craft knife
Awl or sharp pencil
Paints or glazes
Brush
Cut the clay.
Line your work area with paper or canvas or even cloth. I like using unprimed canvas.
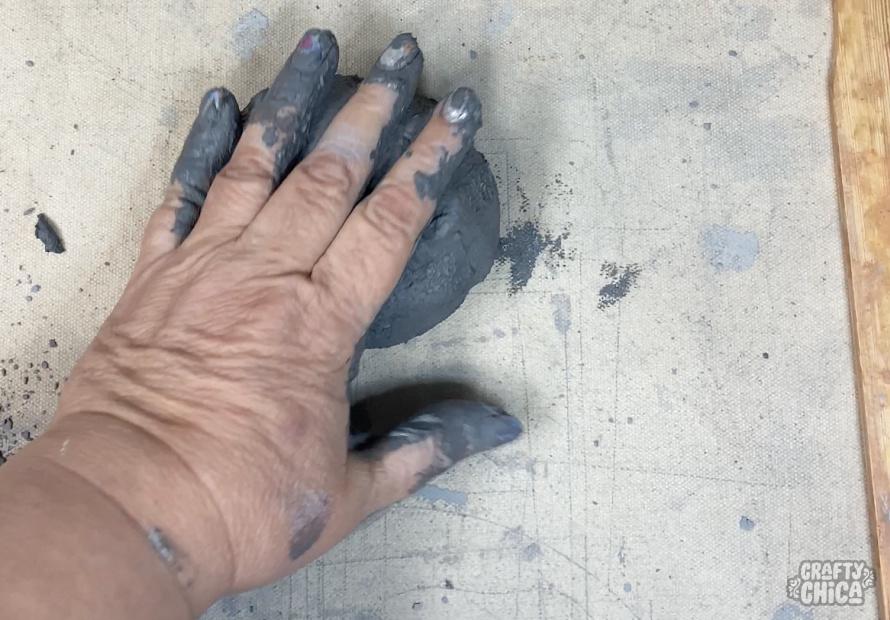
With the size of sketch I had, I used a softball-sized piece of clay. Roll it in your hands until it’s a nice consistency that is not too sticky. If it feels a little dry, add a bit of water to moisten it up.
Place the measuring sticks on each side of the canvas. I use these because they are the perfect thickness!
Set your ball of clay in the center and use the rolling pin to flatten it out. Flip it over and keep rolling until your rolling pin is level with the measuring stick and the clay won’t go any thinner.
Place your template on top of the clay, hopefully you rolled out a piece big enough!
Use your craft knife to cut out around the template. Add two little holes at the top to hang with wire after they are finished.
Place the extra clay back in the bag or covered bin so it won’t dry out.
Draw the face and features.
This is the tricky part, but you can do it! I decided not to “build” a face with more clay and worked kinda fast and used my awl to “draw” the features into the clay. Definately practice on paper first. The only way to learn is to go for it! You can even leave it all blank and paint on the face.
I drew the face shape and the hair and on some of them, I added flowers as well. It’s really about whatever you are comfortable with.
Let the clay air dry, cover it loosely with plastic so it doesn’t curl.
I fired these to cone 04 to turn them from greenware to bisque. If you use air-dry clay, you can skip this step.
Next, add your paint or underglazes!
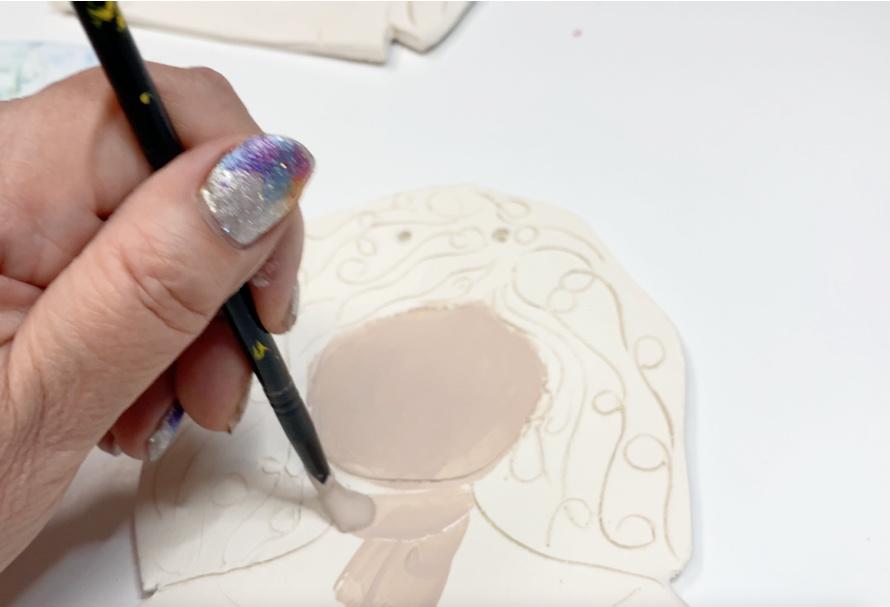
I used three coats of Mayco Stroke n Coat for all the color. At this stage you can use craft paints. Same with air-dry clay. Once they are all finished, fire at cone 06.
TIP: For facial features, water down the underglaze to an inky consistency, then use a very fine tip liner brush.

Add whatever other embellishments you want!
I had a bunch of little ceramic banners and used them to hand letter a word for each girl. This was one of my favorite parts. It allowed each personality speak to me and matched a word to fit. Thread wire through the holes at the top to hang. Don’t forget to sign the backs and add a little story about the ceramic portrait you just made!
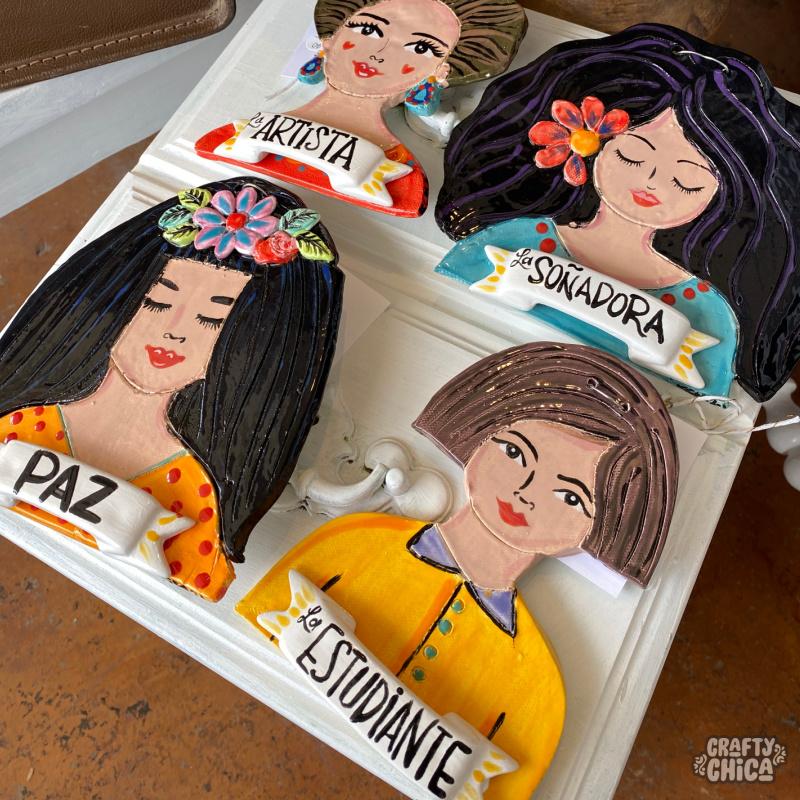
And guess what? I have them listed in my store to buy!