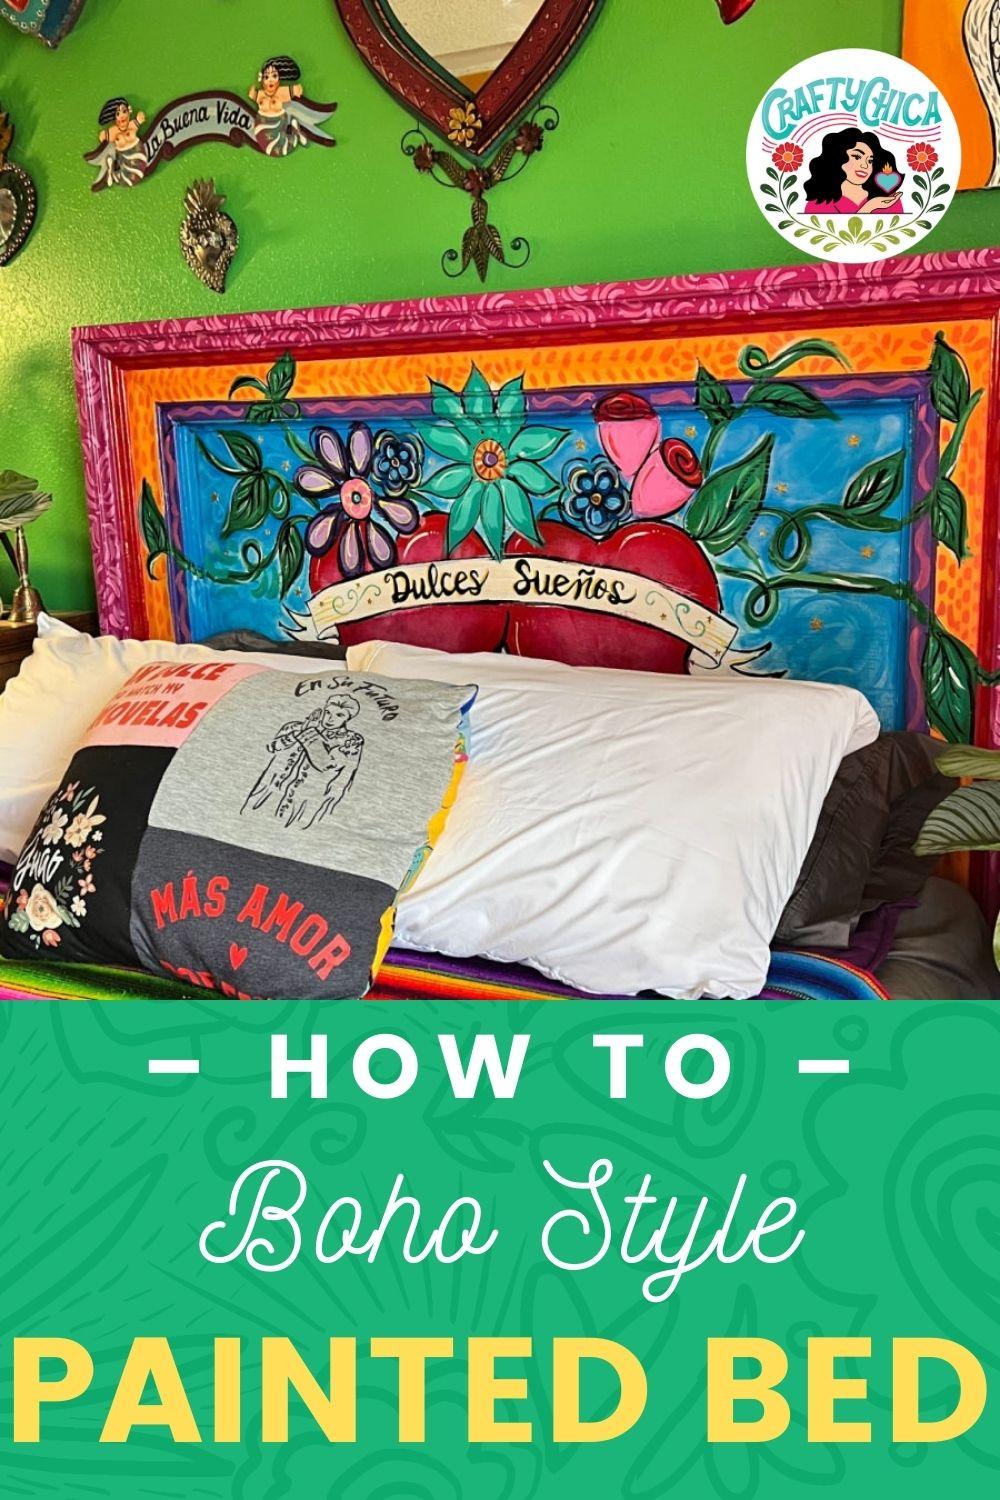
This DIY painted wood headboard is inspired by my Instagram feed. I follow a lot of boho-inspired home decor accounts and decided to stop scrolling and put my ideas into action.
I did my homework and researched to find a brand new bed, solid enough to last for years and smooth enough to withstand a mega painting session.
Here’s a video of my process of my DIY painted wood headboard!

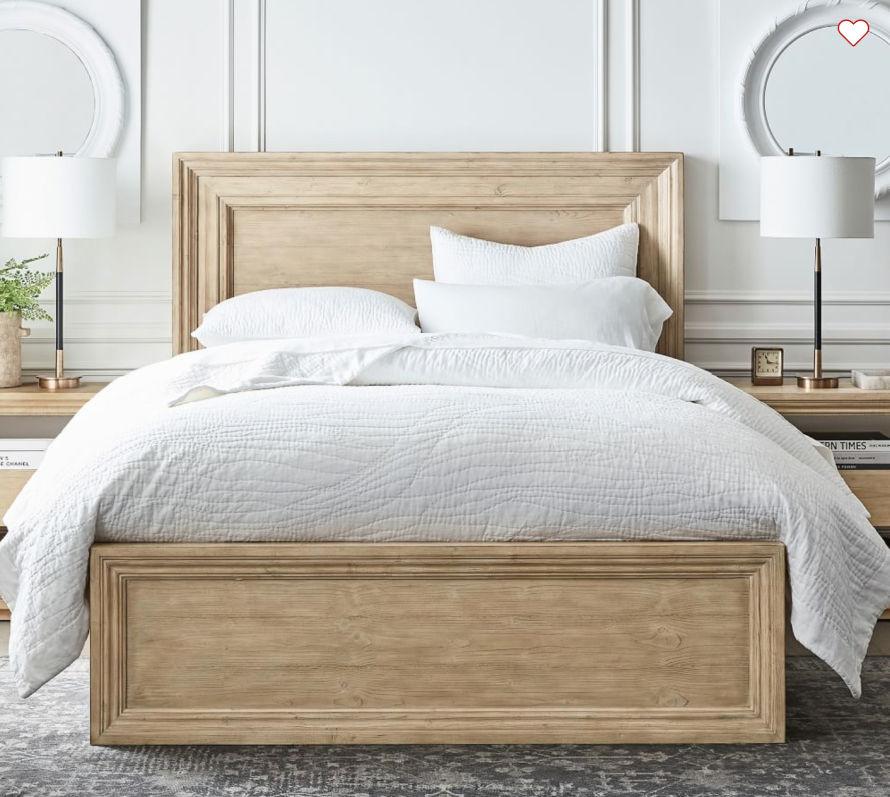
For starters – I needed a bed.
After hunting practically everywhere online, I ended up purchasing this baby from Pottery Barn.
It was a little pricier than I planned but I knew it would be a great investment for a long term furniture piece.
When it arrived we unpacked it and yup – it is very solid in structure!
And the best part? I LOVED the headboard1
Getting starting for the DIY painted wood headboard
Paint the headboard before you assemble the bed. It will be much easier this way!
Related home decor idea: Washing machine drum for fire pit
Here are the supplies we used:
- Fine grit sandpaper
- Semi-gloss house paint for the base colors (you can use craft paints, we had quarts leftover from this project)
- Assorted brushes
- Water and paper towels, drop cloth
- Water-based brush varnish, such as.Mod Podge
- Painter’s tape
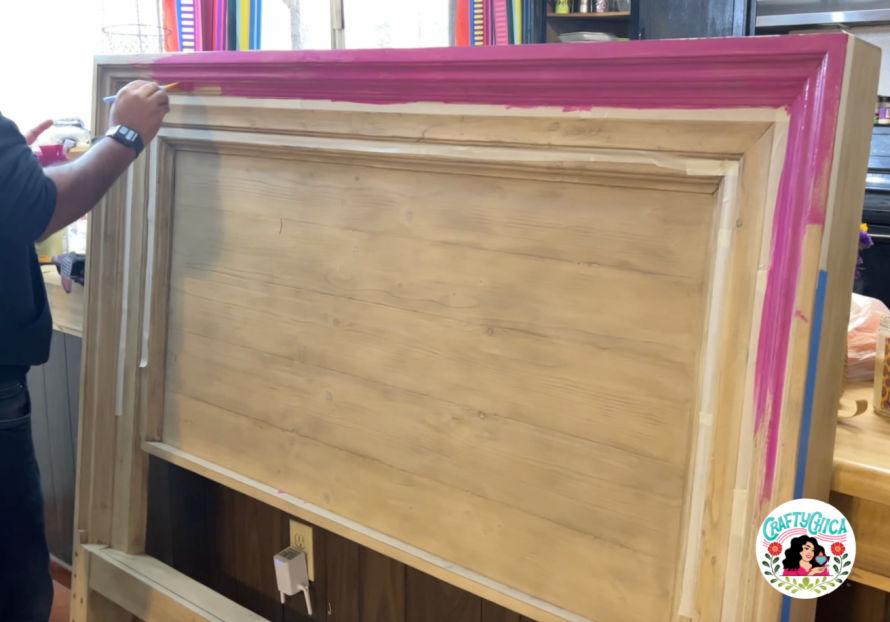
Prep work for a painted headboard
Lightly sand the areas you plan to paint.
All wood furniture comes with a light varnish, by sanding it will help your paint grip to the wood.
Tape off the edges to prevent overage.
Use the dropcloth to cover the floor, trust me, paint will drip and splatter!
Let’s paint!
To make things easier, sketch out your design on paper first.
Use color swatches to make sure you like the combo, because once that bed is put to use, chances are you won’t want to rework any details.
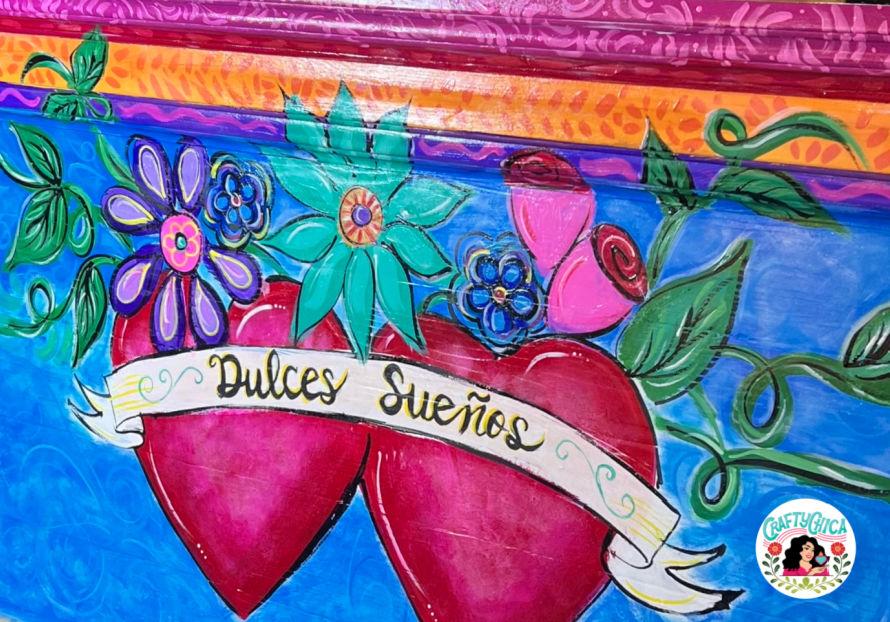
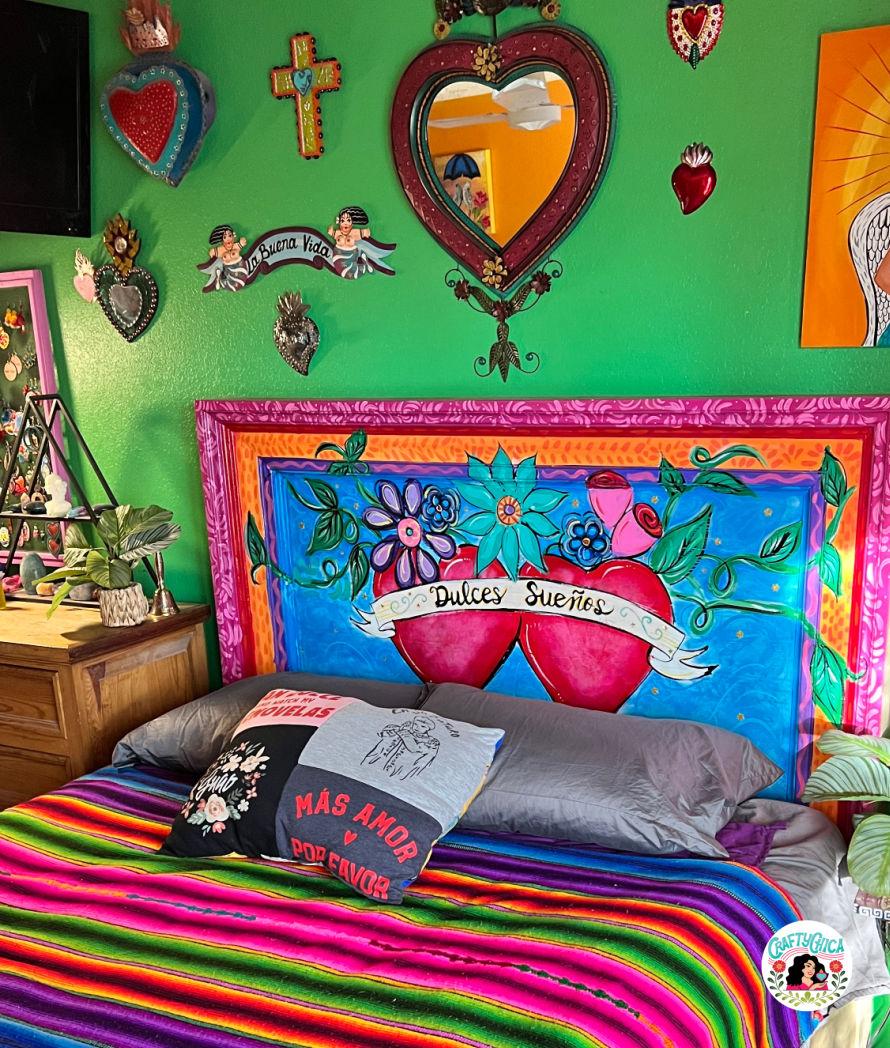
I went with hot pink, red, orange and blue.
I wanted to have a dreamy boho vibe…I painted two hearts to represent eternal companionship (Patrick and I have been married for almost 32 years, we want to continue that, lol!), topped with colorful flowers.
But for this stage, it’s all about the base!
One coat with give you a sheer look where you can still see the wood. It looked kinda cool, but I wanted solid coverage.
Three coats worked perfectly.
Let the base coats dry until you can’t see any shininess!
Add the draft of the design
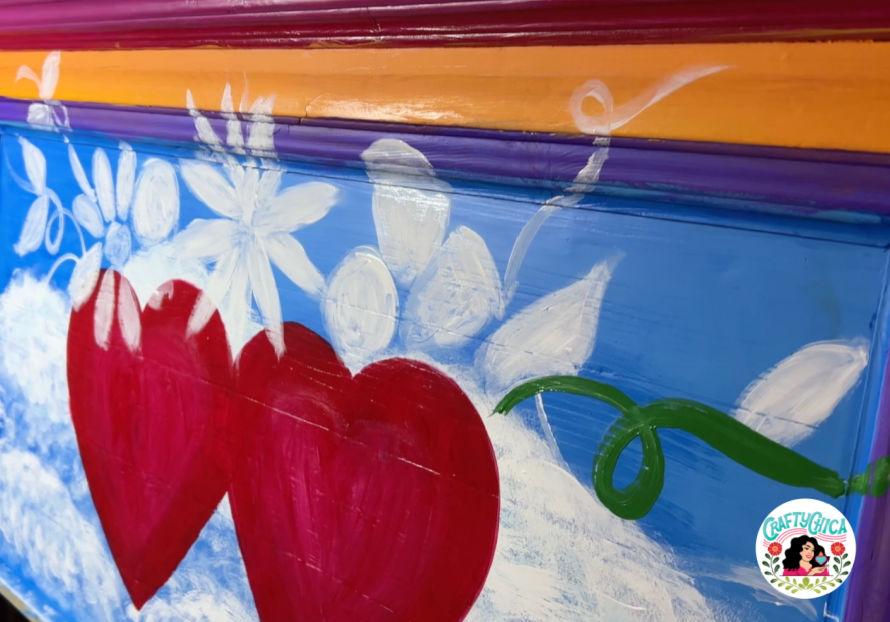 I love bright colors, so I painted a layer of white of my design.
Let dry and add the color you want. This serves as a nice foundation for the colors to shine to their full potential.
Some areas needed two coats.
This part of the process took the longest.
I had Celebrity Big Brother 3 playing in the background (Todrick, how could you???) and by the time I finished, so was the season.
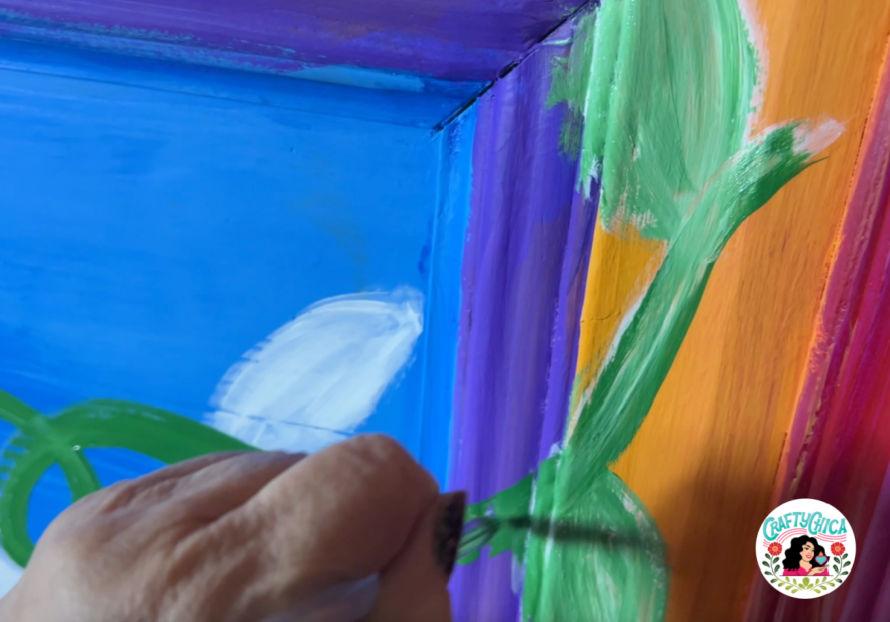
Once all the accent colors dried, I added shading and outlines.
I let it all dry again and then added two coats of shiny Mod Podge (let dry between each coat).
The next day, about 24 hours later, we assembled the bed.
It felt soo magical and happy!
Tips for your DIY painted wood headboard:
I used a wet sponge lightly dipped in paint to achieve a faux finish for the clouds.
Use a skinny liner brush for smaller details.
I added little gold stars!
To add glitter, mix ultrafine glitter in with the varnish and brush on.
Make sure to work in a well ventilated area, even if your material are non-toxic, they still have an odor.
Definitely let your bed air out after varnishing for at least 24 hours.
You don’t want to smell anything weird while you are trying to sleep.
While your bed is drying, add other art to your wall and nightstands, give your whole room a quick refresh to match your new bed!
Rather than buy a new bed, use what you have or look at a thrift store. Think creative!
If you don’t want to freehand, use stencils, a projector so you can sketch your design, or even decoupage!
Here are some other ideas for your bedroom:
DIY Mexican-Embroidery Mural!
DIY Tie Dye Heart Pillowcases – Rainbow Style!
Decoupage Tissue Paper Frames
Create your own DIY cozy corner
Washing machine drum for fire pit
Thanks for reading through this! By the way, if you love boho-style check out these new purses from India I stocked in my online shop! They are gorgeous!