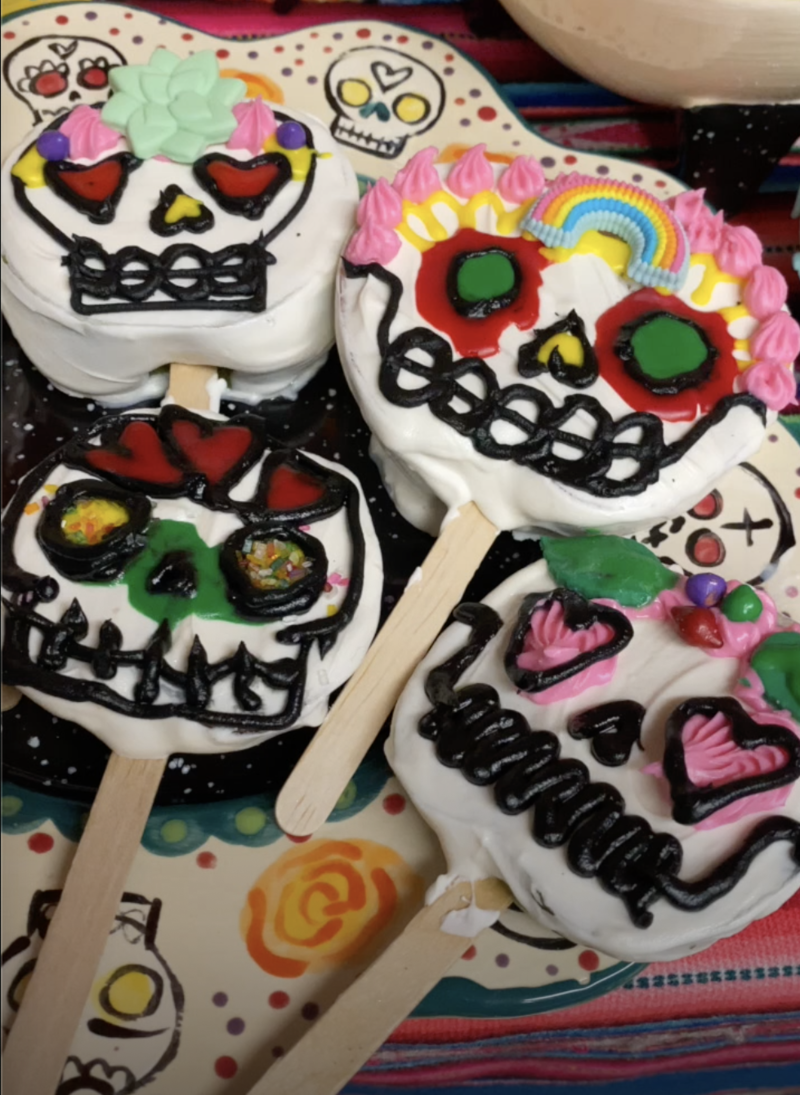
These sugar skull apple slice pops will be such a hit this season for Dia de Los Muertos!
Here’s how the idea came about – I made my ofrenda but wanted to add a takeaway element, something sweet for people to enjoy. These sugar skull caramel apples were so popular, I decided to add a twist.
The twist? Slicing up the apple! Think about it, it’s much easier to eat and one apple makes at least three pops. It’s a win for everyone involved!
RELATED: How to make sugar skulls with royal icing
Let’s just jump into making these, time is clicking by!
Supplies for Sugar Skull Apple Pops
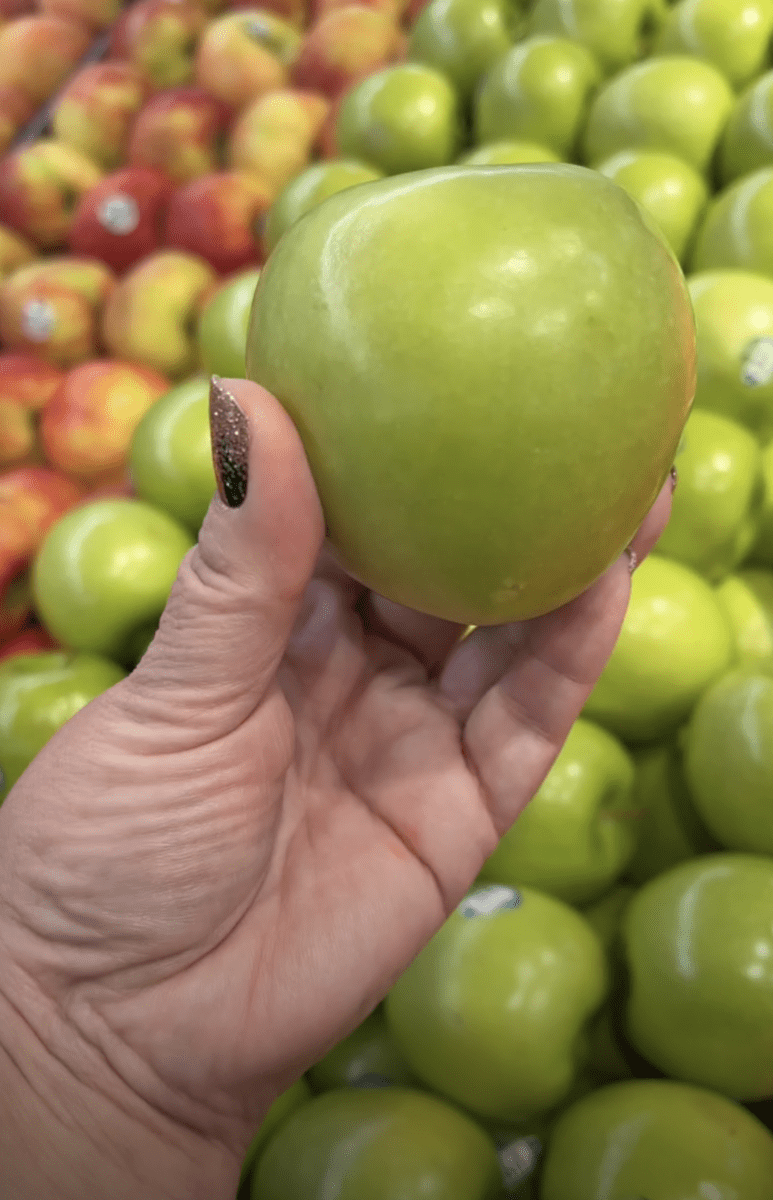
Visit your local grocery store for the apples. There are several varieties to choose from, but I found the grannysmith apples to be the easiest to work with.
One apples makes about three pops. But you can also use the ends for smaller pops. They are a bit more challenging to decorate though.
You’ll also need:
Popsicle sticks (I prefer these over lollipop sticks, more sturdy!)
Tray lined with wax paper
White melting candy
Candy melter (or you can follow directions on package for microwave melting)
Cookie icing – NOT frosting. The cookie icing dries hard and slick. You could also use royal icing.
Cake candy embellishments
Directions for the sugar skull apple slice pops
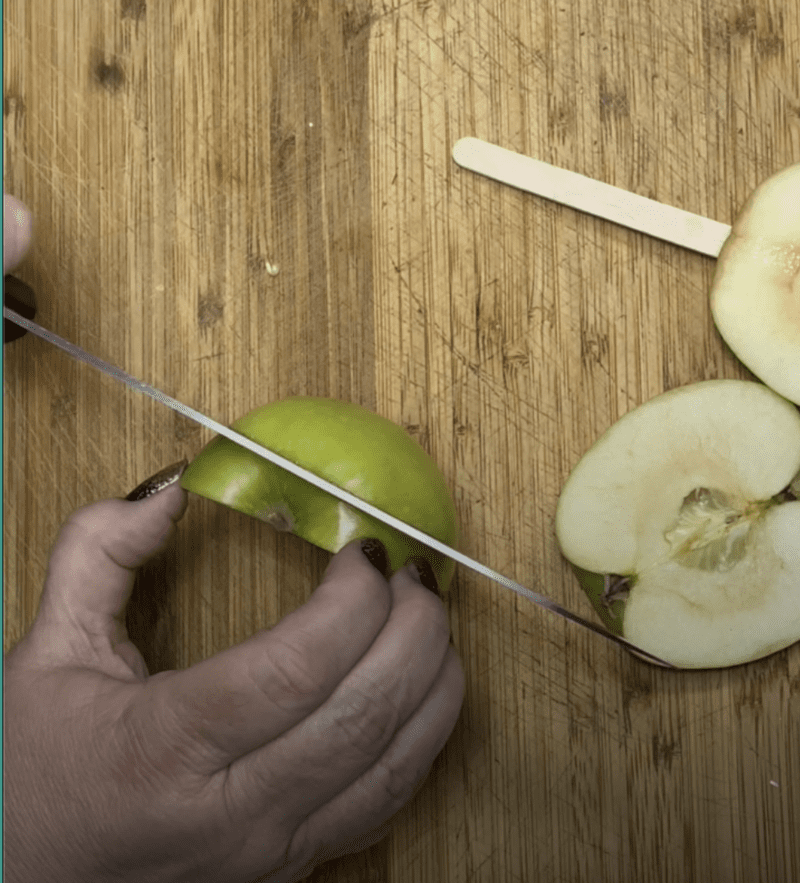
Wash the apples and be very careful and slice them. Keep the slices thick enough to insert the stick.
Cut up more slices than you’ll need because sometimes inserting the stick can be a bit tricky. you can use the excess slices for apple turnovers or even applesauce!
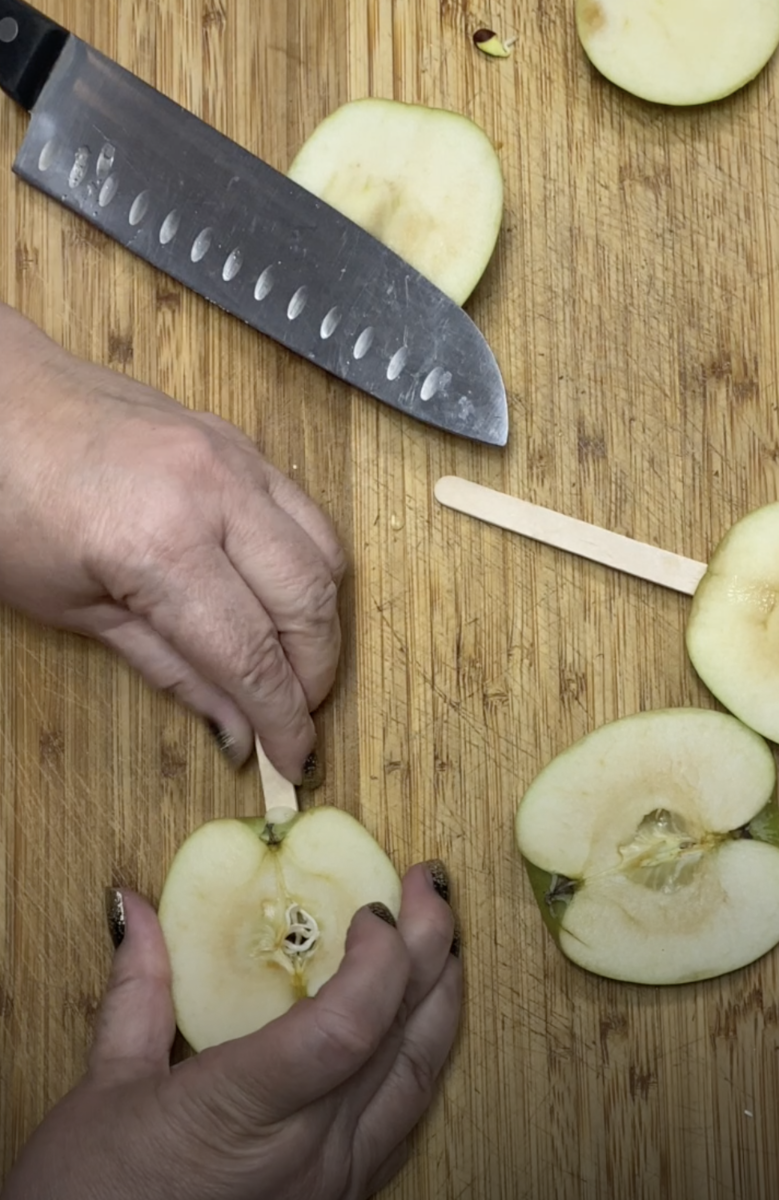
Carefully insert the stick into each slice. Make sure it doesn’t op out on the other side, otherwise it will make your apple slice pop weak.
Time to dip the apples!
There are several ways to melt the white chocolate. I have a candy melter pot that I love, but if you want to do it in the microwave, that works too!
Candy melter method: Plug in the melter and add the silicone pot. Add one bag of the candy melts and turn it on low. Stir until smooth and melted. If you want it to melt faster, switch to high.
Microwave method: Pour the candy melts in a microwave-safe bowl. Heat on high for 15-second intervals and stir in between each time. Keep going until the candy melts are smooth.
Once your melts are ready for dipping, carefully dip the slide, you can use a spoon to cover the hard to reach places.
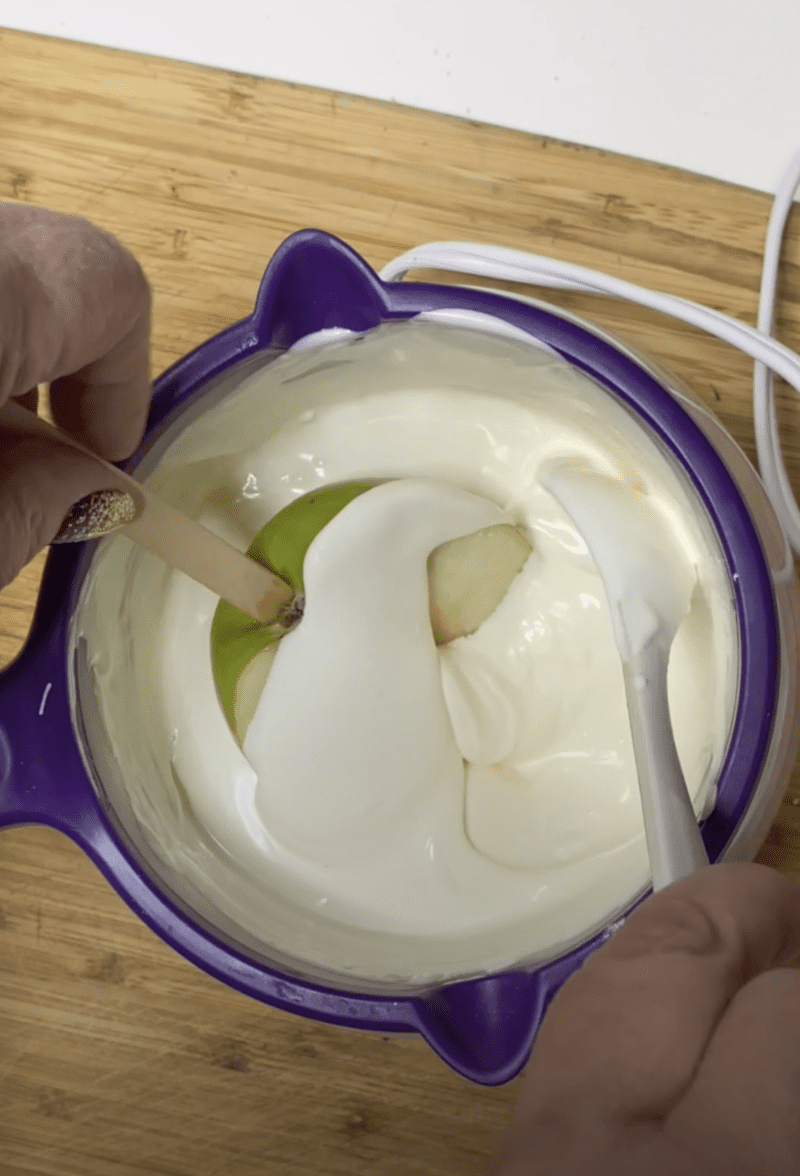
When all your apples are covered, place them on a wax paper-lined tray to coll and harden. In a hurry? Pop them int he fridge.
While they are cooling, prep your cookie icing. I bought all my supplies at the grocery store, including the icing. I found the cake icing doesn’t harden as well as the cookie icing. They sell tubes where you can use different tips to change the look.
Note: The cookie icing is definitely thinner than royal icing, so think loose designs! Or if you want, you can use royal icing.
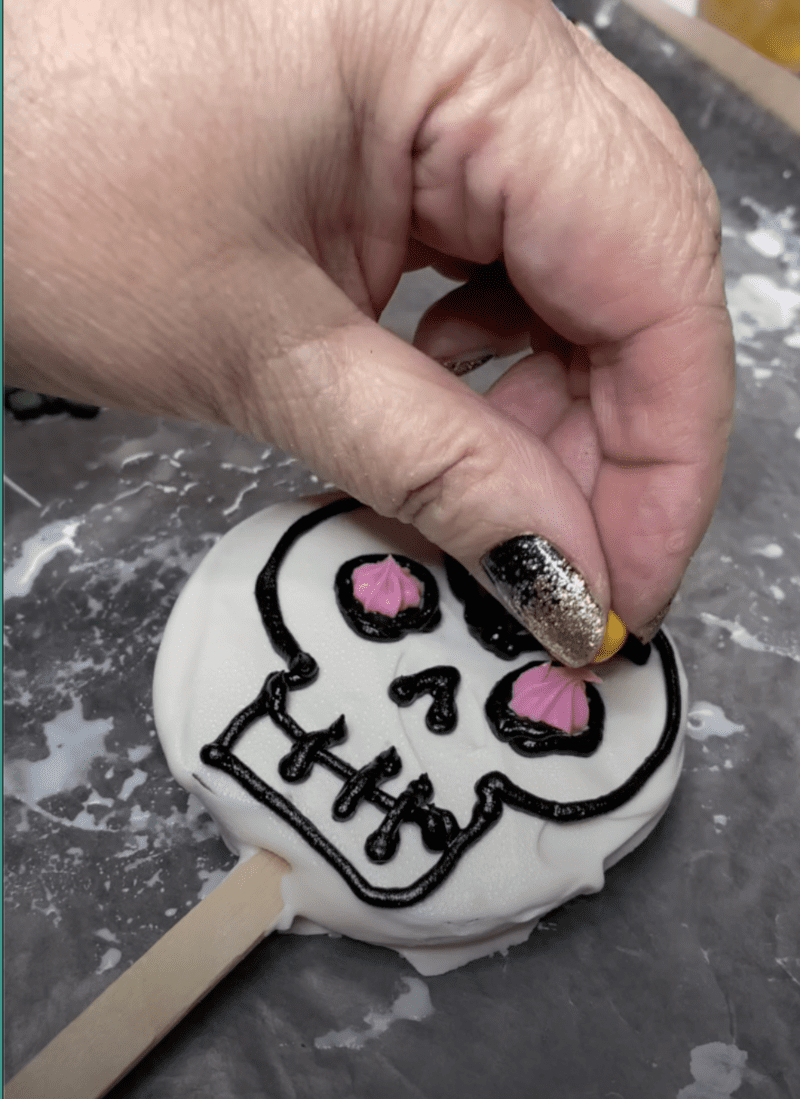
Decorating the sugar skull apple slice pops
Now it’s the super fun part, decorating!
Take your time, there is a bit of a learning curve when it comes to the icing. You can draw your designs on paper first if you think it will help. Or just go for it!
Aside from the icing, you can add small candies or other sugar decorations.
Serving the apple pops
If you are serving these at a party, simple place them on a tray or plate. But if you want them to be taken away, you can put them in a cello bag with a tie. Just let your guests know to eat them within 24 hours, they are freshly sliced apples, after all!
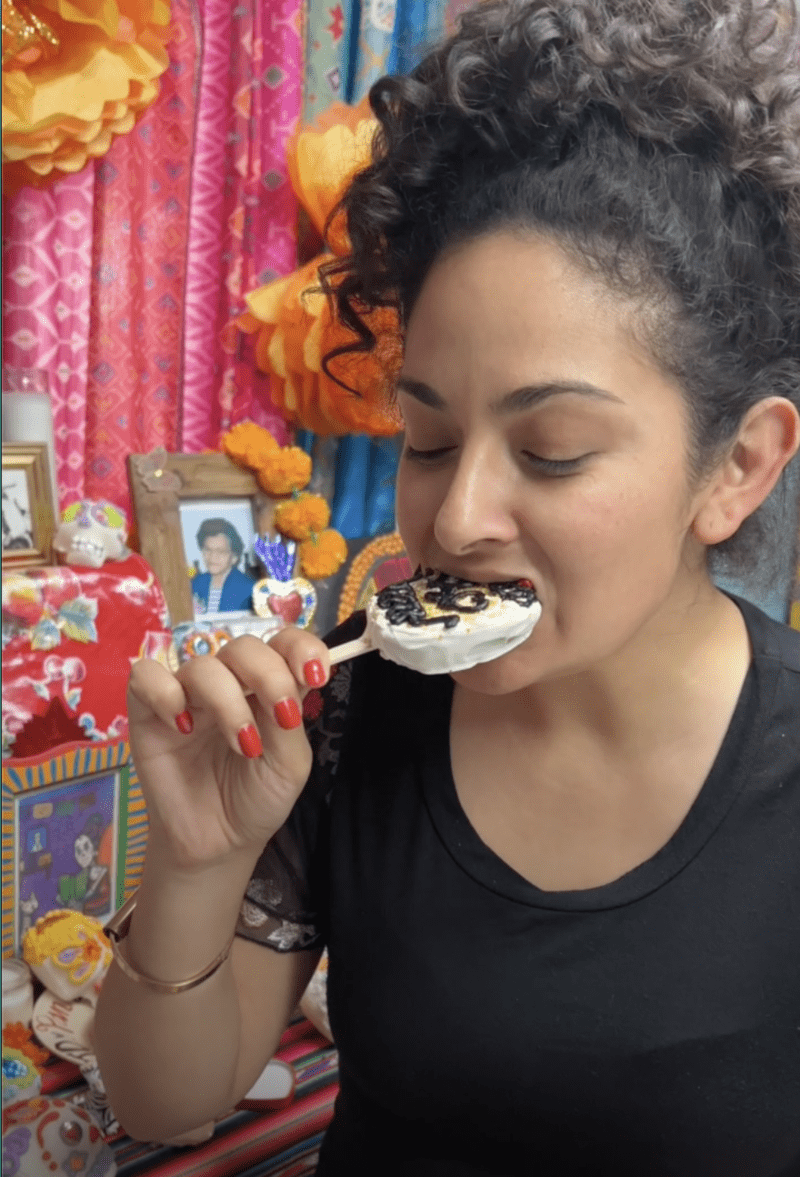
Here is my friend Eli, taking hate first bite. She gave them two thumbs up!

Okay, what do you think? These are so fun to make, nice for a family project or even a friends night of crafting. Edible crafting that is!