Here is a DIY Polymer clay heart rings with image transfer project that adds a twist.

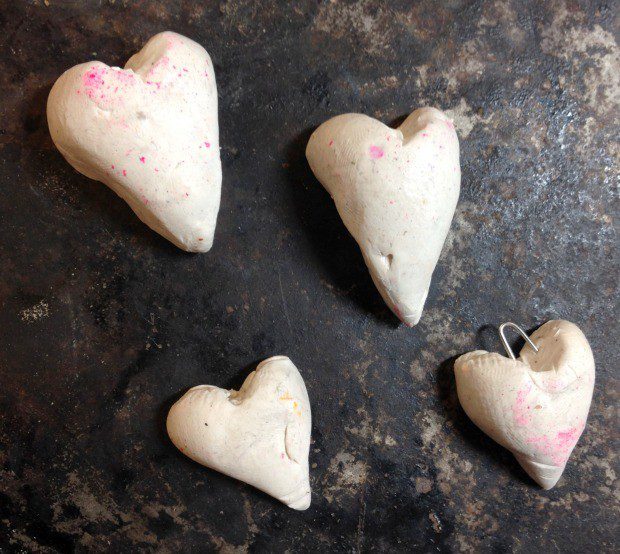
It’s amazing the things you can make with one little ball of polymer clay! My husband makes a lot of clay sculptures and I found a stray ball that was too small for him to use.
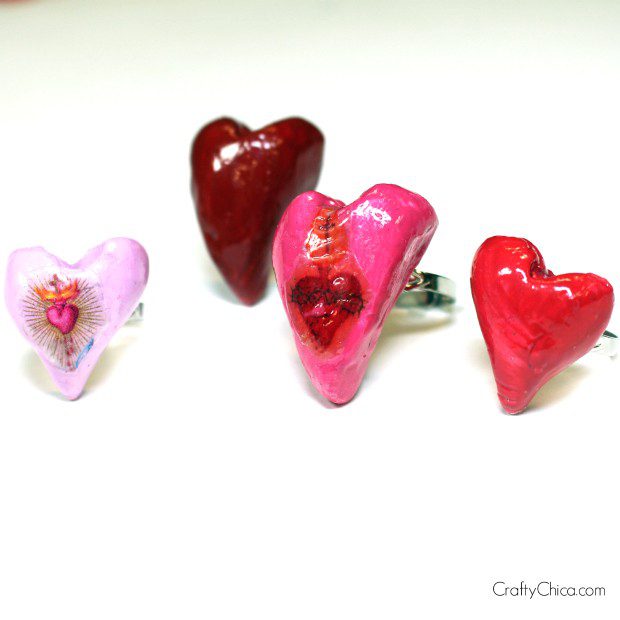
I rescued it and made four juicy heart rings! I then added little pictures, some varnish and wow, what a collection!
Supplies:
Polymer clay
Oven
Water slide decal paper
Craft paint
Gloss brush-on sealer
Directions for DIY Polymer clay heart rings with image transfer
I created four little balls and then formed them into a heart by indenting the top with my fingernail, and making a point at the bottom. I then used a craft knife to cut them in half.
Bake in the oven at 200 for about 15 minutes. Read the polymer clay manufacturer’s directions for exact baking time.
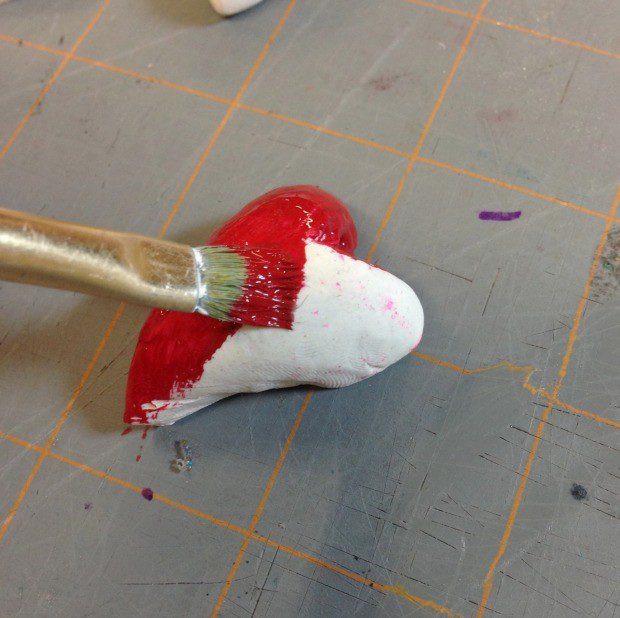
Remove from the oven and let cool, then use acrylic craft paint to coat them.
Add a couple coats to get the brightest color possible!
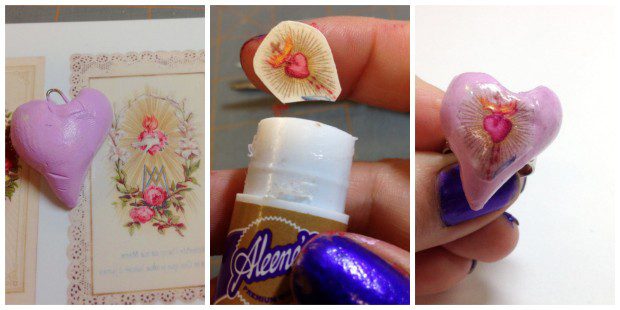
I printed some heart images onto a sheet of decal paper and found one that fit perfectly on my clay heart.
Cut it out and add some Aleene’s Tacky Glue Stick to the front of the image and place it face down on the heart. It’s cool how it just melts into the surface!

Next, add a coat of high-gloss water-based varnish. I used Aleene’s Paper Glaze.
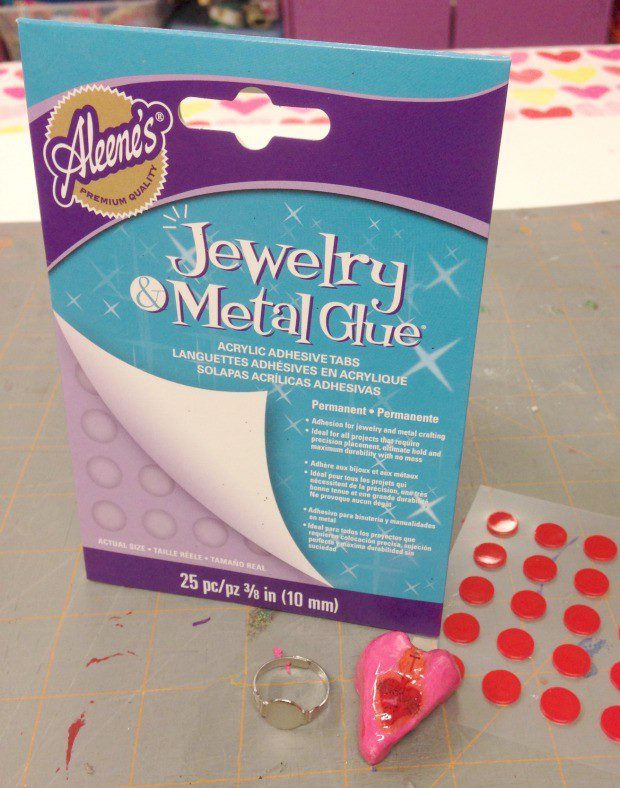
Use extra strength adhesive to connect the ring base to the clay heart. I love these tabs because they are fast to use and hold strong.
We even used them in my shadow box class last week!
Thanks for checking out my post about DIY Polymer clay heart rings with image transfer
Don’t they look yummy? And they only took an evening to make!


Kathy, I so love these! I recently started making pieces of jewelry from polymer clay and I love it. I doubt I will ever be as good as you, but, I love making them.