
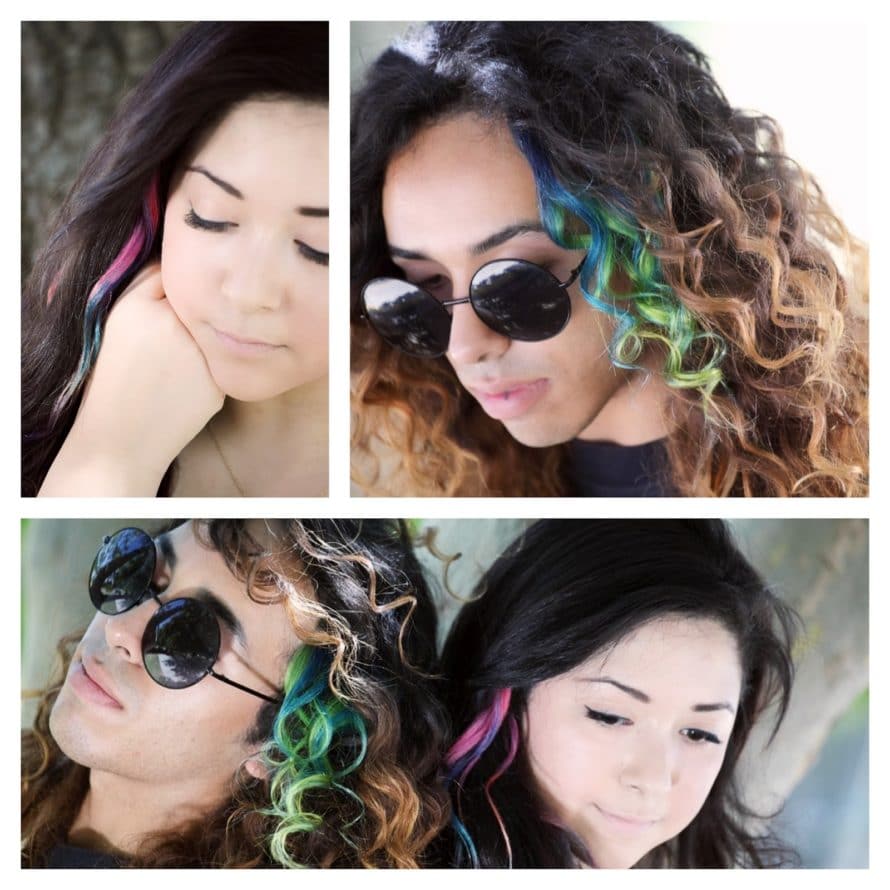
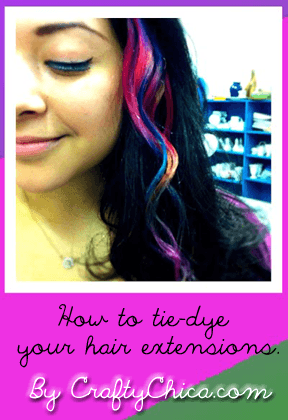
DIY tie dye hair extensions are a thing! I learned how to make these and thought I’d share it here with you! The results are fabulous because it’s an easy way to do something daring – without actually doing something daring. The extensions are made from human hair so it takes the dye beautifully. And they have little clips on the back so you can wear and remove them whenever you want.
These DIY tie dye hair extensions are a cool summer project for kids and teens because they can use them for outings, dress-up, playtime, concerts, and more. You can make a bunch of different colors and combos, give them away, trade with friends and so on.
Think about it – you can make dots, stripes, rainbows, all kinds of different patterns!
DIY tie dye hair extensions SUPPLIES:
Human hair extensions (found at most beauty supply stores)
Tie dye: This is the dye kit I use for all my tie-dye projects!
Tulip One-Step 12 Color Tie-Dye Kit Super Big![]()

![]()
Small hair combs, needles and thread.
Soft Paint brushes, round foam daubers, long skinny brushes, thick brushes
Spray bottle
DIY tie dye hair extensions: DIRECTIONS:
Cut the hair into sections that are manageable to sew to the clips/combs. Use a spray bottle with water to dampen the hair.
Mix the dye, put on the gloves and work over a plastic covered area.
Paint on the dye to the hair in sections, rub it in with your fingers. Continue until all the hair pieces are dyed as you liked.
Cover with plastic and let sit for six hours.
Wash in cool water until it runs clear.
Stitch onto the hair clip or comb.
Brush and use a curling iron or straightener to get them in the shape you want.
Check out the video to see DIY tie dye hair extensions

Tie-dye hair extensions are great project for parties, or to give away to friends, etc. A little goes a long way. I bought the hair at Sally’s Beauty Supply for $30 and the clips were three for $2.00.


Is Maya in The Moment your daughter????? She’s got a beautiful voice and talent!!!