
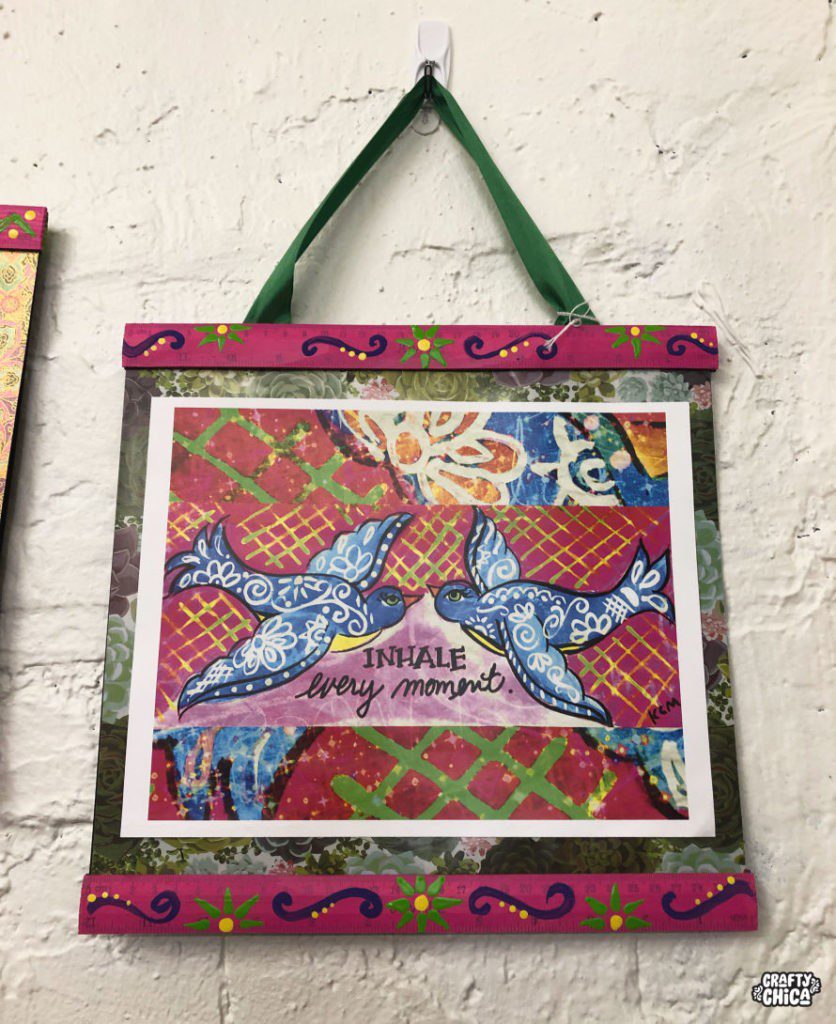
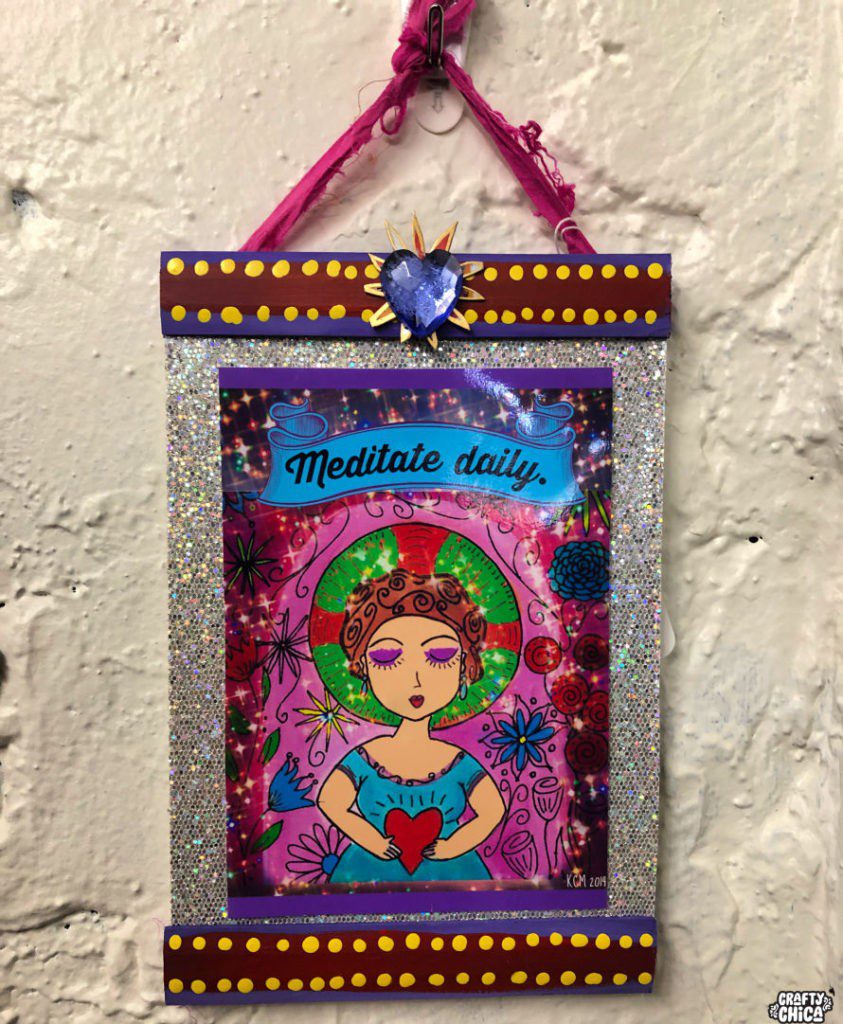
This DIY poster frames tutorial is for those of us who want something different from the traditional glass frame. The essence of these frames is very simple – a magnet bar affixed to a thin strip to hold a lightweight photo or poster.
I took the concept and livened it up!
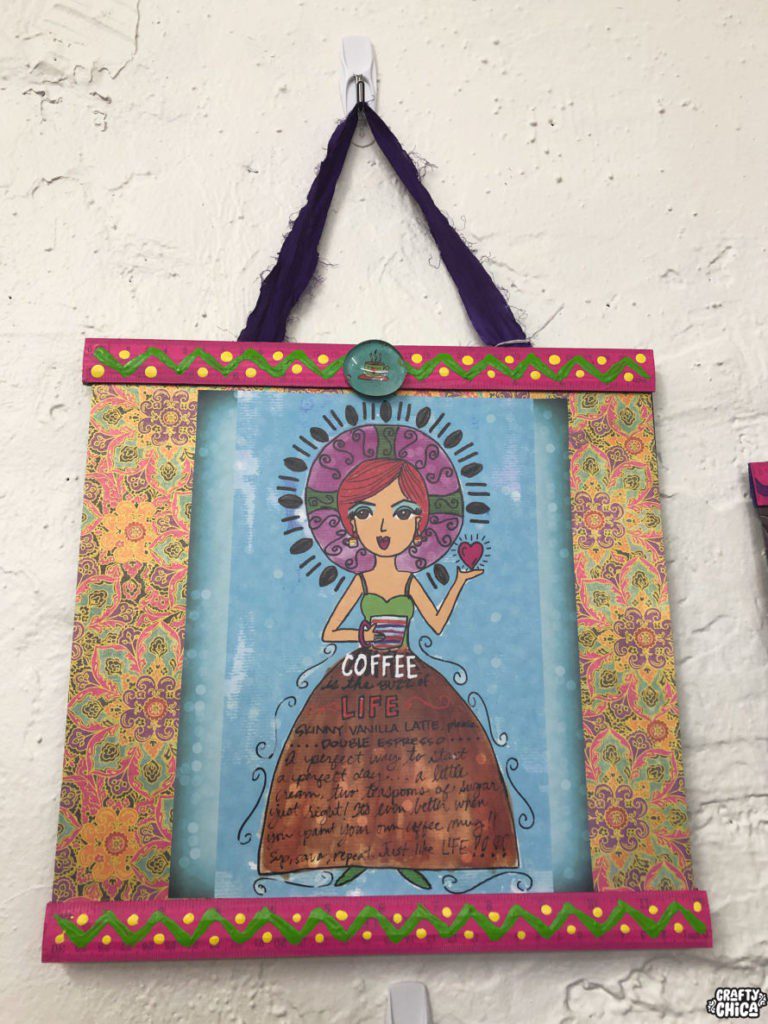
After an afternoon of experimenting, I noticed there are two ways you can approach this project. You make it using magnets or you can just glue the frame to the image. I did the latter because this idea morphed into a mixed media process, and I ended up with some really cute pieces!

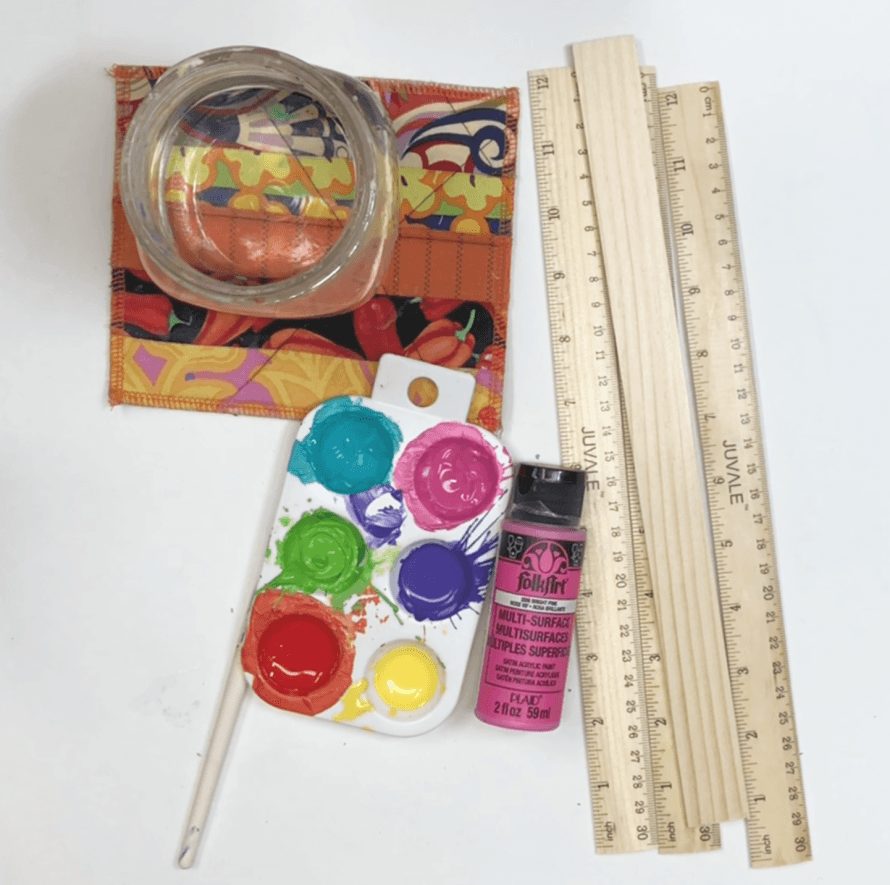
Supply list for DIY Poster Frames
Craft paint, brushes
POster or mixed media art to be huno
Hot glue
Magnets (optional)
Embellishments
Sand paper
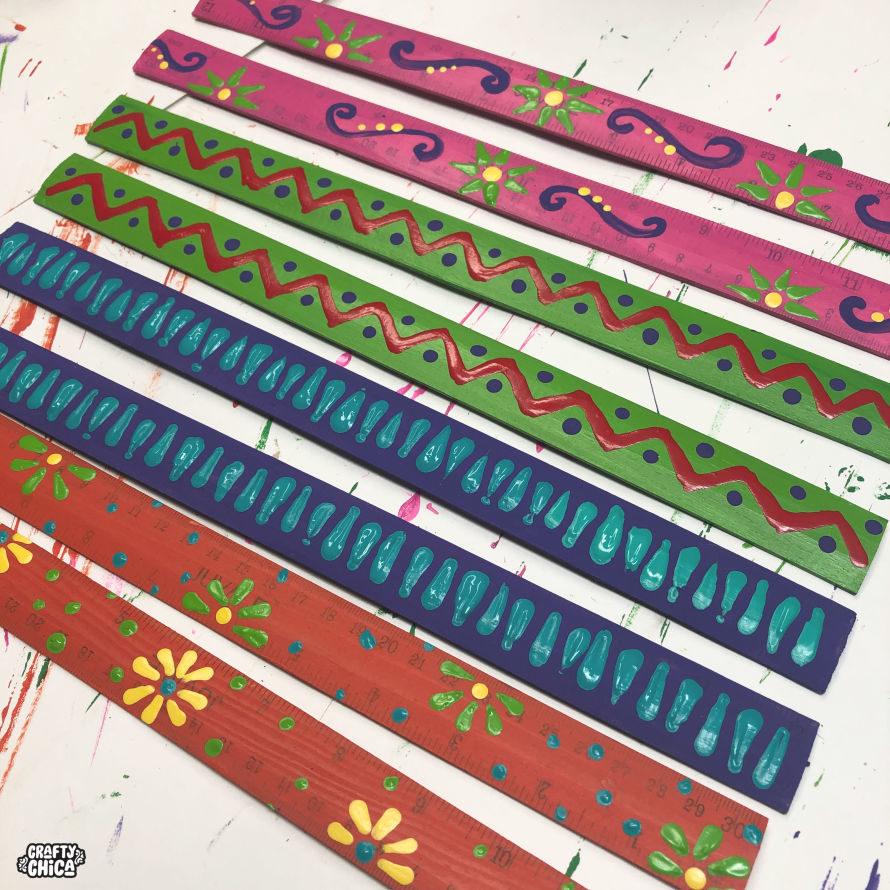
Lightly sand your rulers so they are nice and smooth. Then base coat in your favorite colors and let dry.

Use contrasting colors to make your designs pop! Seal with varnish.
MAGNETS: Use thin magnet sheets and glue on the back of each ruler.
TIP: Make sure you glue one side negative and the other positive, otherwise your frames will not hold, they will repel!
Glue the ribbon on the back of the top ruler on each side.
Make your mixed media piece or grab your poster. Place two rulers, one in back, one in front at the top of your poster. Repeat for the bottom.


I love everything you do! My favorite decor is Dia de los Muertos. My home is covered, I paint skulls, I dress dia…I collect it. The bright colors, the meaning, the beauty…it is me.