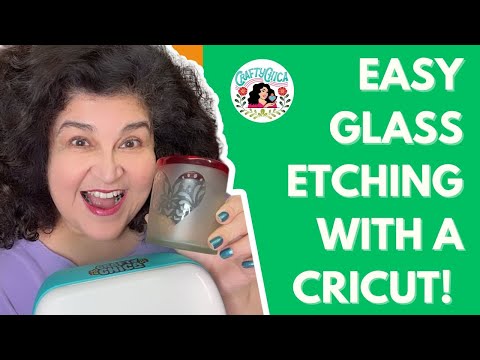
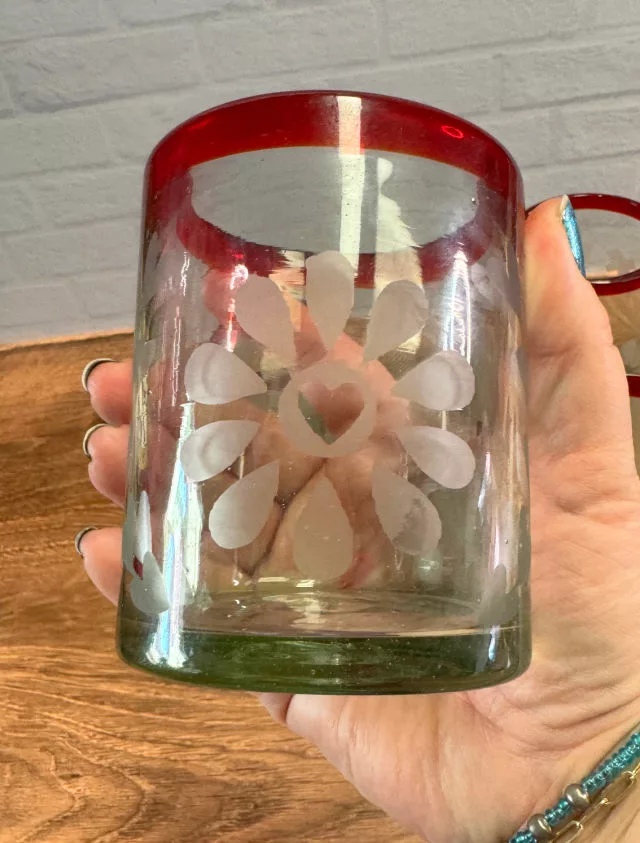
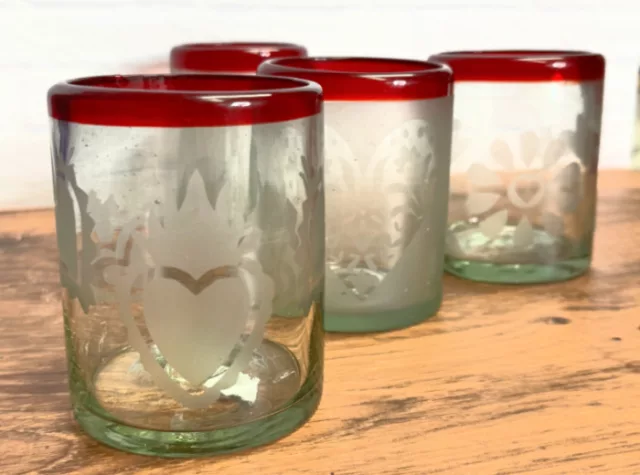
Did you know you can make your own stencils for glass etching? I recently came across some beautiful Mexican tumblers and decided to give them a little Crafty Chica makeover.

Make your own stencils for glass etching
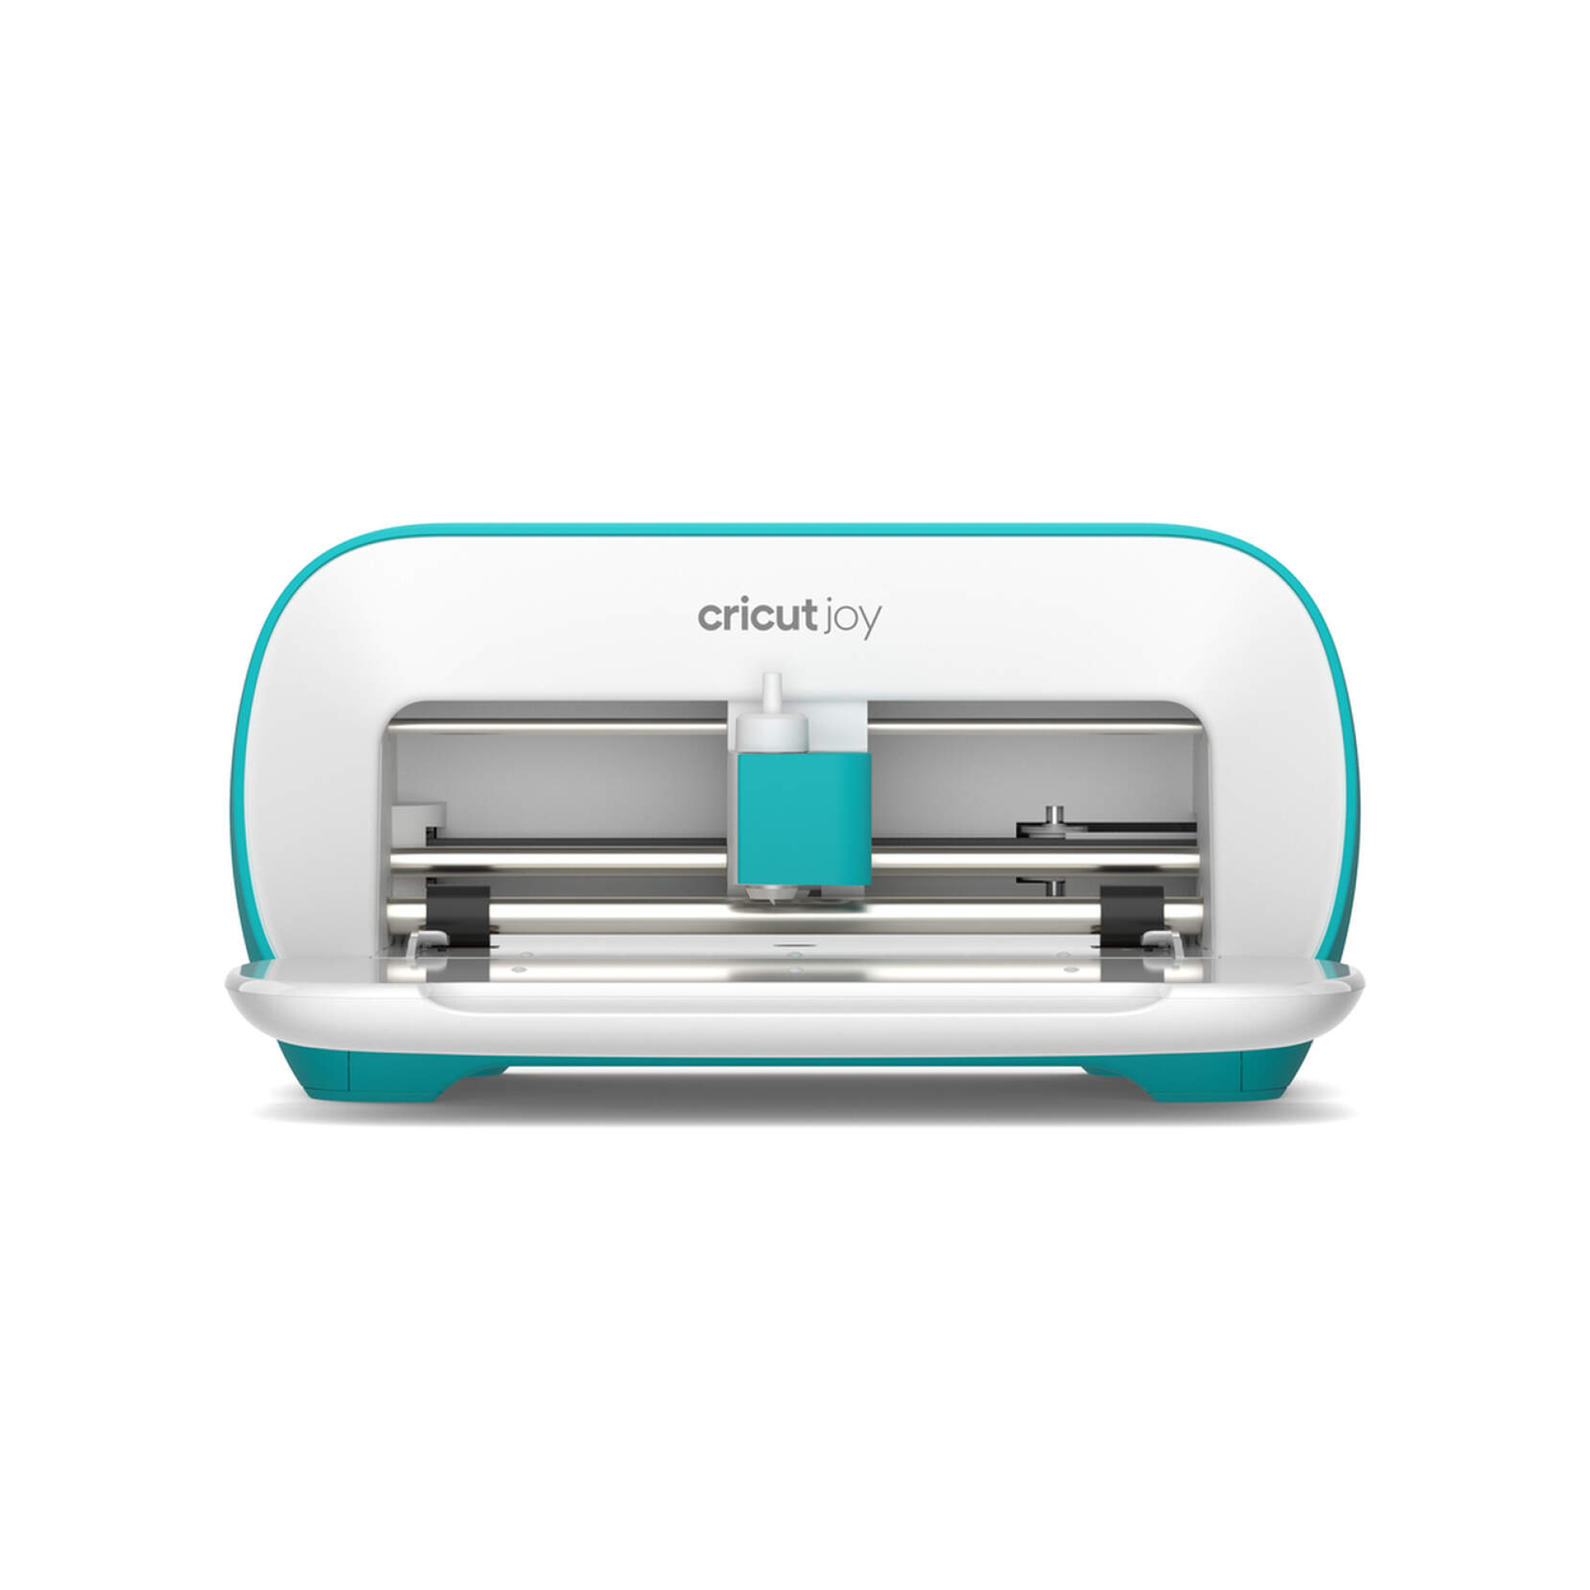
I used my Cricut machine (I used the Cricut Joy for this) to cut my own stencils, and it was much easier than I thought. You will end up with an adhesive stencil that works perfectly to create a cool look.
There are a lot of different ways to make a stencil like this for drinking glasses. You could use contact paper, or just use store-bought stencils.
How etching cream works
Etching cream is a creamy substance that contains a mixture of chemicals. Usually hydrofluoric acid (or another compound that reacts similarly). When you spread this cream over the glass, the acid in the cream reacts with the glass, which is made of silica, and eats away at the surface very slightly. This reaction is very controlled, it only removes a very thin layer of the glass.
Side note: Always use caution, wear gloves and a mask. Cover your work surface and clean up any messes.
First thing – decide on the vibe. I went with hearts for Valentine’s Day. It’s a good idea to have a plan, that way all your glasses will form a set.
Supplies:
– Cricut Joy
– Cricut Design Space software (on a computer or mobile device)
– Removable vinyl
– Transfer tape
– Weeding tool
– Scissors or a trimmer
– A clean, dry glass
– Glass cleaner
Directions for best results:
– Open Cricut Design Space and create a new project.
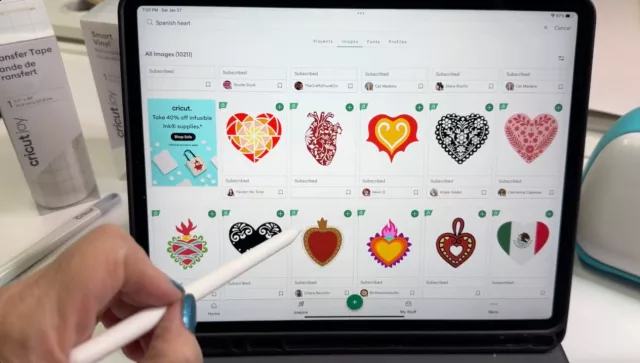
– Choose your design. You don’t want an intricate design, because it will make the final result look a little busy. Stick with something bold so it will stand out on the glass.
– Upload your stencil to the Design Space canvas. This can be text, images, or a combination of both. Keep the size of your glass in mind when designing.
– When your design is ready, ensure it fits within the cutting dimensions of the Cricut Joy. Measure your glass, and then make sure your design lines up to fit.
NOTE: Remember the exposed glass will end up being frosted. Think about this as you choose your design (and later when you go to weed it).
Cutting the vinyl:
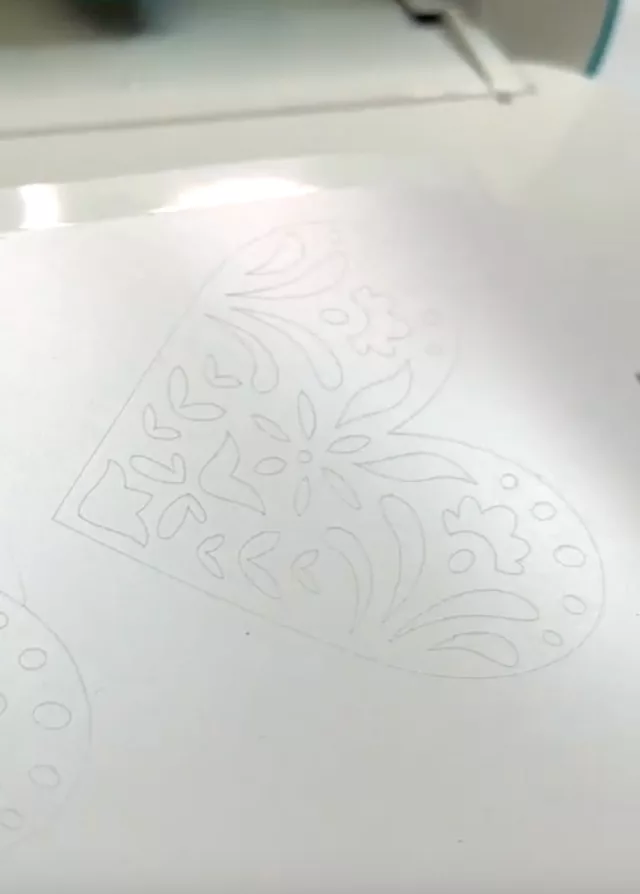
– Place your vinyl on the Cricut Joy cutting mat, ensuring it’s smooth and properly aligned.
– Load the mat into your Cricut Joy.
– In Design Space, follow the prompts to select the correct material type (vinyl) and then proceed to cut your design.
Weeding:
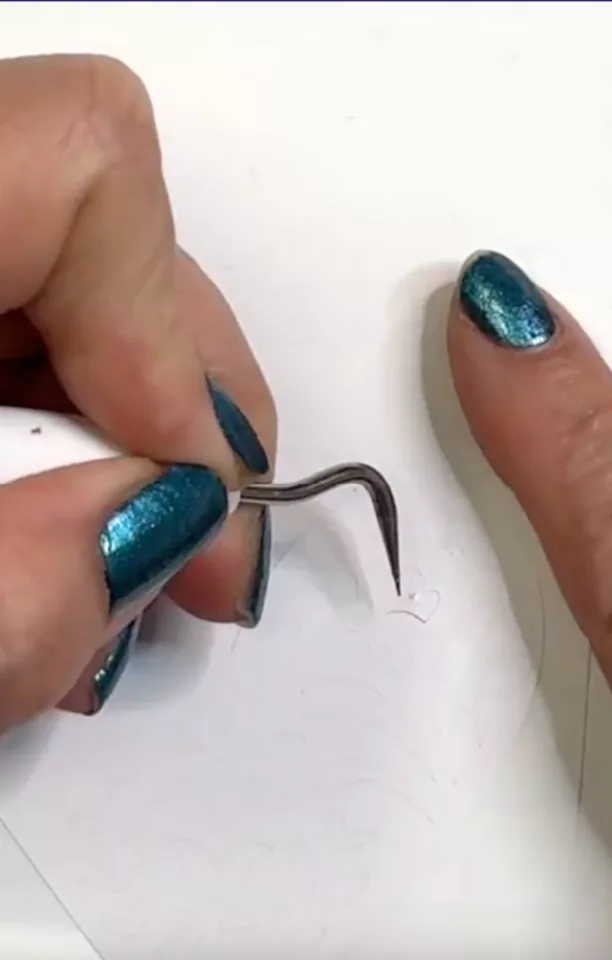
– Once the cut is complete, unload the mat and remove the vinyl.
– Decide what you want to weed – the inside or the outside? A negative image or not? Knowing this will avoid having to cut it a second time.
– Use the weeding tool to carefully remove the excess vinyl, leaving only your design on the backing paper.
Applying transfer tape:
– Cut a piece of transfer tape slightly larger than your stencil.
– Peel off the transfer tape’s backing and apply it over your vinyl stencil. Use a scraper tool or a credit card to smooth out any bubbles and ensure good adhesion to the vinyl.
– Make sure the edges of the design are flush with the transfer tape.
Transfer the stencil:
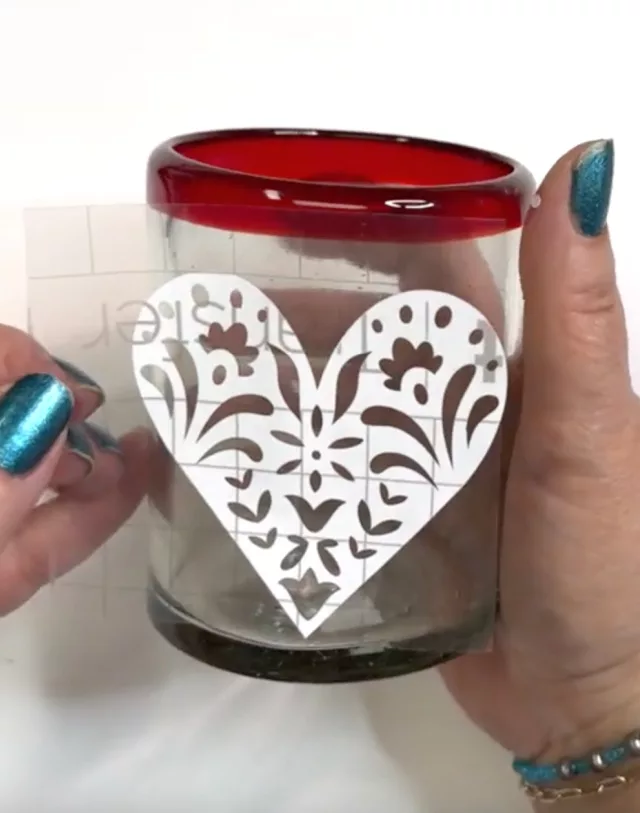
– Carefully peel the transfer tape (now with the vinyl stencil attached) away from the vinyl backing.
– Position the stencil on your clean, dry glass where you want the etching to be. Once in place, smooth it out again to remove any bubbles and ensure it’s fully adhered to the glass.
Remove the transfer tape:
– Carefully peel away the transfer tape, leaving the vinyl stencil attached to the glass. As you pull away the edges of the stencil, make sure there are no air bubbles. Smooth until they are gone. Open areas will allow the etching cream to get in, we don’t want that!
Prep for glass etching:
– Add masking or painter’s tape around the top of the glass to prevent glass etching cream from touching lips.
Glass etching
Supplies:
– Etching cream or etching compound (follow the safety instructions on the product)
– A small paintbrush, sponge applicator, foam brush, wooden stick, or other applicator tool
– Protective gloves and eyewear
– Paper towel or a clean cloth
– Timer
- Masking tape
– Stencil image
Directions:
It is a great idea to cover your work area with a cover. Have towels ready for any clean up.
Apply etching cream:
– Put on your protective gloves and eyewear.
– Apply a thick layer of etching cream over the stencil design area with your brush or sponge. Ensure all parts of the design are covered.
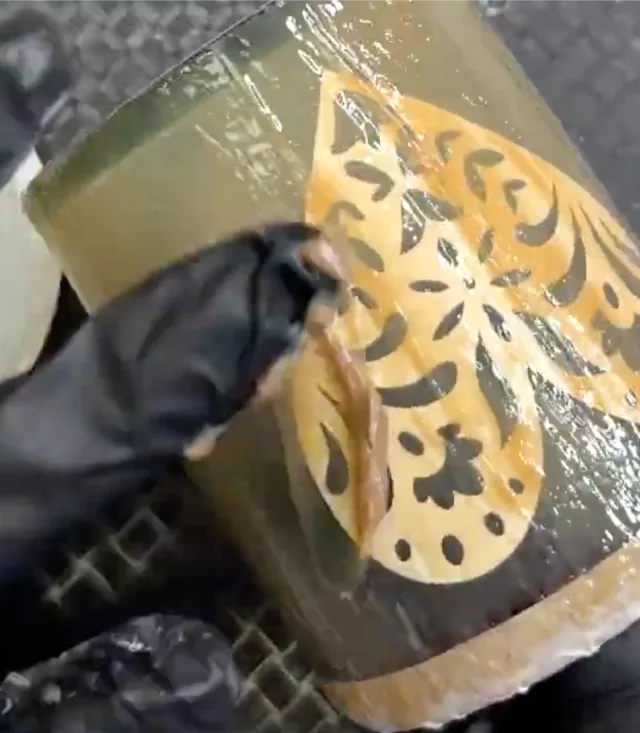
Wait:
– Leave the etching cream on the glass for the time recommended by the product’s instructions (usually around 15-20 minutes).
Rinse off the etching cream:
– After the wait time, rinse off the etching cream under running warm water. Be sure to wear gloves during this process to avoid any skin contact with the cream!
Remove the stencil:
– Once all the etching cream is rinsed away, carefully peel off the vinyl stencil from the glass, as well as the masking tape. Wash the glass again to ensure all residue is removed.
Final cleaning:
– Dry the glass thoroughly with paper towels or a clean cloth.
Other glass items ideas:
Wine bottles
Jars
Containers
Boxes
I hope you liked this post about how to make your own stencils for glass etching! Isn’t it a cool custom project that is a fun way to craft? Are you inspired? Let me know if you try it, and if you want to try another kind of glass project or Cricut idea, here are a few links to check out!
Cricut Joy Projects: DIY Flower Pots!(Opens in a new browser tab)
Bottle Cutting 101: DIY Vases & Glasses