One-yard sewing projects are the BEST! And I have fifteen of them for you to try!
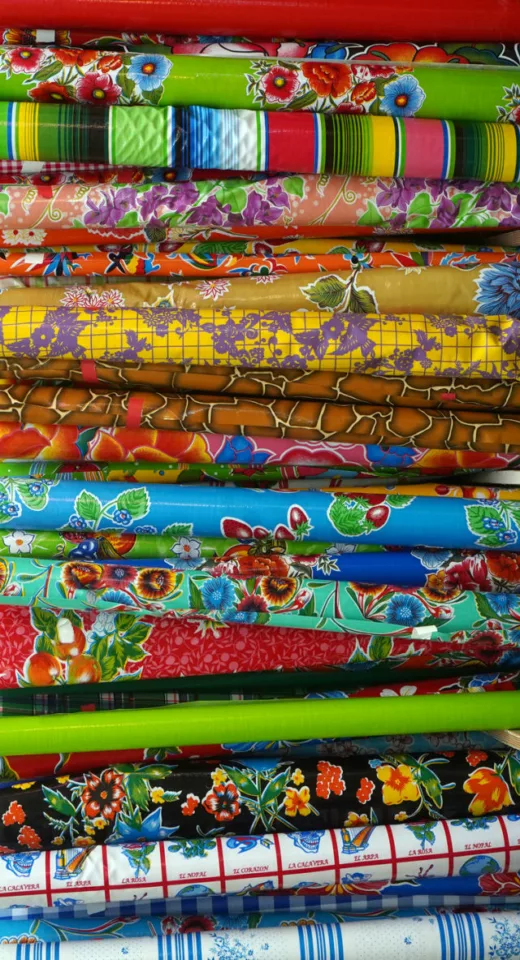
Picture this: You have a glorious single yard of fabric with an amazing pattern, typography, and/or meaningful theme. It’s just waiting to be transformed into a masterpiece, and you, my creative comadres, have la magia at your fingertips. Trust me, these are easy projects. And that’s coming from a self-taught seamstress!

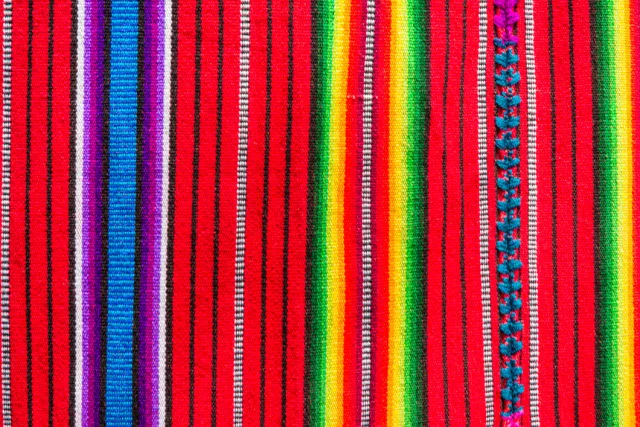
Whether it’s a fabric that echoes the lively motifs of Talavera tiles, the whimsical charm of Otomi embroidery, or the artful spirit of a Frida Kahlo portrait, that one yard is your canvas. And it doesn’t have to be fancy. Your beloved one yard of fabric can be a solid color, new fabric, a repurposed bedsheet, even an old drop cloth! Soooo many handmade items await you!
Whip up stylish accessories, home décor delights and more. Grab your tijeras, ready your máquina de coser (sewing machine), and let’s get crafty!
Today, we’re going to give it a new life!
One-yard sewing projects you’ll love
Supplies:
Here are basic you’ll need:
One-yard of fabric (measures 36″ long and has different widths, usually 42-44″)
Stash sewing thread
Scissors
Pinking shears
Fabric glue (if you do not want to sew)
Mini-iron
Here are simple step-by-step instructions for the swanky, comfy, and stylish projects using just one yard of fabric.
Fringey table runner
Cut the one-yard of fabric in half lengthwise. This will create two long strips. Sew those together, short end to short end. Add colorful pom pom trim, metallic fringe, or bright tassels to the edges.
Variation: Use solid fabric and fabric paint to create vibrant Mexican folk art designs such as flowers, birds, and geometric patterns. Use foam stamps, hand painted designs on appliques. This table runner will add a festive touch to your dining or picnic table – especially for a special event.
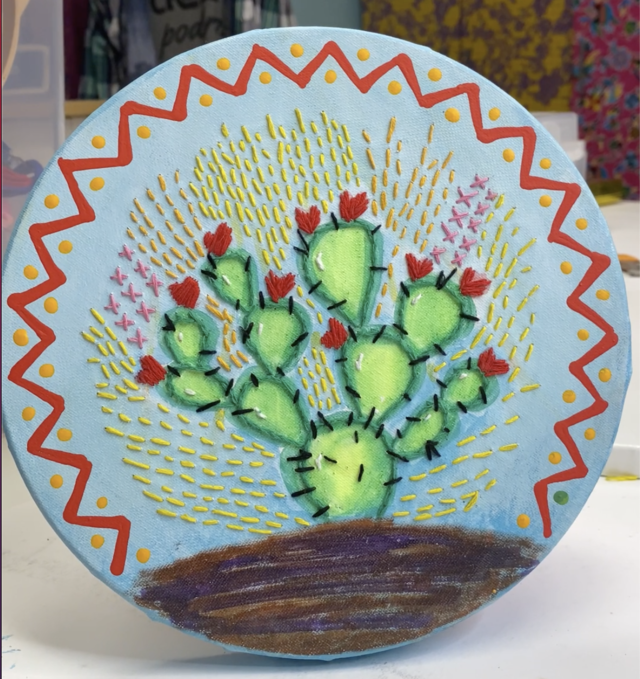
Embroidered wall hanging
Use your one-yard of fabric as a canvas for traditional Mexican embroidery. Choose bright, contrasting colors and stitch intricate designs inspired by Mexican folk art, such as Day of the Dead motifs or Otomi patterns. Frame the finished piece and hang it as a stunning wall decoration.
Variation: If you are using a pattern with an amazing design, use metallic embroidery thread to stitch outlines around the shapes or to add accents to motifs.
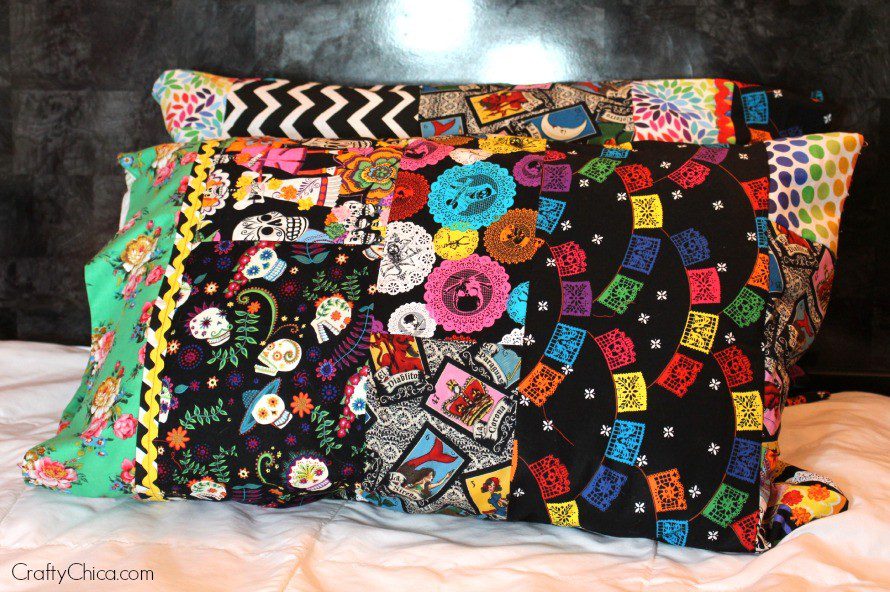
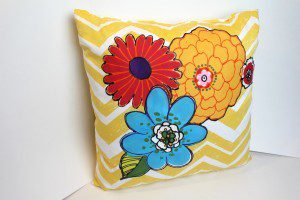
Simple pillowcase
Cut the fabric to a size of about 20×30″ for a standard pillow, adjusting the dimensions if needed for a different pillow size. Fold the fabric in half lengthwise with the right sides together, so it measures 20×15 inches. Sew along the two open sides, leaving the folded edge unsewn, using a ½ inch seam allowance. For a neat finish, you can serge or zigzag the edges to prevent fraying. Turn the pillowcase right side out and press it with an iron for crisp edges. Optionally, you can hem the open end by folding the fabric back about half an inch, pressing it, and then folding again for a double hem before sewing it down. This simple project can be customized with embroidery, fabric paint, or appliques for a personalized touch.
Reversible fabric coasters
You don’t need that much fabric for these, so you can make a batch of them! Cut your one-yard of fabric into 4×4” squares. Line up two pieces, face to face. Sew around three sides. Turn it inside out. Fold in and press the raw edges closed. Topstitch around the entire perimeter, close to the edge, which also closes the gap. quilt the layers by sewing straight lines or decorative patterns across the coaster. Trim excess threads. Add trim if desired. Package them in sets of four to give as a hostess gift!
Variation: add a layer of batting for a thicker coaster.
Fabric Wrapped Flower Pots
Cut your fabric into strips and use Mod Podge to adhere it to small terracotta pots. Let dry and add another coat of Mod Podge to seal. Add painted accents to the rim of the flower pot. Plant vibrant flowers or succulents in the pots for a beautiful and festive addition to your home decor.
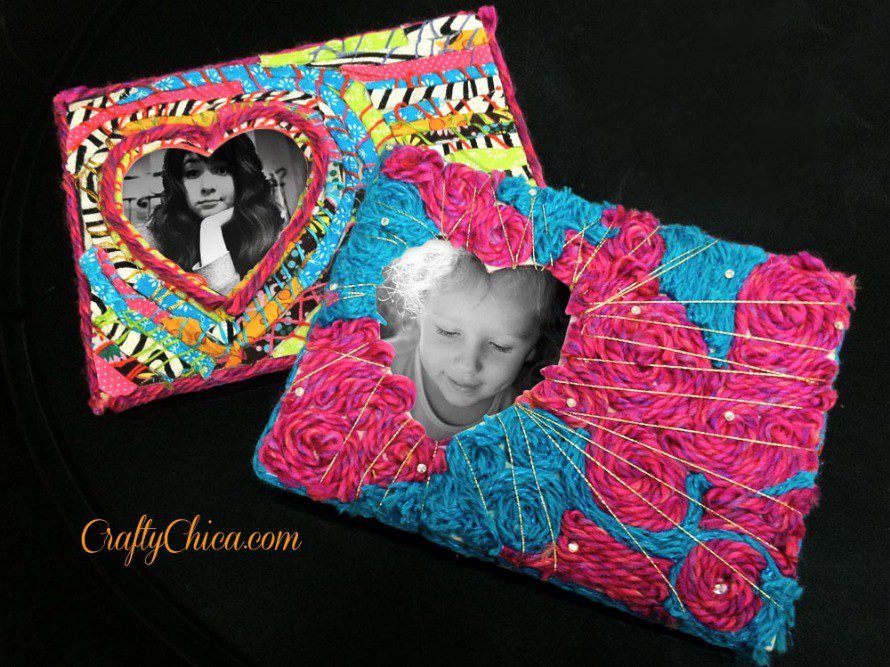
Fabric Covered Photo Frames
Cut your fabric (or old Mexican-embroidered blouse) into pieces to fit the size of your photo frames and use Mod Podge or white craft glue to adhere it to the frames. Cut out your favorite motifs from the leftover fabric and glue them on top of the base fabric. That way all your favorite images will be front and center and no one will know you did a little hack!
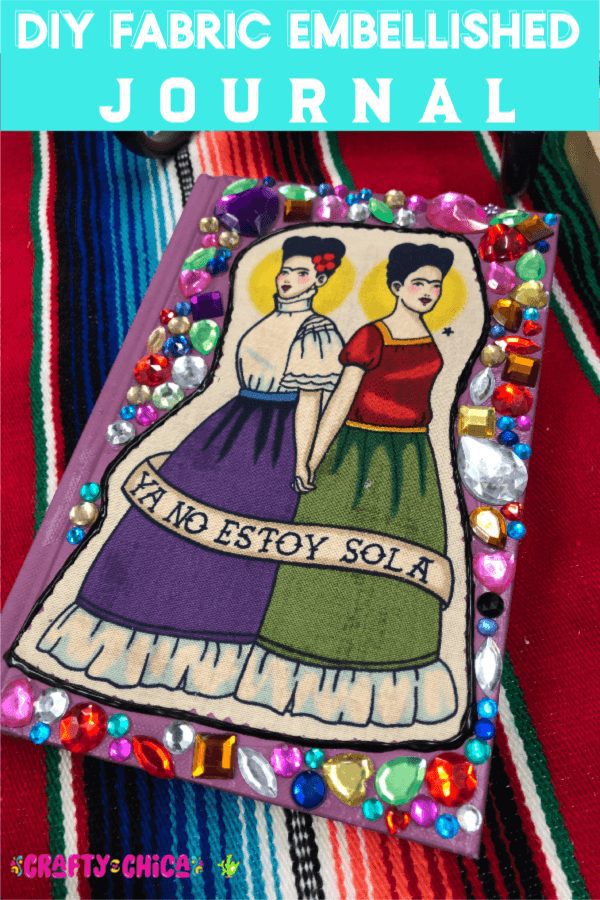
Fabric-covered journal
Use pinking shears to cut your fabric to match the journal cover. Use masking tape to cover pages, and use spray adhesive to attach the fabric. Press with your fingers to seal and remove any bumps. Cut out a motif from your favorite fabric and add it as well! Use fabric glue along the edges to seal.
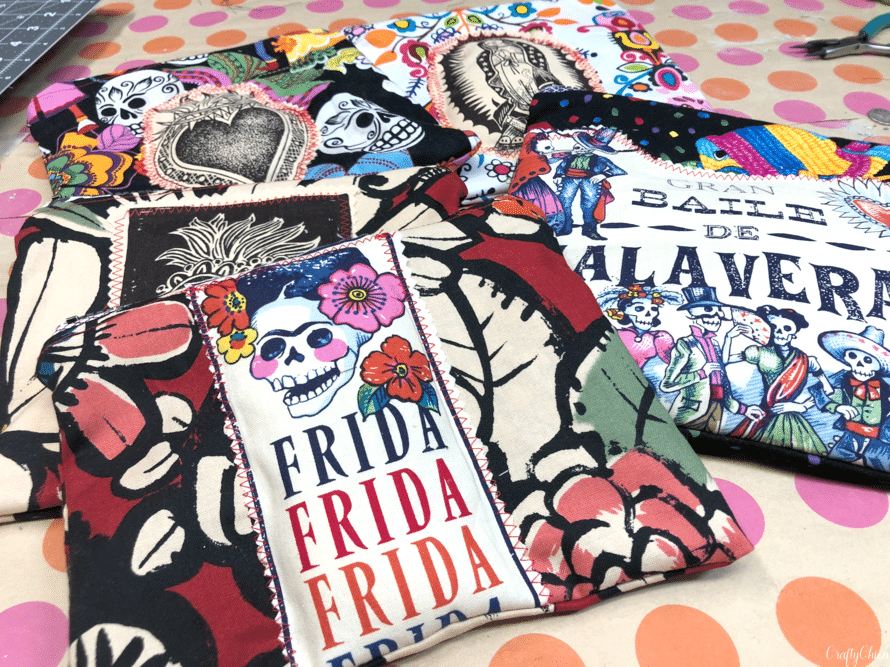
Zipper Pouches
Start by cutting two pieces of fabric to your desired size, plus two pieces of lining fabric of the same size. Choose a zipper that matches the width of your pouch. Place one piece of the outer fabric right side up, lay the zipper face down along the top edge, and then place a lining piece on top, right side down, sandwiching the zipper between them. Sew along the top edge using a zipper foot. Repeat this process on the other side of the zipper with the remaining pieces of outer fabric and lining, creating a tube. Open the zipper halfway for turning the pouch right-side out later. Flatten the tube so that the outer fabric and lining fabric are on opposite sides, ensuring the zipper teeth face towards the outer fabric. Sew around the edges, leaving a gap in the lining for turning. Clip the corners, turn the pouch right side out through the gap, then stitch the gap in the lining closed. Press the pouch for a neat finish, and your zipper pouch is complete, ready for customization or use as is.
Passport Bag
Cut two pieces of fabric, each measuring 9×8”, for the bag’s body, and a strap measuring 42×4” wide.
Strap: Fold the strap fabric in half lengthwise, right sides together, and sew along the long edge, then turn it right side out and press flat.
Bag: Place the two body pieces right sides together and sew around the edges, leaving the top open. Turn the bag right side out and press. Fold the top edge inward by ½ inch, press, and sew to create a neat finish. Attach the ends of the strap to the sides of the bag, securing them with strong stitches. Add a zipper or Velcro closure to the top. This makes a great handmade gift for a friend traveling far and wide.
Placemats
From your yard of fabric, you can make four placemats (12×18”). Cut fabric into rectangles of your chosen size, adding an extra inch on each side for seam allowances. Select a SECOND piece of one-yard fabric for the backside, cutting it to the same dimensions. Place the right sides of the fabric together and sew around the edges, leaving a 4” gap for turning. Clip the corners to reduce bulk, then turn the placemat right side out through the gap. Press the placemats flat with an iron, folding in the fabric at the gap so the edges are neat. Topstitch around the entire perimeter, close to the edge, which also closes the gap.
Variation: Quilt the layers by sewing straight lines or decorative patterns across the placemat.

Light-blocking eye masks
Cut two identical pieces from both the interior and exterior fabrics in your desired eye mask shape, adding an optional layer of light-blocking fabric or thin-batting for comfort. Cut a 12-15” piece of elastic. Place the right sides of your fabrics together, layering the batting accordingly, and tuck the elastic ends between these layers at each side, ensuring they’re positioned for a comfortable fit around your head. Sew around the perimeter, leaving a small opening for turning the mask right side out. After sewing, clip any excess fabric, especially around curves, for a smoother finish. Turn the mask right side out, press it to smooth out any wrinkles, and then topstitch around the entire edge to close the opening and give your eye mask a polished look.

Baby receiving blankets
Use cotton, flannel, or fleece. Cut the fabric to your desired dimensions, typically the full yard for a square blanket or trimmed slightly for a rectangular shape. Select a complementary fabric for the backside, cutting it to the same size. Place the right sides of both fabrics together. Sew around the edges, leaving a 4-inch gap for turning the blanket right side out. Before turning, snip the corners to reduce bulk. After turning, press the edges with an iron, neatly folding in the fabric at the gap. Finish by topstitching around the entire perimeter of the blanket, close to the edge, which also securely closes the gap. For added detail and to prevent the fabrics from shifting, you can quilt the blanket by sewing simple lines or designs through both layers.
Quilted lunch bag
Cut two pieces for the front and back (about 12×14″ each), two pieces for the sides (about 5×14″ each), and one piece for the bottom (about 12×5″), adjusting sizes based on the desired bag dimensions. If you want an insulated lunch bag, also cut matching pieces from insulated batting. Sew the side pieces to the bottom piece, right sides together, to form a ring. Attach the front and back pieces to this ring, sewing right sides together, to create the bag’s body. For the lining, repeat these steps with either the same fabric or a different, lightweight fabric. Place the outer bag and lining right sides together, inserting handles between the layers at the top edge if desired. Sew around the top, leaving a gap for turning. Turn the bag right side out, press the edges, and topstitch around the top to close the gap and give a finished look. For a closure, add a button, Velcro, or zipper as preferred.
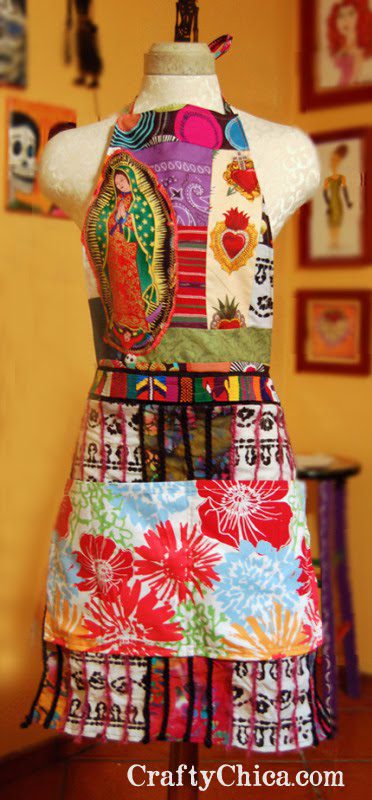
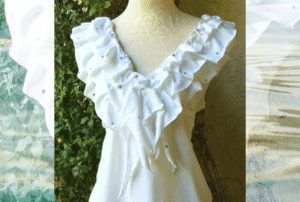
Kitchen apron
Begin by cutting the fabric into the shape of the apron body, which typically includes a rectangular chest piece and a wider section to cover the waist and legs. For the neck strap and waist ties, cut additional strips of fabric or use premade bias tape. Sew the edges of the apron body to prevent fraying, then attach the neck strap at the top corners of the chest piece, adjusting the length to fit. Attach the waist ties to the sides of the apron, ensuring they are long enough to wrap around and tie at the back comfortably. Add a pocket by cutting a smaller piece of fabric, folding and sewing the edges for a neat finish, and then stitching it onto the front of the apron where it’s most accessible. Stitch on an applique on the front and you are good to go!
Another great idea: Make a short skirt!
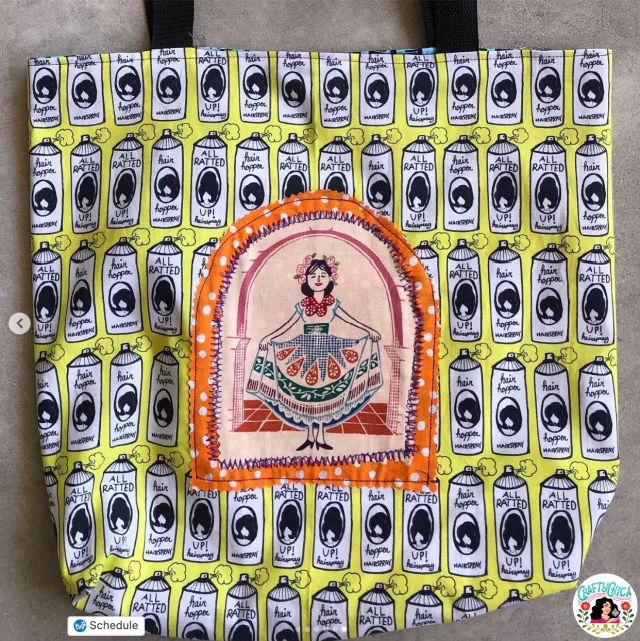
Pretty tote bags
Cut two rectangles for the bag body, each approximately 18×15′, and two strips for handles, each about 22′ long and 3′ wide. Place the two large rectangles right sides together and sew around three sides, leaving the top open, using a half-inch seam allowance. Create a flat bottom: At each bottom corner, flatten the bag to form a triangle and sew across, about 2″ from the corner point. Trim the excess fabric.
Handles, fold the long edges of each strip towards the center and then fold in half lengthwise, pressing with an iron. Topstitch along the open edge and then along the opposite edge to close and strengthen the handles. Attach the handles to the top edge of the bag, sewing them in place on both the front and back, ensuring they are evenly spaced and securely attached. Finish by hemming the top edge of the bag for a clean look.
I hope you’re inspired! One-yard sewing projects are among my favorite crafts because they are so versatile. it’s not just about the fabric or the final piece; it’s about the story you tell and the love you weave into every stitch.
For more a detailed tutorial for these (or free patterns), look online.
Other ideas:
Fabric collage
Cut up and make appliques
Messenger bag
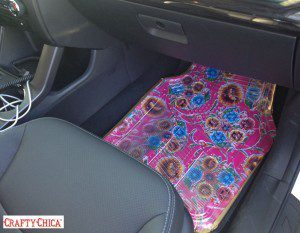
Seat cushion
Sachets
Curtains
Potholders
Jewelry
God forbid you run out of fabric! Check out my post on making a yard from smaller pieces of fabric! Or, um, you can simply visit the fabric store.
Don’t forget to share your creations with our Crafty Chica community – we’re all about celebrating each other’s talents and spreading that crafty amor far and wide. Tag your masterpieces with #CraftyChica so we can all marvel at your work!
Better yet – join the Crafty Chica Facebook group here.
Until next time, keep those creative juices flowing, and never underestimate the power of one yard of fabric to bring a little more color and joy into your life. ¡Hasta la próxima, mis crafty souls!
More sewing ideas
Fast and easy unpaper towels DIY


Your one-yard sewing projects are a game changer. Love the simplicity and budget-friendly aspect. Excited to try the headband and fabric baskets. Thanks for the creative inspo!
Thanks, glad you liked it! I didn’t have a headband or fabric basket project, but I’ll add them!
Lots of cute ideas!! They are fast and easy also.
Thanks for sharing…
Also, I love your fabrics!
I can’t seem to find these kids of fabrics where I live.