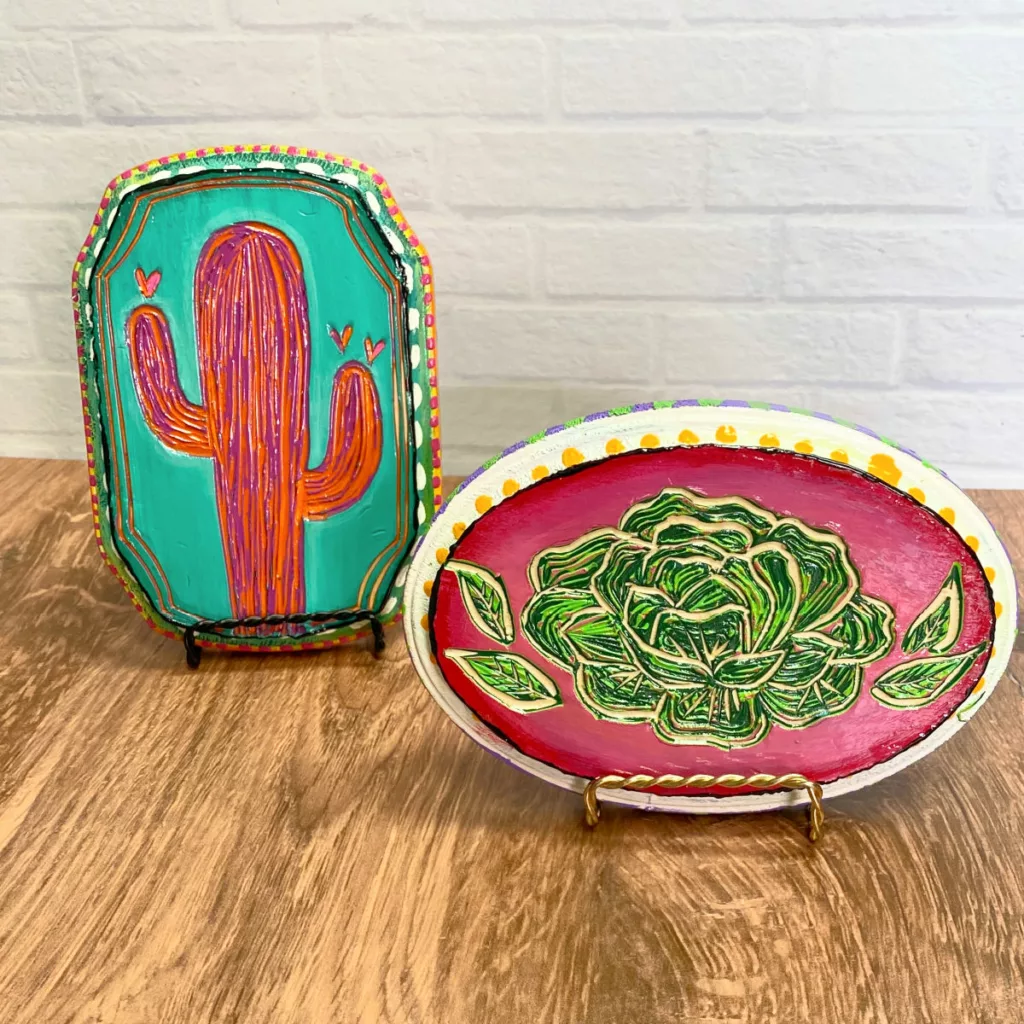
Have you heard of paint carving? Your artful life is about to change FOREVER! Paint carving is a unique way to create textured and layered art pieces. I first saw this method on Instagram and knew I wanted to try it. It’s about painting layers and layers of acrylic paints (craft paints will work too) and then carving out a design.

All of those layers of paint create a foundation of colors to be revealed as you carve your design. I’ll walk you through the process!
Paint carving supplies:
A wooden panel, plank, or a flat piece of wood. I bought wood plaques at the craft store. You can use any hard surface, as long as it is easy to turn as you work.
Craft paints in multiple colors. No oil paint, stick with craft paints for your first try. You’ll need a couple rounds to get used to the process.
Paintbrushes or rollers. I used large round paint brushes to apply the coats of paint. Less brush strokes showed through.
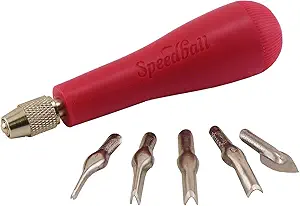
Linocut tool (with multiple blade shapes, if available).
Clear varnish or spray sealer. I used a high gloss spray sealer.
Dust mask and goggles for safety.
Good lighting!
Sandpaper (optional)
Paper towel for clean up
Table fan (optional)
TIPS: This is a long process because you are literally watching paint dry. Therefore I suggest starting with a couple smaller pieces so you can get the hang of the process. Work on other projects while you wait for your paint layers to dry. It took several hours for these two pieces to fully dry.
Paint carving directions

Prepare your workspace:
This process can be messy, so cover your workspace with newspapers or a drop cloth. Gather all your materials and make sure your workspace is well-ventilated. Brush away any dust. You don’t want it to get on your piece, it will make it difficult to carve!
Prepare your wood:
Sand the surface of your wood to make it smooth and remove any dirt, dust, or loose particles. Wipe it down with a damp cloth and let it dry completely. This especially goes for if you are using old or recycled wood. The smoother the surface the better!
Decide on your design:
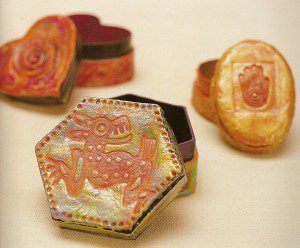
This is a little tricky. almost like reverse glass painting. Think of what you want to carve and the colors. You’ll need about 30-40 layers of each color (or more depending on the look you want), then the next colors. I started with dark in the background and went lighter for the middle and top layers. Once you figure this out, you are ready to add the layers of acrylic paint.
First layer of paint:
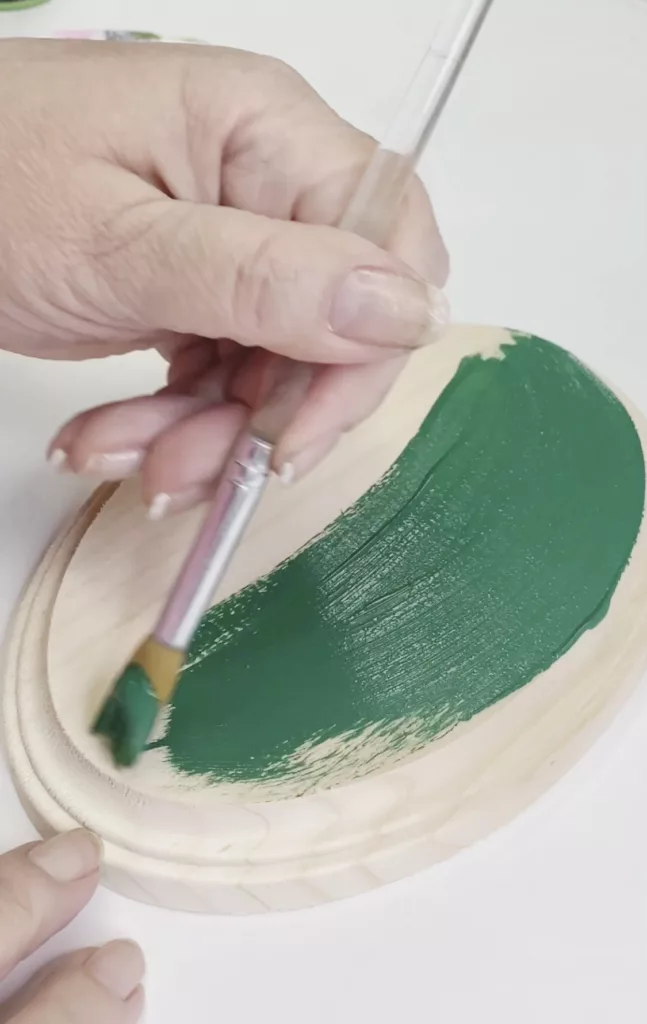
Apply a base coat of white paint, just to serve as a layer to prime the wood. Add your first color layer of craft paint to the wood. It doesn’t have to be perfect – unevenness can add to the texture. Yes, it can be heavy (not too heavy though)! Let it dry completely. I placed my items in front of a table fan, it helped them dry much faster.
Additional layers:
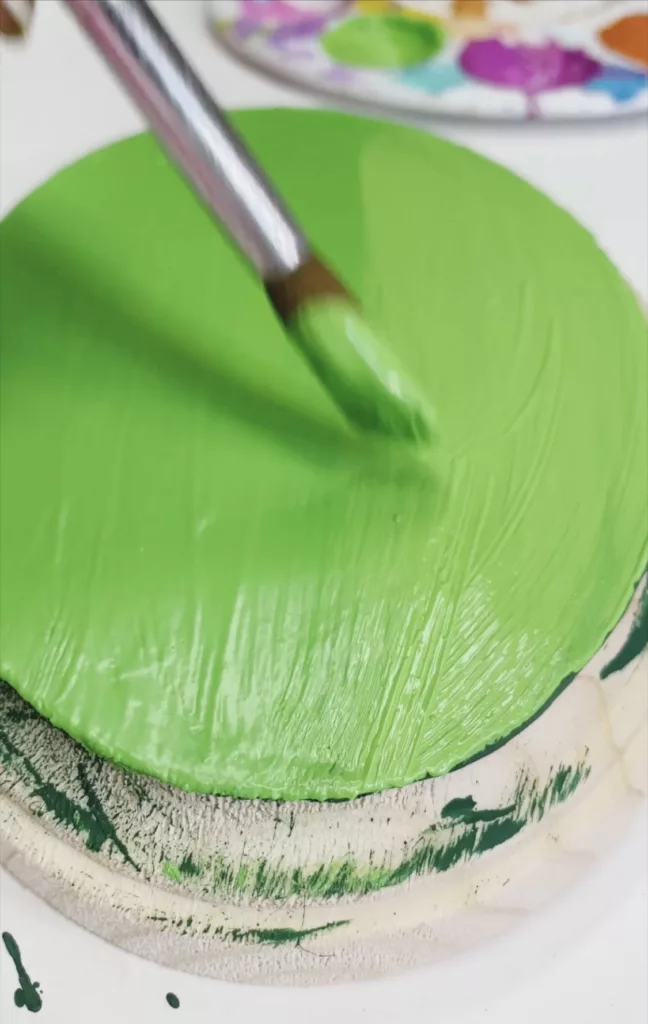
Apply additional layers of different colors of craft paint, letting each layer dry completely before adding the next. The more layers you have, the more depth your carving will have. You don’t want to add too much paint to each layer, it will take way longer to dry. So how many layers? The more the better if you want different colors to show. I’d say at least 40-50 layers of each color. If you are only using one color, then about 60-80 layers will work fine.
Helpful tip:
Really make sure each layer is dry. Trust me. It is awful to carve into damp paint, it will ruin your project! Hold the piece to your face and if it feels cold, it still needs to dry longer.
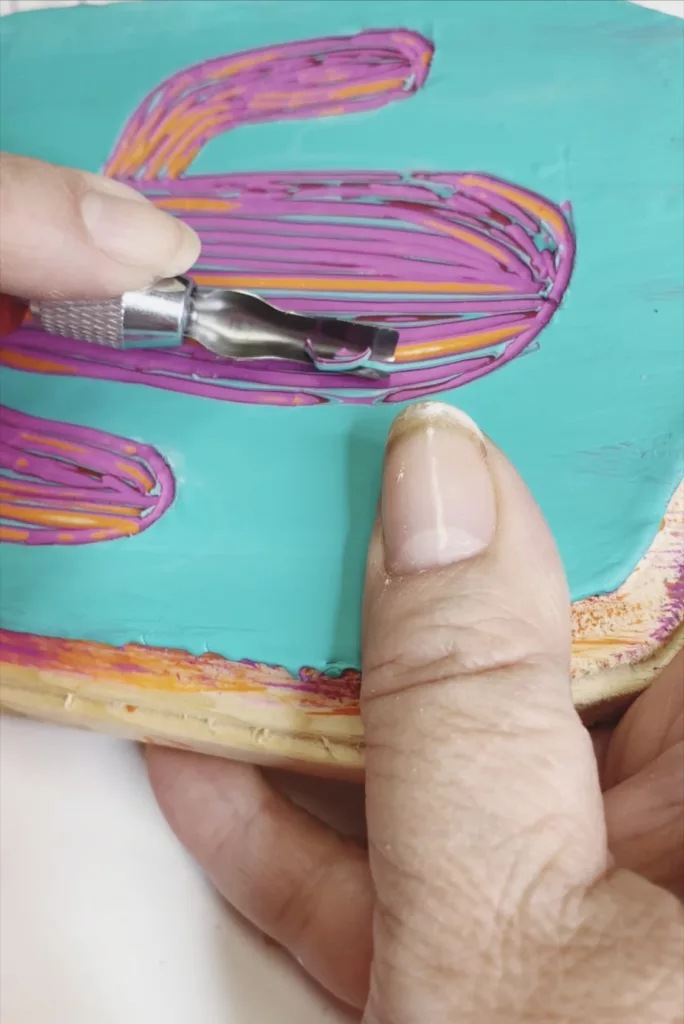
Carving:
No need to worry about the wood grain, it doesn’t matter. It’s covered! Once your last layer is completely dry, you can start carving your design into the paint layers using your linocut tool.
Trace your design onto the surface, or just sketch using a pencil. Carve carefully and slowly. You can carve down to the wood in some places, and less deeply in others, to reveal the different layers of color and create a layered effect.
To be safe at first, stick with pure acrylic paint. Don’t mix and match types of paints until you are more confident with your process.
For future reference, take notes of how many layers you used. That way you’ll know how to change it up for the next piece!

Safety:
Remember to wear your dust mask and goggles when carving to protect yourself from paint dust. Use a wide brush to remove any debris. Save the carvings to use for other projects!
Finishing touches:
Add other painted design elements or leave as is. I added dots and designs around the border of my pieces, because that is my style! You do you, boo.
Once you’re happy with your carving, you can apply a layer of clear varnish to seal and protect your work. Or you can use spray varnish as well. Glittered varnish too! Let it dry completely before hanging or displaying your artwork.
Clean-up: Clean your linocut tools thoroughly after use to keep them in good shape for future projects.
Isn’t paint carving such a twist on lino cutting and even traditional painting? I’m excited to create more and bigger pieces! Remember, the beauty of this technique lies in its unpredictability. Each layer of color that you carve away reveals a new aspect of your art piece, and even mistakes can add to its uniqueness. Enjoy the process and happy creating!
Related ideas about painting and linocut art:
Linocuts and block printing tutorial